
Hi there! I’m Lisa, the heart and soul behind Recipesrealm, and today I’m sharing something truly special with you. This no-bake Oreo cheesecake recipe was born during a sweltering summer evening when I desperately wanted to impress dinner guests but couldn’t bear the thought of heating up my kitchen. What started as a creative experiment has become one of the most requested desserts among my family and friends—and for good reason!
Tired of complicated desserts that require precise baking temperatures and leave you stressed? This no-bake Oreo cheesecake is your answer to effortless elegance. Imagine a velvety smooth cheesecake filling studded with chunks of America’s favorite cookie, all sitting atop a buttery Oreo crust. No oven required, no water baths, no cracks—just pure, creamy perfection.
As someone who has spent over a decade perfecting dessert recipes at Recipesrealm, I can confidently say this is one of the most foolproof yet impressive desserts you’ll ever make. The secret? Quality ingredients, proper chilling time, and a few expert techniques I’m excited to share with you.
In this comprehensive guide, we’ll cover everything from selecting the right cream cheese to achieving that picture-perfect slice. I’ll walk you through ingredient selection, preparation tips, step-by-step instructions, common troubleshooting, creative variations, and serving suggestions. Whether you’re a novice baker or a seasoned dessert enthusiast, you’ll find this recipe approachable and absolutely delicious.
Why This No-Bake Oreo Cheesecake Recipe Works
The beauty of this no-bake Oreo cheesecake lies in its perfect balance of convenience, flavor, and wow-factor presentation. Here’s why this recipe has earned its place as a Recipesrealm favorite:
- No Special Equipment Needed: Forget about springform pans (though you can use one!). A regular 9-inch pie dish works beautifully, and you don’t need a stand mixer—a hand mixer or even vigorous whisking will do.
- Set and Forget: While traditional cheesecakes bake for over an hour and require careful monitoring, this no-bake version simply chills in your refrigerator. Make it in the morning for an evening dessert, or prepare it the night before for stress-free entertaining.
- Foolproof Results Every Time: The no-bake method eliminates common cheesecake disasters like cracking, sinking centers, or overbaking. If you can mix ingredients and refrigerate, you can master this dessert.
- Universally Loved Flavor: Oreos are a nostalgic favorite that appeals to all ages. The cookies provide textural contrast and that distinctive chocolate-vanilla flavor that transforms a simple cheesecake into something extraordinary.
- Budget-Friendly Indulgence: With just a handful of affordable ingredients—cream cheese, Oreos, heavy cream, and sugar—you can create a dessert that looks and tastes like it came from a high-end bakery.
- Make-Ahead Marvel: This cheesecake actually improves with time. Make it up to three days in advance, and the flavors will meld beautifully while you focus on other party preparations.
Choosing the Right Ingredients for No-Bake Oreo Cheesecake
The quality of your ingredients directly impacts the final result. Since this no-bake Oreo cheesecake has so few components, each one matters tremendously.
Best Ingredients for This Recipe
Cream Cheese: This is the star of your cheesecake. Always choose full-fat brick-style cream cheese (not the spreadable kind in tubs, which contains stabilizers that affect texture). Philadelphia brand is the gold standard, but store brands work well too. The crucial part? Bring it to room temperature! Cold cream cheese creates lumps that no amount of mixing can smooth out. Leave it on the counter for 45-60 minutes before starting.
Oreo Cookies: The classic Oreo cookie is what this recipe calls for—not Double Stuf, not Thin, just the regular variety. You’ll need about 36 cookies total: some for the crust, some crushed into the filling, and a few for garnish. The regular version provides the perfect cookie-to-cream ratio. While you can experiment with flavored Oreos (mint, peanut butter, golden), the classic works best for that signature taste everyone loves.
Heavy Whipping Cream: This adds airiness and a lighter texture to what could otherwise be a dense cheesecake. Look for cream with at least 36% milk fat for the best whipping properties. Don’t substitute with half-and-half or milk—the fat content is essential for both whipping and setting.
Buying Tips
When shopping for your no-bake Oreo cheesecake ingredients, keep these tips in mind:
- Check Expiration Dates: Fresh cream cheese makes a significant difference in flavor and texture. Check the date on the package and choose the freshest available.
- Cold Cream: Heavy whipping cream must be very cold to whip properly. Store it in the coldest part of your refrigerator (usually the back of the bottom shelf) until you’re ready to use it.
- Butter Quality: For the crust, use unsalted butter so you can control the sweetness. European-style butter with higher fat content creates an even richer crust.
- Sugar Selection: Powdered sugar (also called confectioners’ sugar) dissolves more easily into the no-bake filling than granulated sugar, creating a smoother texture. Granulated sugar works for the crust.
Substitutions
While I recommend sticking to the recipe for best results, here are some workable substitutions for the no-bake Oreo cheesecake:
- Dairy-Free Version: Use dairy-free cream cheese (Kite Hill or Miyoko’s work well) and coconut cream in place of heavy cream. Chill a can of full-fat coconut milk overnight, then scoop out the solidified cream.
- Reduced Sugar: You can reduce the sugar by up to one-third without drastically affecting texture, though the cheesecake will be less sweet. Alternatively, use a sugar substitute like erythritol or monk fruit sweetener in a 1:1 ratio.
- Graham Cracker Crust: If you’re not an Oreo purist, substitute graham crackers for the crust portion. You’ll need about 1½ cups of crumbs.
- Cookie Alternatives: Chocolate chip cookies, Nutter Butters, or vanilla wafers can replace Oreos for different flavor profiles, though it won’t technically be an Oreo cheesecake anymore!
Ingredients & Prep for No-Bake Oreo Cheesecake
Filling Prep Essentials
Success with your no-bake Oreo cheesecake starts with proper preparation:
Room Temperature is Key: Remove cream cheese from the refrigerator 45-60 minutes before you begin. Properly softened cream cheese should give easily when pressed but not be greasy or melting. This simple step prevents lumps and ensures a silky-smooth filling.
Chill Your Bowl: About 15 minutes before whipping, place your mixing bowl and beaters in the freezer. Cold equipment helps heavy cream whip faster and achieve better volume.
Crush Cookies Uniformly: For the filling, you want varied Oreo pieces—some fine crumbs and some chunky pieces for texture. The easiest method is placing cookies in a zip-top bag and crushing with a rolling pin. For the crust, you need fine, uniform crumbs; a food processor works best for this.
Core Ingredients
For the Crust:
- 24 Oreo cookies (with cream filling)
- 5 tablespoons unsalted butter, melted
- Pinch of salt
For the Filling:
- 24 ounces (3 packages) cream cheese, room temperature
- 1 cup powdered sugar
- 1 teaspoon pure vanilla extract
- 1½ cups heavy whipping cream, cold
- 12 Oreo cookies, roughly chopped
- Pinch of salt
For Garnish:
- 6-8 whole Oreo cookies
- Optional: whipped cream, chocolate sauce, or chocolate shavings
Pantry Staples
Beyond the main ingredients, keep these essentials on hand:
- Vanilla Extract: Always use pure vanilla extract, not imitation. The difference in flavor is noticeable in simple recipes like this.
- Salt: Just a pinch enhances all the flavors and balances the sweetness. Don’t skip it!
- Optional Flavor Boosters: A tablespoon of instant espresso powder deepens the chocolate flavor, while a teaspoon of almond extract adds complexity.
Step-by-Step Cooking Instructions for No-Bake Oreo Cheesecake
Let’s create this spectacular dessert together! I’ll walk you through each step with the detail and care I’d use if you were standing in my kitchen beside me.
Pre-Cooking Prep for No-Bake Oreo Cheesecake
Step 1: Prepare Your Pan
Line a 9-inch springform pan with parchment paper on the bottom, or lightly grease a 9-inch pie dish. If using a springform pan, I recommend wrapping the outside with plastic wrap to prevent any filling from seeping through the bottom seal during chilling.
Step 2: Bring Ingredients to Proper Temperature
Set out your cream cheese 45-60 minutes before starting. It should be soft enough that you can easily press your finger into it, leaving an indentation. Meanwhile, ensure your heavy cream stays refrigerated until the moment you need it—cold cream whips better.
Step 3: Prep Your Oreos
Separate your cookies into three groups:
- 24 cookies for the crust (process into fine crumbs)
- 12 cookies for the filling (roughly chop into varied-size pieces)
- 6-8 cookies for garnish (leave whole)
Step 4: Chill Mixing Equipment
Place your mixing bowl and beaters in the freezer for 10-15 minutes. This helps the cream whip to stiff peaks more efficiently.
Cooking Method for No-Bake Oreo Cheesecake
Making the Crust:
Step 1: Process 24 Oreos (cream filling and all) in a food processor until you have fine, uniform crumbs. You should have about 2½ cups of crumbs. If you don’t have a food processor, place cookies in a heavy-duty zip-top bag and crush with a rolling pin until finely ground.
Step 2: Transfer crumbs to a medium bowl. Pour in melted butter and add a pinch of salt. Stir with a fork until the mixture resembles wet sand—every crumb should be moistened with butter.
Step 3: Pour the crumb mixture into your prepared pan. Using the bottom of a measuring cup or glass, press the crumbs firmly and evenly across the bottom and slightly up the sides (about ½ inch). Press hard—a firm crust won’t crumble when you slice the cheesecake.
Step 4: Refrigerate the crust while you prepare the filling. This 15-20 minute chill helps it set and makes it less likely to stick to the filling.
Making the Filling:
Step 5: In a large mixing bowl, beat the room-temperature cream cheese with an electric mixer on medium speed for 2-3 minutes until completely smooth and fluffy. Scrape down the sides of the bowl halfway through to ensure no lumps remain.
Step 6: Add powdered sugar, vanilla extract, and a pinch of salt to the cream cheese. Beat on low speed until just combined, then increase to medium-high and beat for another 2 minutes until light and airy. The mixture should be smooth, fluffy, and pale in color.
Step 7: In your chilled bowl with chilled beaters, whip the cold heavy cream on medium speed. As it begins to thicken (after about 1 minute), increase to medium-high speed. Continue whipping until stiff peaks form—when you lift the beaters, the cream should stand straight up without drooping. This takes 3-4 minutes total. Be careful not to overwhip, or it will become grainy.
Step 8: Add about one-third of the whipped cream to the cream cheese mixture. Using a spatula, gently fold it in using a circular motion—this lightens the cream cheese and makes it easier to incorporate the rest of the whipped cream without deflating it.
Step 9: Add the remaining whipped cream and fold gently but thoroughly until no white streaks remain. The mixture should be light, airy, and uniform in color. This folding technique is crucial—aggressive mixing deflates the whipped cream and results in a dense cheesecake.
Step 10: Gently fold in the chopped Oreos, distributing them evenly throughout the filling. Reserve a few pieces for topping if desired.
Step 11: Pour the filling over the chilled crust, spreading it evenly with an offset spatula or the back of a spoon. Smooth the top and gently tap the pan on the counter 2-3 times to release any air bubbles.
Doneness Check for No-Bake Oreo Cheesecake
Unlike baked cheesecakes where you check internal temperature, a no-bake Oreo cheesecake is done when it’s properly chilled and set. Here’s how to know:
Initial Set: After 4 hours in the refrigerator, the cheesecake should be firm to the touch around the edges but might still be slightly soft in the very center. This is normal.
Fully Set: After 6-8 hours (or overnight), the entire cheesecake should be uniformly firm. When you gently press the center with your finger, it should feel set—not liquid or jiggly—but still have a slight give, like pressing on a stick of cold butter.
The Wobble Test: Gently shake the pan. A properly set no-bake cheesecake will wobble as one cohesive unit, like Jell-O, rather than having liquid waves across the surface.
Resting for No-Bake Oreo Cheesecake
While this isn’t a “resting” period like you’d have with meat, the chilling time is essential to the success of your no-bake Oreo cheesecake:
Minimum Chill Time: 6 hours, though overnight (8-12 hours) is ideal. This allows the filling to firm up completely and the flavors to meld.
Maximum Make-Ahead: You can make this cheesecake up to 3 days in advance. Cover it tightly with plastic wrap (press the wrap directly onto the surface or tent it carefully to avoid marring the top) and store in the refrigerator.
Freezer Option: For longer storage, freeze the finished cheesecake for up to 2 months. Thaw overnight in the refrigerator before serving.
Garnishing Before Serving: Add any whipped cream, cookie garnishes, or chocolate drizzle just before serving, not during the initial chill time, to keep decorations looking fresh.
Pro Tips for Perfect No-Bake Oreo Cheesecake
After making countless no-bake Oreo cheesecakes, I’ve learned these insider tricks that elevate the recipe from good to absolutely spectacular.
Avoiding Common Mistakes with No-Bake Oreo Cheesecake
Problem: Lumpy Filling
Solution: This almost always stems from cold cream cheese. If you forgot to soften it, cut it into small cubes and microwave in 10-second intervals, stirring between each, until just softened (not melted). Alternatively, let it sit in a bowl of warm water (still in its wrapper) for 10 minutes.
Problem: Runny Cheesecake That Won’t Set
Solution: Ensure you whipped the heavy cream to stiff peaks—soft peaks won’t provide enough structure. Also, verify you used heavy whipping cream (36%+ fat), not half-and-half or coffee cream. If the cheesecake is still soft after 8 hours, give it another 4-6 hours—patience is key.
Problem: Dense, Heavy Texture
Solution: You either deflated the whipped cream during folding or didn’t whip it enough initially. Use a gentle folding motion (not stirring or beating) when combining the whipped cream with the cream cheese mixture.
Problem: Soggy Crust
Solution: Make sure you used enough butter and pressed the crust firmly. A loosely packed crust absorbs moisture from the filling. Also, chilling the crust before adding the filling creates a barrier.
Problem: Cheesecake Sticks to Pan
Solution: For springform pans, run a thin knife around the edge before releasing the sides. For pie dishes, dip your knife in hot water and wipe dry before each slice—the warm blade cuts through cleanly.
Tool Recommendations for No-Bake Oreo Cheesecake
Essential Tools:
- 9-inch Springform Pan: Makes removing and serving the cheesecake elegant and easy. The removable sides mean you can plate it beautifully.
- Electric Mixer: A hand mixer works perfectly for this recipe. Stand mixers work too but can overmix if you’re not careful.
- Food Processor: Creates uniform cookie crumbs for the crust quickly and easily.
- Offset Spatula: Helps smooth the top of the cheesecake and makes folding ingredients together easier.
- Rubber Spatula: Essential for folding without deflating the whipped cream.
Nice-to-Have Tools:
- Large Zip-Top Bags: For crushing cookies if you don’t have a food processor.
- Piping Bag with Star Tip: For adding decorative whipped cream borders.
- Bench Scraper: Helps create perfectly smooth sides if you’re going for a professional look.
Storage & Reheating for No-Bake Oreo Cheesecake
Refrigerator Storage: Cover the cheesecake tightly with plastic wrap or store in an airtight container. It will keep for 5-7 days in the refrigerator. The Oreo pieces will soften slightly over time, but the flavor remains delicious.
Freezer Storage: This no-bake Oreo cheesecake freezes beautifully! Wrap individual slices or the whole cheesecake tightly in plastic wrap, then aluminum foil. Freeze for up to 2 months. Thaw overnight in the refrigerator, never at room temperature (which can make it weepy).
Serving from Frozen: For a fun twist, serve slices partially frozen—they have an ice cream cake-like texture that’s incredibly refreshing on hot days!
Note on “Reheating”: You never reheat cheesecake! Always serve it cold or at cool room temperature. If it’s been refrigerated, you can let it sit at room temperature for 10-15 minutes before serving to take the chill off slightly.
Flavor Variations for No-Bake Oreo Cheesecake
One of the joys of this no-bake Oreo cheesecake is how easily it adapts to different flavor profiles and dietary needs. Here are my favorite tested variations:
Chocolate Lover’s No-Bake Oreo Cheesecake
For those who want even more chocolate, try these modifications:
Double Chocolate: Melt 4 ounces of semi-sweet chocolate and let it cool slightly. Fold it into the cream cheese mixture before adding the whipped cream. The result is a rich, dark chocolate cheesecake studded with Oreo pieces.
Chocolate Ganache Topping: Heat ½ cup heavy cream until just simmering, then pour over 1 cup of chocolate chips. Let sit for 2 minutes, then stir until smooth. Let cool for 10 minutes, then pour over the set cheesecake. Refrigerate for another hour to set the ganache.
Brownie Bottom: Instead of an Oreo crust, press a thin layer of brownie batter into the bottom of your pan and bake just until set (about 15 minutes at 350°F). Cool completely, then add the no-bake Oreo filling on top.
Diet-Friendly No-Bake Oreo Cheesecake Options
Lower Calorie: Use reduced-fat cream cheese (not fat-free, which doesn’t set properly) and replace half the heavy cream with Greek yogurt. The texture will be slightly different—more tangy and less rich—but still delicious. Reduce sugar to ¾ cup.
Keto-Friendly: This requires more significant modifications. Use sugar-free chocolate sandwich cookies (ChocZero or similar), replace powdered sugar with powdered erythritol or allulose, and ensure your cream cheese and heavy cream are full-fat (perfect for keto!). The result has about 6-8g net carbs per slice versus 35g+ in the regular version.
Gluten-Free: Simply use gluten-free chocolate sandwich cookies in place of Oreos. Many brands make excellent alternatives that taste nearly identical. Check labels to ensure all ingredients are certified gluten-free if you have celiac disease.
Global Flavors for No-Bake Oreo Cheesecake
Matcha Green Tea: Add 2 tablespoons of high-quality matcha powder to the cream cheese mixture. Use vanilla or plain cookies instead of Oreos for a stunning pale green cheesecake with subtle earthy sweetness.
Dulce de Leche: Swirl ½ cup of dulce de leche throughout the filling for a caramel-infused Latin-inspired treat. Use maria cookies or vanilla wafers for the crust.
Tiramisu Style: Add 2 tablespoons of instant espresso powder to the filling and use Ladyfinger cookies soaked in espresso for the crust layer instead of Oreos. Dust the top with cocoa powder.
Strawberries and Cream: Fold in 1 cup of diced fresh strawberries and use golden Oreos instead of regular. Top with fresh strawberry sauce and whipped cream.
Creative Twists Table
| Variation | Key Ingredients | Flavor Profile | Difficulty |
|---|---|---|---|
| Peanut Butter Cup no-bake Oreo cheesecake | Add ½ cup peanut butter to filling; use peanut butter Oreos | Rich, nutty, sweet | Easy |
| Mint Chocolate no-bake Oreo cheesecake | Add 1 tsp mint extract + green food coloring; use mint Oreos | Refreshing, cool | Easy |
| Cookies and Cream Extreme no-bake Oreo cheesecake | Triple the Oreo pieces in filling; add mini chocolate chips | Ultra-chocolate | Easy |
| Raspberry Swirl no-bake Oreo cheesecake | Swirl in ¼ cup raspberry preserves | Fruity, tart | Medium |
| Salted Caramel no-bake Oreo cheesecake | Drizzle salted caramel between layers; top with sea salt | Sweet and salty | Medium |
| S’mores | Graham crust, add mini marshmallows, torch the top | Campfire-inspired | Medium |
| Nutella Dream | Swirl ½ cup Nutella into filling | Hazelnut-chocolate | Easy |
| Birthday Cake | Add sprinkles to filling; use golden Oreos; top with more sprinkles | Festive, vanilla | Easy |
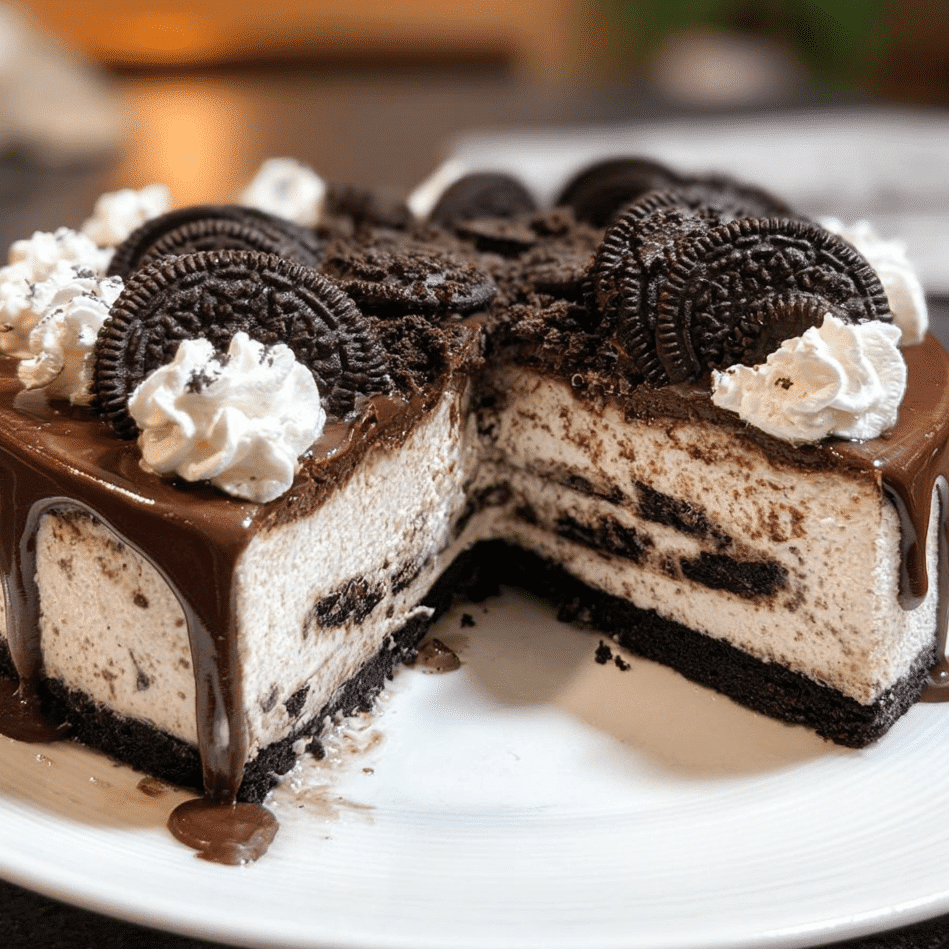
Serving Suggestions for No-Bake Oreo Cheesecake
The moment of serving is when your no-bake Oreo cheesecake truly shines. Here’s how to present it beautifully and pair it with complementary flavors.
Perfect Plating
Clean Slices: For pristine cuts, dip a sharp knife in hot water, wipe it dry with a towel, and slice. Clean and reheat the knife between each slice. This prevents the filling from sticking to the blade and creating messy slices.
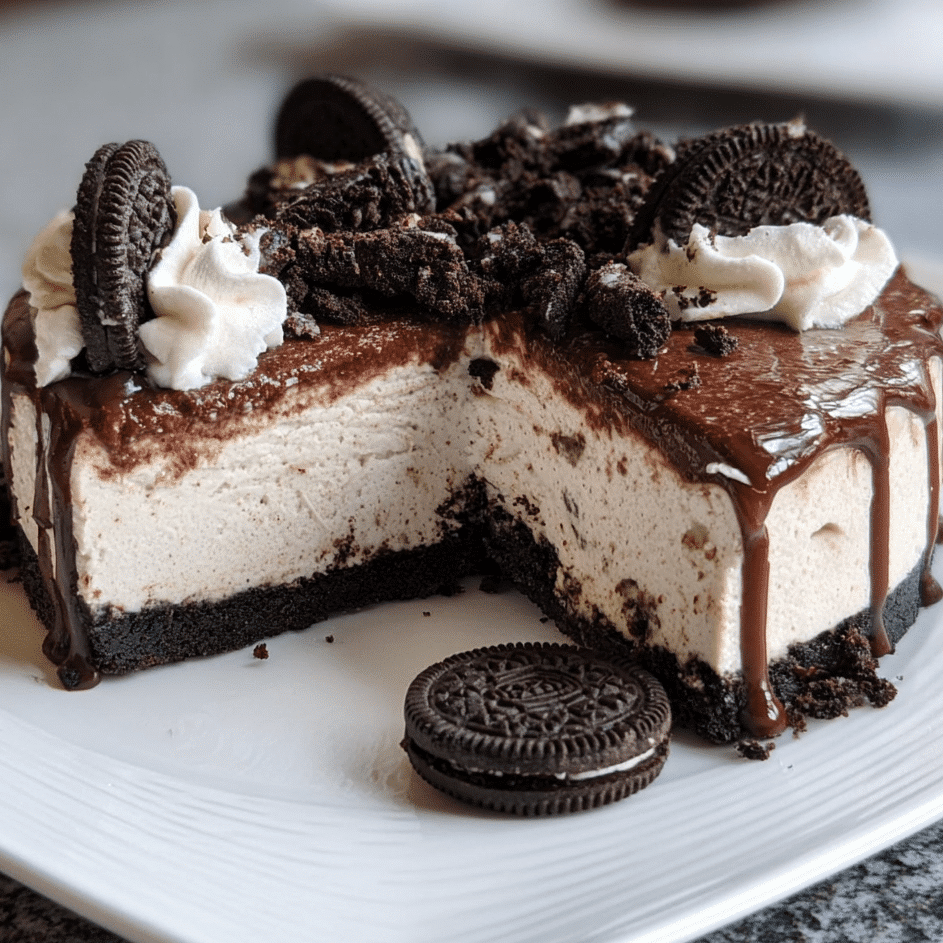
Garnish Ideas: Right before serving, top each slice with:
- A dollop of freshly whipped cream
- A whole Oreo cookie positioned at an angle
- A drizzle of chocolate sauce
- Fresh berries (strawberries or raspberries provide beautiful color contrast)
- A dusting of cocoa powder or crushed Oreo crumbs
- Chocolate shavings or curls
Plating Style: Serve on a white plate for dramatic contrast. Add a small pool of chocolate sauce or raspberry coulis to one side of the plate, place the slice on top or beside it, and add your garnishes. For a rustic look, serve directly from a glass pie dish.
Side Pairings
Coffee and Tea: This rich cheesecake pairs beautifully with:
- Strong espresso or cappuccino (the coffee cuts through the richness)
- Earl Grey tea (the bergamot complements the vanilla notes)
- Chai latte (warming spices balance the cold sweetness)
Fresh Fruit: Serve alongside:
- Fresh strawberries or raspberries (acidity balances richness)
- Sliced peaches or nectarines in summer
- Orange segments with a mint garnish
Textural Contrasts: Add crunch with:
- Crushed Oreos sprinkled on the plate
- Chopped toasted nuts (pecans or almonds work beautifully)
- Chocolate-covered pretzels on the side
Beverage Pairings
Non-Alcoholic:
- Cold milk (classic and nostalgic—just like having Oreos and milk!)
- Chocolate milk or hot chocolate
- Vanilla cream soda or root beer float
- Iced coffee with vanilla syrup
Dessert-Specific: Since this recipe contains no restricted ingredients, I’ll focus on non-alc options. A creamy vanilla milkshake or black iced coffee both complement the cheesecake’s richness wonderfully.
FAQs About No-Bake Oreo Cheesecake
Can I make no-bake Oreo cheesecake without a springform pan?
Absolutely! A 9-inch pie dish works perfectly. You won’t be able to remove the cheesecake from the pan, but you can serve slices directly from the dish—it looks beautiful and rustic. Alternatively, line a regular cake pan with parchment paper with overhang on the sides, which creates “handles” for lifting the cheesecake out once it’s set.
Why is my no-bake Oreo cheesecake not setting?
The most common reasons are: (1) The heavy cream wasn’t whipped to stiff peaks—soft peaks don’t provide enough structure. (2) You used a lower-fat cream or milk instead of heavy whipping cream. (3) It hasn’t chilled long enough—give it a full 8 hours or overnight. (4) The whipped cream was deflated during mixing—fold gently! If it’s been more than 12 hours and it’s still soft, place it in the freezer for 2-3 hours, which will help it set.
Can I use frozen no-bake Oreo cheesecake directly?
Yes! The cheesecake can be sliced and served directly from the freezer—it has a delightful ice cream cake texture that’s especially refreshing in summer. If you prefer the traditional creamy texture, thaw slices in the refrigerator for 4-6 hours or overnight.
How do I prevent a soggy crust in my no-bake Oreo cheesecake?
Ensure you use enough melted butter (5 tablespoons) and press the crust very firmly into the pan—it should feel compact, not loose. Chilling the crust for 15-20 minutes before adding the filling also helps create a barrier. Some bakers even bake the crust at 350°F for 10 minutes, then cool it completely before adding the no-bake filling—this creates an extra-sturdy base.
Can I reduce the sugar in no-bake Oreo cheesecake?
Yes, you can reduce the powdered sugar to ¾ cup without dramatically affecting the texture. The cheesecake will be less sweet but still delicious. Keep in mind that Oreos are already quite sweet, so even with reduced sugar in the filling, the overall dessert is still dessert-level sweet. For a more significant reduction, use a sugar substitute like erythritol or monk fruit sweetener.
What can I do if my no-bake Oreo cheesecake filling is lumpy?
If you discover lumps after mixing, run the mixture through a fine-mesh strainer, pressing it through with a spatula or the back of a spoon. This removes any cream cheese lumps. Alternatively, blend the cream cheese mixture (before adding whipped cream) in a blender for 30 seconds to ensure it’s completely smooth. Prevention is key: always use room-temperature cream cheese and beat it thoroughly before adding other ingredients.
Is no-bake Oreo cheesecake safe during pregnancy?
Yes! Unlike traditional cheesecake made with eggs, this no-bake version contains no raw eggs, which is the primary pregnancy concern with traditional recipes. All ingredients—cream cheese, heavy cream, cookies, and butter—are pregnancy-safe when using pasteurized dairy products (which is standard in the US). As always, consult your healthcare provider about your specific dietary needs.
Can I make mini no-bake Oreo cheesecakes?
Definitely! Line a muffin tin with cupcake liners, press about 1 tablespoon of crust mixture into the bottom of each cup, and top with the filling. You’ll get about 12-16 mini cheesecakes. These are perfect for parties and portion control. Chill time is slightly shorter—about 4 hours—since the portions are smaller. Garnish each with a mini Oreo or whipped cream rosette.
How long does no-bake Oreo cheesecake last in the refrigerator?
Properly stored in an airtight container or tightly wrapped in plastic wrap, it lasts 5-7 days in the refrigerator. The texture and flavor actually improve over the first 2-3 days as the cookies soften slightly and the flavors meld. After day 5, the Oreos may become quite soft, but the cheesecake is still safe and delicious to eat.
Can I make this no-bake Oreo cheesecake dairy-free?
Yes, with some substitutions. Use dairy-free cream cheese (brands like Kite Hill, Miyoko’s, or Tofutti work well) and replace the heavy cream with full-fat coconut cream. To get coconut cream, refrigerate a can of full-fat coconut milk overnight, then scoop out only the thick cream that solidifies on top, leaving the liquid behind. Whip it just like regular cream. Use dairy-free cookies for the crust. The texture will be slightly different—a bit firmer and less smooth—but still delicious.
What’s the best way to transport no-bake Oreo cheesecake?
Keep it very cold until the last possible moment. If using a springform pan, don’t remove the sides until you arrive at your destination—the ring provides stability during transport. Place the cheesecake on a flat surface in your vehicle (the floor works better than a seat, which can tilt). If transporting on a hot day, place the cheesecake in a cooler with ice packs (not directly touching the cheesecake) for up to 2 hours. For longer distances, consider making individual mini cheesecakes in cups with lids for easier, more stable transport.
Conclusion
There you have it—the ultimate guide to creating a show-stopping no-bake Oreo cheesecake right in your own kitchen! This recipe has been perfected through years of testing at Recipesrealm, and I’m confident it will become one of your go-to desserts for any occasion.
What makes this dessert truly special isn’t just its incredible taste or stunning presentation—it’s the joy it brings to everyone who tries it. I’ve served this no-bake Oreo cheesecake at birthday parties, holiday gatherings, potlucks, and quiet family dinners, and it never fails to earn rave reviews. There’s something magical about that first bite: the crunchy Oreo crust giving way to impossibly smooth, creamy filling dotted with chunks of chocolate cookies.
The beauty of this recipe lies in its versatility and forgiveness. Whether you’re a nervous beginner or a confident home baker, this no-bake approach eliminates so much stress and potential for error. No worrying about oven temperatures, no anxiously watching for cracks, no complicated water baths—just simple mixing, gentle folding, and patient chilling.
Remember, the keys to success are room-temperature cream cheese, properly whipped heavy cream, gentle folding technique, and adequate chilling time. Follow these principles, and I promise you’ll create a dessert that looks like it came from a professional bakery.
I encourage you to make this recipe your own! Try the flavor variations I’ve shared, experiment with different garnishes, or create your own unique twist. At Recipesrealm, we believe cooking should be creative and fun, not stressful or restrictive.
So what are you waiting for? Grab those Oreos, pull out your cream cheese, and let’s create some delicious memories together! Whether you’re making this for a special celebration or simply because you deserve something wonderful, this no-bake Oreo cheesecake is sure to delight.
Fire up your refrigerator and try The Ultimate New York Cheesecake Recipe: Creamy, Rich & Irresistible.
If you loved this recipe, don’t forget to share it with your friends or save it to try later! I’d be thrilled to see your personal touch—share your photos on Pinterest
Print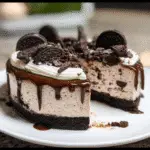
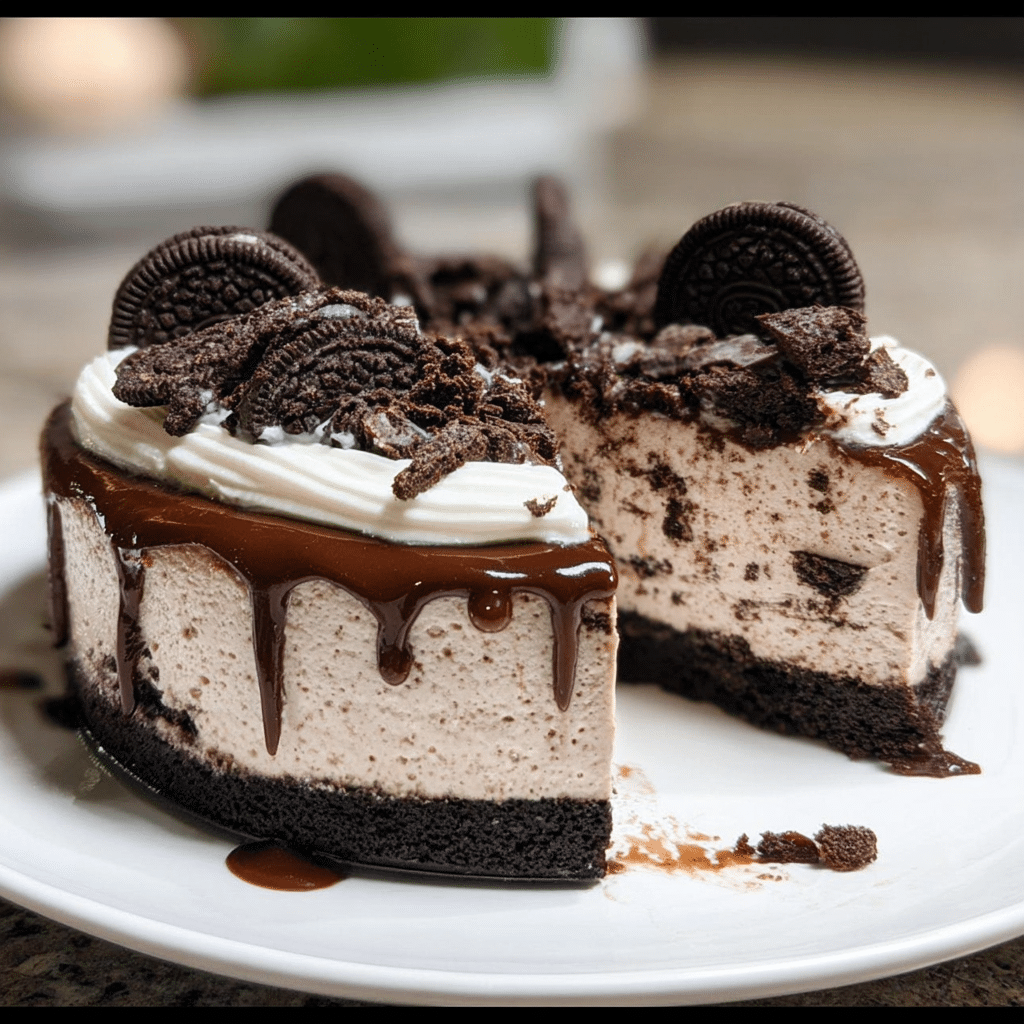
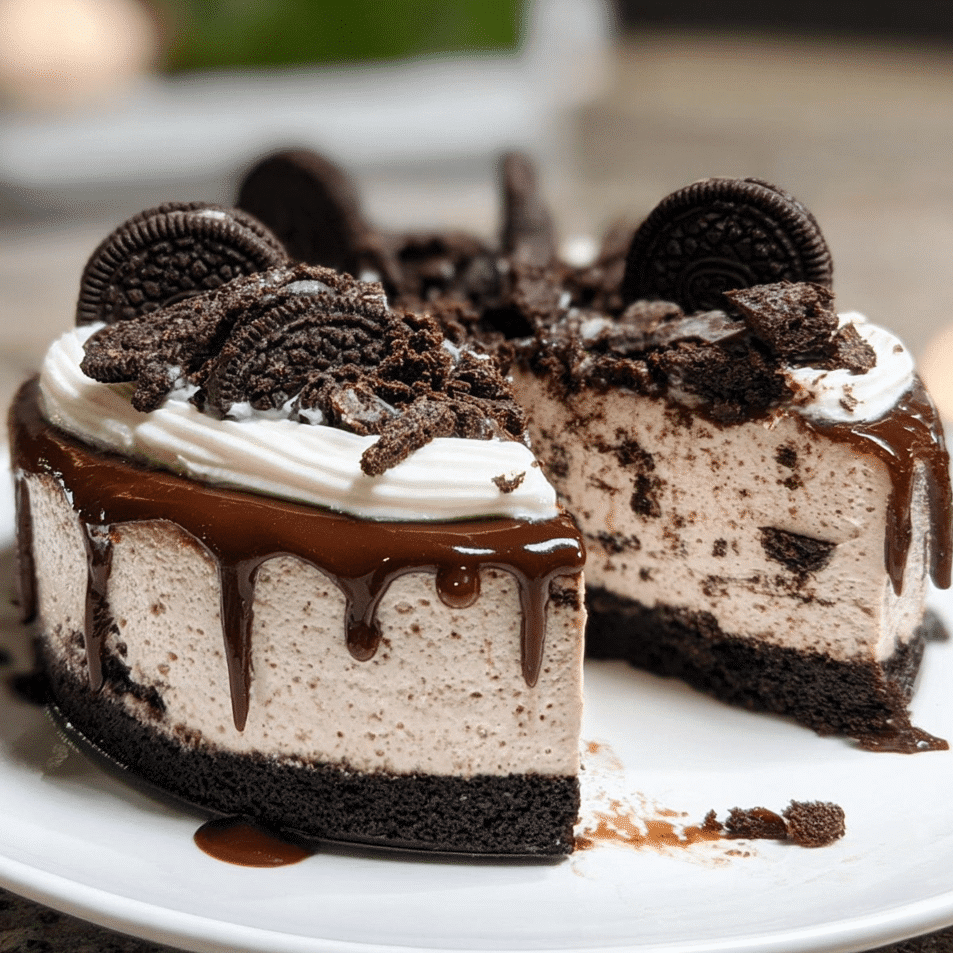
no-bake Oreo cheesecake
Description
This No-Bake Oreo Cheesecake is a creamy, indulgent dessert loaded with crushed Oreos in every bite. With a crunchy cookie crust and smooth cream cheese filling, it’s the perfect make-ahead treat for any Oreo lover!
Ingredients
**For the Crust:**
24 Oreo cookies
1/4 cup (60g) melted butter
**For the Cheesecake Filling:**
16 oz (450g) cream cheese, softened
1 cup (240ml) heavy whipping cream
3/4 cup (90g) powdered sugar
1 tsp vanilla extract
10 Oreo cookies, crushed
**For Topping:**
Crushed Oreos or mini Oreos for decoration
Chocolate drizzle (optional)
Instructions
1. Crush 24 Oreos finely in a food processor, then mix with melted butter until combined.
2. Press mixture firmly into the base of a 9-inch (23 cm) springform pan. Chill while you prepare the filling.
3. In a large bowl, beat cream cheese, powdered sugar, and vanilla until smooth.
4. In a separate bowl, whip the heavy cream until stiff peaks form.
5. Fold the whipped cream into the cream cheese mixture until fully combined and fluffy.
6. Gently fold in the crushed Oreos.
7. Spoon the filling over the prepared crust and smooth the top.
8. Refrigerate for at least 6 hours or overnight until set.
9. Top with extra Oreos or chocolate drizzle before serving.
Notes
Use full-fat cream cheese for the best texture.
Chill overnight for a firm, sliceable cheesecake.
You can freeze leftovers for up to 1 month — thaw in the fridge before serving.