
There’s nothing quite like the moment when you take your first bite of homemade tiramisu and realize you’ve created something truly magical. As someone who’s spent years perfecting desserts in my kitchen, I understand the frustration of following a recipe only to end up with a soggy, flavorless mess instead of the dreamy, coffee-soaked Italian classic you were craving.
Hi there! I’m Lisa, the heart and soul behind Recipesrealm, and tiramisu holds a special place in my culinary journey. I’ll never forget the first time I tasted authentic tiramisu during a family gathering—the silky mascarpone cream, the bold espresso-soaked ladyfingers, and that perfect dusting of cocoa created an unforgettable symphony of flavors. That moment inspired me to master this beloved dessert, and after countless kitchen experiments and happy taste-testers, I’m thrilled to share my perfected homemade tiramisu recipe with you!
This isn’t just another dessert recipe. I’m going to walk you through everything you need to know: selecting the finest ingredients, mastering the delicate layering technique, achieving that perfect creamy-yet-firm texture, and even troubleshooting common mistakes. Whether you’re preparing this for a romantic dinner, holiday celebration, or simply treating yourself, this guide will ensure your tiramisu turns out restaurant-quality every single time.
Why This Homemade Tiramisu Recipe Works
Creating an authentic homemade tiramisu doesn’t have to be intimidating or time-consuming. This recipe delivers spectacular results because it focuses on three essential elements: authentic flavor, foolproof technique, and impressive presentation that looks as stunning as it tastes.
Here’s what makes this recipe special:
- No-bake simplicity means you can create an elegant Italian dessert without turning on your oven—perfect for hot summer days or when your oven is occupied with the main course
- Make-ahead friendly design allows the flavors to meld beautifully overnight, actually improving with time, which makes it ideal for entertaining and stress-free party planning
- Authentic Italian technique using traditional methods passed down through generations, ensuring you get that genuine trattoria taste right in your own kitchen
- Foolproof mascarpone cream that comes together in minutes without curdling or becoming grainy, even for complete beginners
- Customizable coffee intensity so you can adjust the espresso strength to suit your personal preference, from subtly coffee-kissed to boldly caffeinated
- Picture-perfect presentation that impresses guests every single time, making you look like a professional pastry chef with minimal effort
Choosing the Right Ingredients for Homemade Tiramisu
The secret to extraordinary homemade tiramisu lies in selecting quality ingredients. Since this dessert has relatively few components, each one plays a starring role in the final flavor profile. Let’s break down exactly what you need and why it matters.
Best Ingredients for This Recipe
Mascarpone Cheese: This Italian cream cheese is the heart and soul of tiramisu. Look for authentic Italian mascarpone with a minimum 40% fat content for the richest, silkiest texture. Domestic brands can work in a pinch, but imported mascarpone has an unmistakable luxurious quality. Make sure it’s fresh—check the expiration date and avoid any containers that appear separated or watery.
Ladyfinger Cookies (Savoiardi): Italian savoiardi biscuits are specifically designed for tiramisu. They’re drier and more porous than regular ladyfingers, which allows them to absorb the coffee mixture without completely falling apart. Crisp, fresh ladyfingers are essential—stale ones won’t soak up the espresso properly.
Eggs: Use the freshest, highest-quality eggs you can find. Since the eggs aren’t cooked in traditional tiramisu, freshness is paramount. Farm-fresh or organic eggs with bright orange yolks will give you the richest flavor and most beautiful golden color in your cream.
Espresso or Strong Coffee: Authentic Italian espresso creates the classic flavor, but any strong-brewed coffee works beautifully. The key is using coffee that’s bold enough to shine through the sweet mascarpone cream. Instant espresso powder dissolved in hot water is a convenient alternative.
Buying Tips
When shopping for your homemade tiramisu ingredients, keep these expert tips in mind:
For Mascarpone: Check the refrigerated Italian cheese section, not the regular cream cheese area. The texture should be smooth and spreadable, similar to softened butter. If you gently press the container, it should feel uniformly soft without hard spots. Avoid any packages with liquid separation visible through clear packaging.
For Ladyfingers: Italian markets and specialty stores often carry authentic savoiardi. Look for packages labeled specifically for tiramisu. The cookies should be pale golden, uniform in size, and make a light snapping sound when you gently squeeze the package. Soft or bendy ladyfingers won’t work well.
For Eggs: Choose eggs labeled “pasteurized” if you’re concerned about consuming raw eggs, though this is optional. The shells should be clean, uncracked, and refrigerated at the store. When you crack them open, the whites should be thick and clear, and the yolks should stand up proudly in a dome shape.
For Cocoa Powder: Invest in high-quality unsweetened Dutch-process cocoa for dusting. It has a deeper, less acidic flavor than natural cocoa powder and creates that signature dark, velvety finish.
Substitutions
While I always recommend sticking to traditional ingredients for the most authentic homemade tiramisu, here are some workable substitutions:
Instead of Mascarpone: Mix 8 oz softened cream cheese with 1/4 cup heavy cream and 2 tablespoons sour cream. This won’t be identical, but it creates a similarly rich, tangy base. Another option is to blend equal parts cream cheese and ricotta, then fold in whipped cream for lightness.
Instead of Ladyfingers: Sponge cake cut into strips can work as a substitute, though the texture will be slightly different. Pound cake is too dense. If using sponge cake, cut it into finger-sized pieces about the same dimensions as traditional ladyfingers.
Instead of Espresso: Strong brewed French roast coffee, cold brew concentrate diluted with water, or instant coffee dissolved at double strength all work well. You need about 1 1/2 to 2 cups of liquid total. The coffee should taste strong on its own—if it’s weak in the cup, it’ll be barely noticeable in the finished dessert.
For Sugar Alternatives: You can replace granulated sugar with superfine sugar for easier dissolving, or use powdered sugar in the cream for an even silkier texture. For reduced-sugar versions, use half the amount of sugar and add a few drops of vanilla stevia, though this will alter the traditional flavor slightly.
Ingredients & Prep for Homemade Tiramisu
Main Ingredients
Let me break down exactly what you’ll need to create this show-stopping homemade tiramisu. This recipe serves 8-10 people in a 9×13-inch dish.
For the Mascarpone Cream:
- 6 large egg yolks (reserve whites for another use or for a lighter version)
- 3/4 cup granulated sugar, divided
- 16 oz mascarpone cheese, brought to room temperature
- 1 3/4 cups heavy whipping cream, cold
- 2 teaspoons pure vanilla extract
- 1/4 teaspoon fine sea salt
For the Coffee Soak:
- 2 cups strong espresso or very strong coffee, cooled to room temperature
- 3 tablespoons granulated sugar (optional, depending on your sweetness preference)
- 1/4 cup coffee liqueur (optional—omit for a family-friendly version)
For Assembly:
- 40-48 Italian ladyfinger cookies (savoiardi)
- 3 tablespoons unsweetened cocoa powder for dusting
- Dark chocolate shavings for garnish (optional but beautiful)

Essential Prep Work
Mascarpone Preparation: Remove your mascarpone from the refrigerator 30-45 minutes before starting. Room-temperature mascarpone blends smoothly without lumps, while cold mascarpone can cause your cream to seize up or become grainy. Gently stir it in the container to check consistency—it should be soft and spreadable like softened butter.
Egg Safety Note: Since traditional tiramisu uses raw eggs, use the freshest eggs possible and keep everything refrigerated. If you’re concerned about food safety, you can use pasteurized eggs or make a cooked custard base by gently heating the egg yolks with sugar in a double boiler until they reach 160°F, then cooling completely before proceeding.
Coffee Preparation: Brew your espresso or strong coffee and let it cool completely—hot coffee will melt your cream layers. If you’re in a hurry, pour the hot coffee into a shallow dish and place it in the refrigerator. Add the sugar while the coffee is still warm so it dissolves completely. Taste your coffee mixture—it should be pleasantly sweet and strong, as it will mellow when absorbed by the ladyfingers.
Equipment Setup: Have ready a 9×13-inch baking dish (glass or ceramic shows off the beautiful layers), a large mixing bowl for the cream, a shallow dish for coffee soaking, a hand mixer or stand mixer, and a fine-mesh sieve or small strainer for dusting cocoa.
Workspace Organization: Clear plenty of counter space and arrange your ingredients in the order you’ll use them. Tiramisu assembly moves quickly once you start, so having everything within reach prevents the cream from deflating or the ladyfingers from over-soaking.
Step-by-Step Cooking Instructions for Homemade Tiramisu
Pre-Cooking Prep for Homemade Tiramisu
Before we begin assembling our homemade tiramisu, let’s ensure everything is ready for seamless construction. Proper preparation is the secret to achieving those perfect, Instagram-worthy layers.
Start by separating your eggs while they’re cold—this is much easier than separating room-temperature eggs. Place the yolks in a large mixing bowl and reserve the whites for another use (meringues, anyone?). Let the egg yolks sit at room temperature for about 15 minutes; this helps them blend more smoothly with the sugar.
Prepare your coffee mixture by combining the cooled espresso with sugar, stirring until fully dissolved. Taste it—the flavor should be boldly coffee-forward with a pleasant sweetness. Pour this into a shallow dish that’s wide enough to dip the ladyfingers flat. If you’re using coffee liqueur, add it now.
Have your serving dish ready and nearby. I recommend lining your 9×13-inch dish with plastic wrap if you plan to unmold and serve the tiramisu on a platter, though this is entirely optional. Most people serve it directly from the dish, which is perfectly traditional.
Cooking Method for Homemade Tiramisu
Step 1: Create the Egg Yolk Base
Using an electric hand mixer or stand mixer fitted with the whisk attachment, beat the egg yolks with 1/2 cup of sugar on medium-high speed for 3-5 minutes. You’re looking for a pale yellow, thick mixture that forms ribbons when you lift the beaters. This process incorporates air and creates volume, which gives your tiramisu its characteristic light, mousse-like texture. The mixture should nearly double in volume and become noticeably lighter in color.
Step 2: Incorporate the Mascarpone
Reduce your mixer speed to low and add the room-temperature mascarpone cheese, about 1/3 of the container at a time. Beat just until combined and smooth—overbeating can cause the mascarpone to separate and become grainy. Scrape down the sides of the bowl as needed. The mixture should be silky and uniform with no lumps of mascarpone visible. Add the vanilla extract and salt, mixing just until incorporated.
Step 3: Whip the Cream
In a separate large, clean bowl, combine the cold heavy cream with the remaining 1/4 cup of sugar. Using clean beaters, whip the cream on medium speed, gradually increasing to medium-high. Beat until soft peaks form—this means when you lift the beaters, the cream forms peaks that gently fold over at the tips. This takes about 3-4 minutes. Be careful not to overbeat; you want soft, billowy peaks, not stiff, grainy butter.
Step 4: Fold Everything Together
Using a large rubber spatula, gently fold about 1/3 of the whipped cream into the mascarpone mixture. This lightens the dense mascarpone and makes it easier to incorporate the remaining cream. Use a gentle folding motion—cut down through the center, sweep across the bottom, and fold over the top. Rotate the bowl a quarter turn and repeat. Add the remaining whipped cream and fold until no white streaks remain, but be gentle to maintain all that airy volume you’ve worked hard to create. The finished cream should be light, fluffy, and cloud-like.
Step 5: Assemble the First Layer
Working quickly but carefully, dip each ladyfinger cookie into the coffee mixture. Here’s the crucial technique: Dip each side for just 1-2 seconds—literally count “one-one-thousand, two-one-thousand” and remove. The ladyfinger should be moistened but still hold its shape; if you soak too long, you’ll have a soggy mess. Some people prefer to brush the coffee onto the ladyfingers with a pastry brush for more control.
Arrange the soaked ladyfingers in a single layer in the bottom of your dish, placing them close together with no gaps. You should be able to fit about 20-24 ladyfingers in a 9×13-inch dish. Break cookies as needed to fill in any gaps—this is your tiramisu, and it doesn’t need to be perfect!
Step 6: Add the First Cream Layer
Spoon half of your mascarpone cream over the ladyfinger layer. Use an offset spatula or the back of a spoon to spread it evenly, creating a smooth, uniform layer that covers every bit of the ladyfingers. Be generous—this cream is what makes tiramisu heavenly. Gently smooth the top so the surface is level.
Step 7: Create the Second Layer
Repeat the dipping and layering process with the remaining ladyfingers, creating a second complete layer. Again, work quickly so the coffee doesn’t get warm and the first layer doesn’t start deflating. Arrange them in the opposite direction from your first layer if you want that classic crisscross appearance when you cut into it.
Step 8: Final Cream Layer and Finishing Touches
Spread the remaining mascarpone cream over the second ladyfinger layer, smoothing it beautifully. Take a moment to make sure the surface is even and attractive—this is what your guests will see first. Use your spatula to create gentle swirls if you want a more rustic, homemade look, or smooth it completely for a modern, minimalist presentation.
Cover the dish tightly with plastic wrap, making sure the wrap doesn’t touch the cream surface. Refrigerate for at least 6 hours, but preferably overnight. This resting time is when the magic happens—the flavors meld together, the ladyfingers soften to the perfect texture, and everything settles into harmonious deliciousness.
Doneness Check for Homemade Tiramisu
Unlike baked desserts, homemade tiramisu doesn’t have an internal temperature to check. Instead, you’ll know your tiramisu is ready when:
The cream layers have set into a silky, spoonable consistency—not runny or liquidy, but still soft and creamy. If you gently press the surface with your finger, it should leave a slight impression without sinking in.
The ladyfingers have absorbed the coffee and cream to achieve that characteristic soft, cake-like texture. They shouldn’t be crunchy anymore, but they also shouldn’t be falling apart or mushy.
The entire dessert has chilled thoroughly—at least 6 hours, preferably 8-24 hours. The flavors become more complex and integrated the longer it sits. I actually think tiramisu tastes best on the second day.
When you take a spoonful, all the layers should come together cohesively, creating distinct yet unified bites where you can taste the coffee, cream, and cocoa in perfect harmony.
Resting for Homemade Tiramisu
Patience is perhaps the hardest part of making homemade tiramisu, but it’s absolutely essential for achieving that authentic, restaurant-quality result. Here’s why the resting period matters so much:
The Science of Resting: During refrigeration, the moisture from the mascarpone cream gradually permeates the ladyfingers, transforming them from crisp cookies into soft, cake-like layers. Simultaneously, the coffee flavor mellows and distributes throughout, and the egg yolks and cream stabilize, creating that signature silky texture.
Minimum Resting Time: Your tiramisu needs at least 6 hours in the refrigerator, but I strongly recommend overnight (8-12 hours) for optimal results. If you’re really pressed for time, you can get away with 4 hours, though the texture won’t be quite as refined.
Optimal Resting Time: The sweet spot is 12-24 hours. This gives the flavors time to fully develop and meld, creating depth and complexity you simply can’t achieve with shorter resting times. The ladyfingers reach ideal softness without becoming mushy, and the layers settle into perfect harmony.
Maximum Resting Time: Tiramisu can be made up to 2 days in advance and actually continues to improve slightly during this time. After 48 hours, the ladyfingers may start to become a bit too soft, and the cream can begin to weep slightly, though it’s still perfectly delicious.
Final Dusting: Wait until just before serving to dust the top with cocoa powder. If you do it too early, the cocoa will absorb moisture from the cream and lose its beautiful matte finish, turning slightly gray and dissolving into the cream. Place your cocoa powder in a fine-mesh sieve and tap it gently over the entire surface, creating an even, generous layer. Add chocolate shavings or a light dusting of espresso powder for extra elegance.
Pro Tips for Perfect Homemade Tiramisu
Avoiding Common Mistakes with Homemade Tiramisu
Even experienced cooks can encounter challenges when making homemade tiramisu. Let me share the most common pitfalls and exactly how to avoid them.
Soggy, Falling-Apart Ladyfingers: This is the number one complaint I hear. The fix is simple: dip, don’t soak. Your ladyfingers need literally 1-2 seconds per side in the coffee—just long enough to moisten the exterior. Think of it as a quick baptism, not a leisurely bath. If you’re nervous about getting it right, use a pastry brush to paint the coffee onto the ladyfingers instead of dipping them. This gives you more control, though it takes a bit longer.
Grainy or Separated Mascarpone Cream: This happens when the mascarpone is too cold, when you overmix, or when you use low-quality mascarpone. Always bring your mascarpone to room temperature—this is non-negotiable. Mix just until combined, not a second longer. If your cream does separate, try whisking in a tablespoon of cold heavy cream to bring it back together. Prevention is easier than cure, so be gentle with your mixing.
Runny Cream That Won’t Set: This usually indicates under-whipped cream or too-warm ingredients. Make sure your heavy cream is very cold and whipped to soft peaks before folding. Also, check that your mascarpone hasn’t been replaced with mascarpone-style spread, which has added ingredients that affect texture. The real thing should contain only cream and citric acid.
Bitter or Overpowering Coffee Flavor: If your tiramisu tastes more like coffee than dessert, you’ve used coffee that’s too strong or too much coffee altogether. Remember, the ladyfingers should be moistened, not saturated. Also, adding that optional 3 tablespoons of sugar to your coffee mixture really helps balance the bitterness. High-quality espresso or coffee is less bitter than cheap brands.
Cream Sinking Into Ladyfinger Layers: This happens when the ladyfingers are over-soaked or when you wait too long between layering. Work efficiently—assemble your tiramisu relatively quickly so the layers stay distinct. If the first layer of ladyfingers has been sitting for 15 minutes before you add cream, they’ll have softened too much and won’t support the cream properly.
Tool Recommendations for Homemade Tiramisu
Having the right tools makes creating homemade tiramisu so much easier:
Electric Hand Mixer or Stand Mixer: While you technically can whisk everything by hand, it takes considerably longer and your arm will be exhausted. A good electric mixer is worth its weight in gold for whipping cream and beating egg yolks to proper volume.
9×13-inch Glass or Ceramic Baking Dish: Glass is my favorite because you can see the beautiful layers from the sides. Ceramic holds temperature well. Avoid metal pans, which can react with acidic ingredients and affect flavor.
Shallow Wide Bowl for Coffee Soaking: You need something wide enough to lay a ladyfinger flat. A 9-inch pie dish or shallow pasta bowl works perfectly. The coffee should be about 1 inch deep.
Offset Spatula: This angled spatula makes spreading the cream layers smooth and even without disturbing the ladyfingers underneath. If you don’t have one, the back of a large spoon works fine.
Fine-Mesh Sieve: Essential for dusting cocoa powder evenly without clumps. A small strainer or even a tea infuser works in a pinch.
Rubber Spatula: For folding the whipped cream into the mascarpone mixture without deflating all that lovely air you’ve incorporated.
Storage & Reheating for Homemade Tiramisu
Proper storage ensures your homemade tiramisu stays fresh and delicious for days.
Refrigerator Storage: Cover your tiramisu tightly with plastic wrap or aluminum foil and store it in the refrigerator for up to 3 days. The flavors continue to develop over this time. Always keep it well-covered to prevent it from absorbing refrigerator odors and to keep the top from drying out.
Serving Temperature: Tiramisu is best served slightly chilled but not ice-cold. Remove it from the refrigerator about 10-15 minutes before serving to take the chill off. This allows the flavors to bloom and the texture to become even more creamy.
Individual Portions: If you’ve made tiramisu in individual serving glasses or jars, cover each one with plastic wrap. They store beautifully for up to 3 days and make elegant pre-portioned desserts for dinner parties.
Not Recommended for Freezing: I don’t recommend freezing assembled tiramisu. The ladyfingers become waterlogged and mushy when thawed, and the cream can separate. However, you can freeze the mascarpone cream alone for up to 1 month if needed, thawing it overnight in the refrigerator and re-whipping briefly before assembling.
Leftover Revival: If your tiramisu has been in the refrigerator for 2-3 days and the top looks a bit dry, simply dust with fresh cocoa powder before serving. This instantly refreshes the appearance.
Flavor Variations for Homemade Tiramisu
One of the beautiful things about mastering homemade tiramisu is that you can customize it to suit different tastes, dietary needs, and occasions. Let me share some of my favorite variations.
Chocolate Lover’s Twist
Transform your classic homemade tiramisu into a chocolate dream by folding 1/4 cup of melted and cooled dark chocolate into the mascarpone cream. You can also add chocolate shavings between the layers for extra indulgence. For an even more intense experience, replace 1/4 cup of the coffee with chocolate liqueur, or brush the ladyfingers with melted chocolate before soaking them in espresso. Finish with both cocoa powder and chocolate curls on top for a truly decadent presentation.
Fruit-Infused Variations
While not traditional, fruit versions of homemade tiramisu are wonderfully refreshing. For a strawberry version, layer thinly sliced fresh strawberries between the cream and ladyfingers, and reduce the coffee by half, adding a tablespoon of strawberry liqueur. Raspberry tiramisu works beautifully with a raspberry coulis drizzled between layers. For a tropical twist, use coconut milk in place of half the heavy cream and add passion fruit pulp between layers—soak the ladyfingers in strongly brewed tropical tea instead of coffee.
Seasonal Specialties
Pumpkin Spice Tiramisu (Fall): Add 1/2 cup of pumpkin puree and 1 teaspoon of pumpkin pie spice to the mascarpone cream. Dust with cinnamon instead of cocoa powder. This makes an incredible alternative to traditional Thanksgiving desserts.
Peppermint Mocha Tiramisu (Winter): Add 1/4 teaspoon of peppermint extract to the mascarpone cream and 2 tablespoons of cocoa powder. Use peppermint mocha coffee for soaking. Garnish with crushed candy canes.
Lemon Berry Tiramisu (Spring): Add 2 teaspoons of lemon zest to the cream and reduce coffee to 1 cup, mixing it with 1/2 cup of limoncello. Layer with fresh blueberries and raspberries.
Caramel Macchiato Tiramisu (Summer): Drizzle caramel sauce between layers and add a pinch of sea salt to the mascarpone cream. Use caramel-flavored coffee for soaking.
Dietary Adaptations for Homemade Tiramisu
Lower Sugar Version: Reduce the sugar in the mascarpone cream by half and use unsweetened coffee for soaking. The dessert will still be pleasantly sweet from the mascarpone and ladyfingers. You can also substitute half the sugar with erythritol or monk fruit sweetener, though this changes the texture slightly.
Lighter Version: Replace half of the mascarpone with drained Greek yogurt or ricotta cheese, and use light whipped topping instead of heavy cream. This cuts calories significantly while maintaining decent flavor. It won’t be as rich and luxurious as traditional tiramisu, but it’s a good compromise for health-conscious guests.
Egg-Free Version: Use a no-egg mascarpone cream by simply whipping mascarpone with powdered sugar and vanilla, then folding in whipped cream. This is actually quite popular in Italy, particularly for serving to young children or pregnant women.
Gluten-Free Homemade Tiramisu: Replace traditional ladyfingers with gluten-free ladyfingers or gluten-free pound cake cut into strips. The texture will be slightly different, but the flavors remain authentic. Make sure your cocoa powder is certified gluten-free.
Keto-Friendly Version: Use sugar-free ladyfingers (or make almond flour ones yourself), substitute all sugar with erythritol or allulose, and ensure your coffee and cocoa powder are unsweetened. This creates a dessert with only about 6-8g net carbs per serving.
Global Flavor Inspirations for Homemade Tiramisu
| Variation | Key Changes | Flavor Profile | Soaking Liquid |
|---|---|---|---|
| Matcha Tiramisu | Add 2 tbsp matcha powder to cream; dust top with matcha instead of cocoa | Earthy, slightly bitter green tea with sweet cream | Green tea or matcha latte |
| Dulce de Leche Tiramisu | Swirl dulce de leche throughout cream layers | Rich caramel sweetness with coffee undertones | Espresso with cinnamon |
| Chai Spice Tiramisu | Add 1 tsp chai spice blend to cream | Warm spices—cardamom, ginger, cinnamon | Strong chai tea concentrate |
| Tiramisu Affogato Style | Serve individual portions with hot espresso poured over at the table | Interactive dessert, hot-cold contrast | Pre-assembled with cold espresso |
| Amaretto Almond Tiramisu | Add 1/4 cup amaretto liqueur; top with toasted sliced almonds | Nutty, almond-forward sweetness | Half espresso, half amaretto |
| Turkish Coffee Tiramisu | Use Turkish coffee with cardamom; add rose water to cream | Exotic, floral, intensely aromatic | Turkish coffee with cardamom |
| Vietnamese Coffee Tiramisu | Mix sweetened condensed milk into coffee soak; use strong dark roast | Intensely sweet, bold coffee flavor | Vietnamese-style coffee |
| Mocha Frappé homemade tiramisu | Blend chocolate syrup into coffee mixture | Youthful, sweet, chocolate-coffee blend | Iced mocha |
Each of these variations maintains the essential structure of homemade tiramisu while offering unique flavor experiences that transport you to different culinary traditions around the world.
Serving Suggestions for Homemade Tiramisu
The beauty of homemade tiramisu is its versatility—it’s equally at home at an elegant dinner party or a casual family gathering. Let me share some of my favorite ways to present and serve this stunning dessert.

Classic Presentation: Dust the entire surface generously with unsweetened cocoa powder just before serving. Use a fine-mesh sieve and tap gently to create an even layer. For an extra touch of elegance, place a decorative stencil on top and dust cocoa powder over it to create beautiful patterns. Add chocolate shavings or chocolate-covered espresso beans scattered artfully across the top.
Individual Servings: While traditional homemade tiramisu is served family-style from a large dish, individual portions in clear glasses, mason jars, or wine glasses create an impressive presentation perfect for dinner parties. Layer the components the same way, and guests can see the beautiful striations. Top each with a dollop of whipped cream and a chocolate curl.
Plated Elegance: Cut rectangular or triangular portions and plate them individually. Add a small pool of chocolate sauce or espresso reduction on the plate, place the homemade tiramisu slice on top, and garnish with fresh mint leaves and a few fresh berries for color contrast.
Pairing Suggestions: Homemade tiramisu pairs beautifully with a variety of beverages and complementary treats:
- Serve with freshly brewed espresso or cappuccino for the ultimate Italian experience
- Dessert offerings like Vin Santo or Moscato d’Asti complement the sweet cream beautifully
- For a non-sweet beverage, try sparkling water with a twist of lemon to cleanse the palate
- Fresh berries on the side add a bright, acidic contrast that cuts through the richness
- Biscotti or pizzelle cookies make excellent accompaniments for texture variation
- Consider serving with affogato-style hot espresso poured over a small scoop of vanilla gelato alongside
Portion Sizes: Tiramisu is rich and decadent, so portions should be modest. A 9×13-inch pan cut into 3×3-inch pieces yields 12 servings, which is appropriate for dessert after a full meal. For a cocktail party or dessert buffet where it’s one of several options, you can cut smaller 2×3-inch pieces for 18-20 servings.
Temperature Serving Tip: Remove homemade tiramisu from the refrigerator 10-15 minutes before serving. This slight warming allows the mascarpone cream to soften and the flavors to become more pronounced. If it’s served too cold, the cream can taste flat and overly firm.
FAQs About Homemade Tiramisu
Can I make homemade tiramisu without eggs?
Yes, absolutely! While traditional tiramisu contains raw egg yolks, you can create a delicious egg-free version. Simply omit the eggs entirely and create your cream by beating room-temperature mascarpone with powdered sugar and vanilla extract until smooth, then folding in whipped heavy cream. The texture will be slightly lighter and less custardy than traditional homemade tiramisu, but it’s still delicious and eliminates any concerns about raw eggs. This version is perfect for pregnant women, young children, or anyone with egg allergies.
How long can I store homemade tiramisu in the refrigerator?
Properly stored homemade tiramisu will keep in the refrigerator for 3-4 days when tightly covered with plastic wrap or aluminum foil. In fact, it often tastes even better on day two after the flavors have had more time to meld. However, after 3 days, the ladyfingers can become overly soft and the cream may begin to weep slightly. For best quality and food safety (since traditional homemade tiramisu contains raw eggs), consume it within 3 days. Always keep it refrigerated and never leave it at room temperature for more than 2 hours.
Can I use regular cookies instead of ladyfingers?
While Italian savoiardi ladyfingers are ideal for homemade tiramisu, you can use substitutes in a pinch. Sponge cake cut into finger-sized strips works reasonably well, as does angel food cake. Avoid cookies that are too dense (like shortbread or butter cookies) or too fragile (like graham crackers), as they won’t absorb the coffee properly. Whatever you use should be able to soak up liquid without completely falling apart. That said, authentic ladyfingers are worth seeking out because they’re specifically designed for this purpose.
Is homemade tiramisu safe for pregnant women?
Traditional tiramisu contains raw eggs, which pose a risk of salmonella infection, so it’s generally not recommended for pregnant women, young children, elderly people, or anyone with a compromised immune system. However, you have several safe options: use pasteurized eggs (available in most grocery stores), make an egg-free version using only mascarpone and whipped cream, or create a cooked custard base by heating the egg yolks with sugar to 160°F in a double boiler before proceeding with the recipe. These modifications make homemade tiramisu perfectly safe for pregnant women to enjoy.
Why is my homemade tiramisu runny?
A runny tiramisu typically results from one of these issues: under-whipped cream (whip to soft peaks before folding), over-soaked ladyfingers (dip for only 1-2 seconds per side), mascarpone that’s too warm (should be room temperature but not warm), or insufficient chilling time (needs at least 6 hours, preferably overnight). The dessert should be assembled and refrigerated immediately, allowing time for everything to set properly. If your homemade tiramisu is already assembled and runny, unfortunately there’s not much you can do except let it chill longer and hope it sets up.
Can I make homemade tiramisu ahead of time?
This is actually one of the best things about tiramisu—it must be made ahead! The dessert needs at least 6 hours of refrigeration to set properly, but it’s even better after 12-24 hours when the flavors have fully melded. You can make homemade tiramisu up to 2 days in advance with excellent results. Just wait to dust the top with cocoa powder until 1-2 hours before serving for the prettiest presentation. This make-ahead quality makes tiramisu perfect for entertaining since you can prepare it the day before and focus on other dishes on party day.
How do I know if my mascarpone has gone bad?
Fresh mascarpone should be smooth, creamy white to pale ivory in color, and smell mildly sweet with a subtle tang similar to cream cheese. Signs that it’s spoiled include: sour or unpleasant odor, visible mold (discard immediately), watery separation that doesn’t blend back in when stirred, yellowish discoloration, or a taste that’s sharply sour rather than pleasantly tangy. Always check the expiration date before purchasing, and once opened, use mascarpone within 3-5 days for best quality. Never use mascarpone that seems questionable, as it’s a key ingredient that affects the entire dessert.
Can I use decaf coffee in homemade tiramisu?
Yes, absolutely! Decaf coffee or espresso works perfectly in tiramisu if you’re sensitive to caffeine or serving the dessert in the evening. The flavor difference is minimal once the coffee is combined with the sweet mascarpone cream. Use a high-quality decaf espresso or strong-brewed decaf coffee, and make sure it’s still bold and flavorful—weak coffee will result in a bland homemade tiramisu regardless of whether it’s caffeinated or not. You can also use half regular and half decaf for a moderate caffeine level.
What’s the difference between tiramisu and other layered Italian desserts?
Homemade tiramisu is distinguished by its specific combination of coffee-soaked ladyfingers and mascarpone cream. Zuppa Inglese uses alchermes liqueur and custard instead of coffee and mascarpone. Panna cotta is a molded gelatin-set cream dessert without layers. Semifreddo is a frozen mousse-like dessert. What makes homemade tiramisuunique is the marriage of bold coffee flavor with rich, creamy mascarpone and the contrasting textures of soft ladyfingers and silky cream—all without baking or cooking (besides brewing coffee).
Can I halve the recipe for a smaller batch?
Yes, this recipe halves beautifully! Use a 9×9-inch square pan or 8×8-inch dish for half the recipe, which will serve 6-8 people. Cut all ingredients in half, but maintain the same soaking time for ladyfingers and chilling time for the assembled dessert. You can also make the full recipe and assemble it in individual serving dishes—a 9×13-inch pan’s worth of ingredients will fill about 12 wine glasses or small dessert cups, which is perfect for dinner parties.
Conclusion
Creating authentic homemade tiramisu is one of those magical kitchen experiences that transforms simple ingredients into something truly spectacular. What I love most about this dessert is how it captures the essence of Italian cooking—taking quality ingredients, treating them with respect, and allowing time to work its magic to create layers of extraordinary flavor.
As you’ve learned throughout this guide, success with homemade tiramisu isn’t about complicated techniques or specialized equipment. It’s about understanding a few key principles: keeping your mascarpone at the right temperature, exercising restraint when soaking those ladyfingers, whipping your cream to perfect soft peaks, and most importantly, practicing patience while your creation chills and develops its full potential.
Whether you’re making this for a romantic anniversary dinner, a holiday celebration, Sunday family dinner, or simply because you’re craving something wonderful, this homemade tiramisu recipe will become a treasured part of your cooking repertoire. The first time you hear someone take that first bite and let out a contented sigh, you’ll understand why this dessert has captured hearts around the world for generations.
At Recipesrealm, we believe that food isn’t just about taste—it’s about creating memories and sharing moments. This homemade tiramisu embodies that philosophy perfectly, bringing people together over something beautiful, delicious, and made with love in your own kitchen. Every layer tells a story, every bite creates a moment, and every time you make it, you’re continuing a delicious Italian tradition that’s stood the test of time.
So fire up that espresso machine, gather your ingredients, and get ready to impress yourself and everyone lucky enough to share your table. Once you’ve mastered this classic, explore the variations I’ve shared—there’s a whole world of homemade tiramisupossibilities waiting for you!
I’d love to hear how your homemade tiramisu turns out! Did you stick with the classic version or try one of the creative variations? What’s your favorite part of making (and eating!) this iconic Italian dessert? Try our Buttery Cookies Sandwiched with Creamy Filling next for another showstopping dessert that’s sure to impress!
If you loved this recipe, don’t forget to share it with your friends or save it to try later! I’d be thrilled to see your personal touch—share your photos on Pinterest
Print
creamy homemade tiramisu dessert
Description
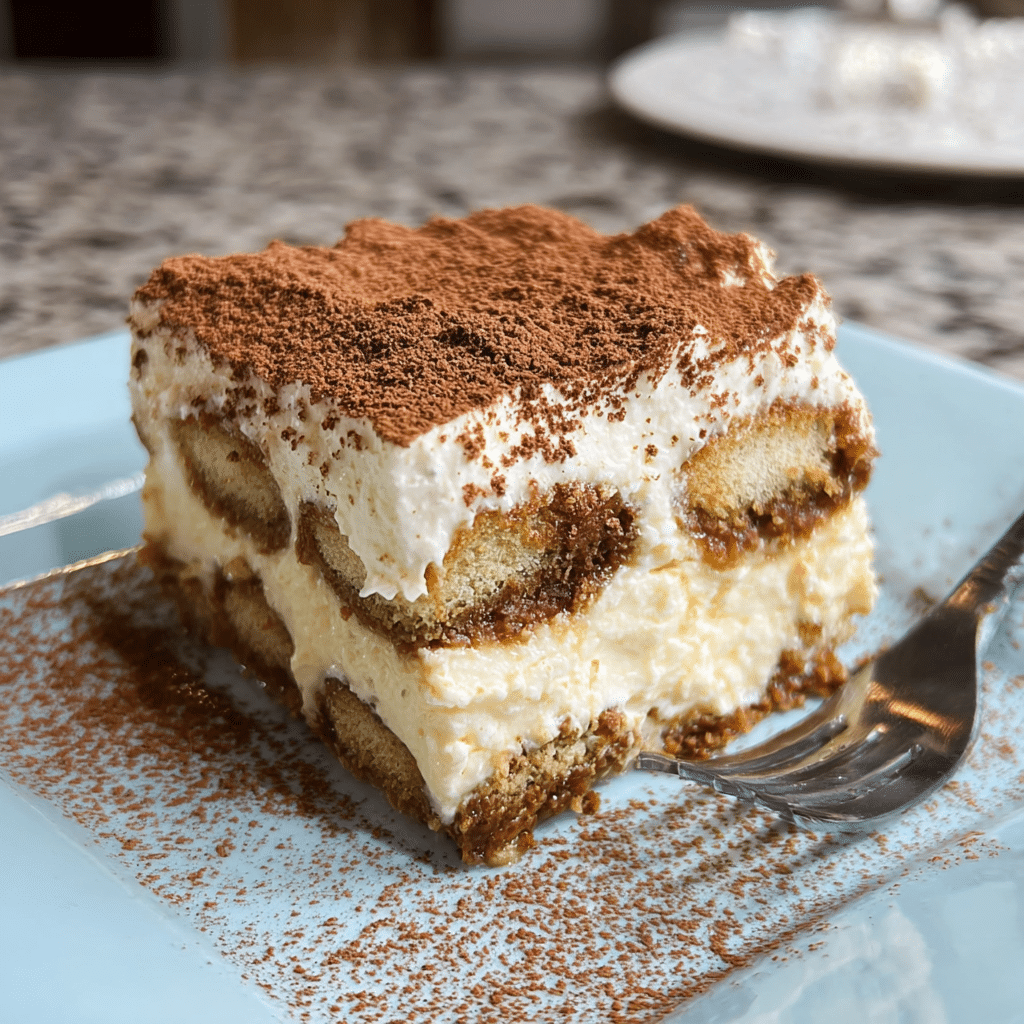
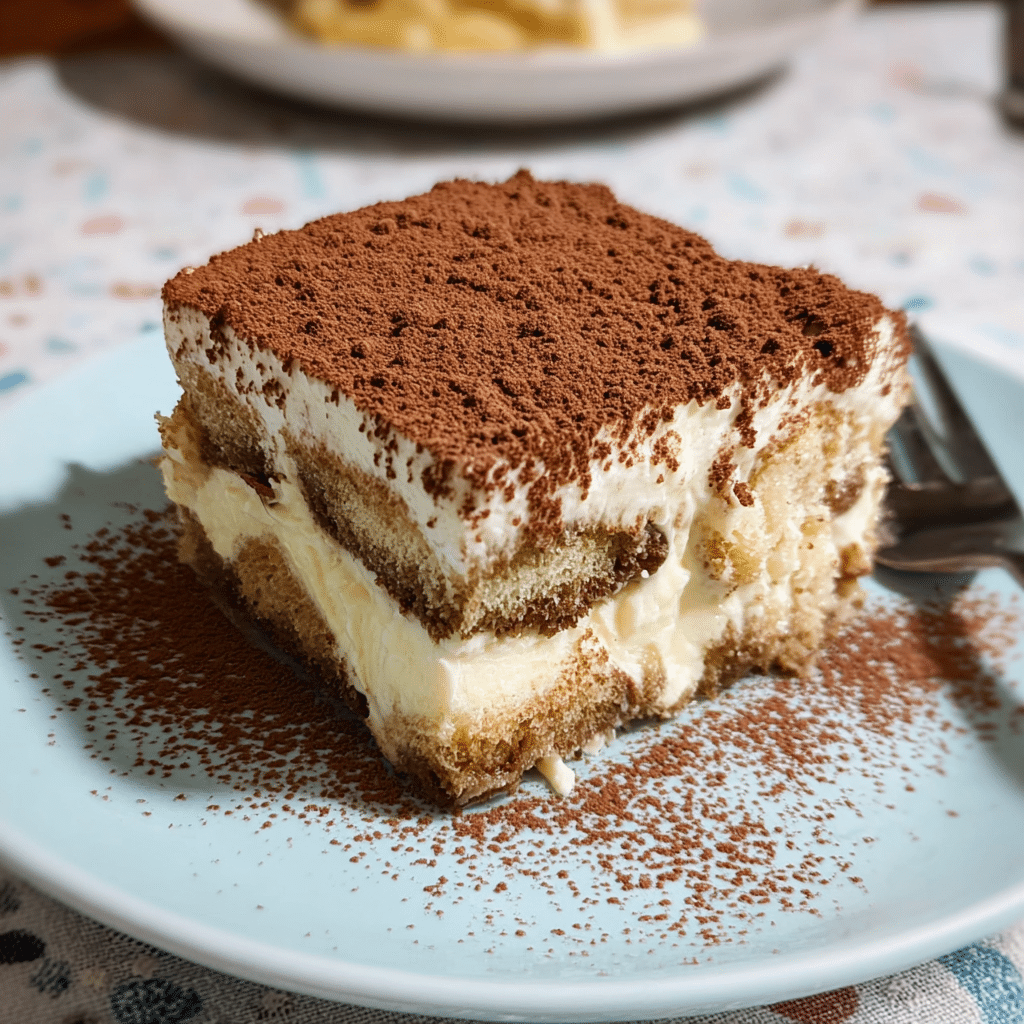
This Creamy Homemade Tiramisu Dessert is a luxurious Italian classic made with layers of espresso-soaked ladyfingers, rich mascarpone cream, and a dusting of cocoa powder. It’s elegant, no-bake, and perfect for dinner parties or celebrations.
Ingredients
**For the Cream:**
4 large egg yolks
1/2 cup (100g) granulated sugar
8 oz (225g) mascarpone cheese, softened
1 cup (240ml) heavy cream
**For the Coffee Layer:**
1 1/2 cups (360ml) strong brewed espresso or coffee, cooled
2 tbsp coffee liqueur (optional)
24 ladyfingers (savoiardi biscuits)
**For Topping:**
2 tbsp unsweetened cocoa powder
Dark chocolate shavings (optional)
Instructions
1. In a heatproof bowl, whisk egg yolks and sugar over a pot of simmering water (double boiler) for 5–6 minutes until pale and thickened. Remove from heat and let cool slightly.
2. Beat in mascarpone until smooth and creamy.
3. In a separate bowl, whip heavy cream to stiff peaks, then gently fold it into the mascarpone mixture until combined.
4. Combine espresso and coffee liqueur in a shallow dish.
5. Quickly dip each ladyfinger into the coffee mixture (do not soak) and arrange a layer in a 9×9 inch (23 cm) dish.
6. Spread half of the mascarpone cream over the ladyfingers and smooth evenly.
7. Repeat with another layer of dipped ladyfingers and the remaining cream.
8. Cover and refrigerate for at least 4 hours, preferably overnight.
9. Before serving, dust generously with cocoa powder and top with chocolate shavings.
Notes
Use high-quality mascarpone and espresso for the best flavor.
For a non-alcoholic version, skip the liqueur.
Tiramisu tastes even better after chilling overnight — the flavors fully develop.