
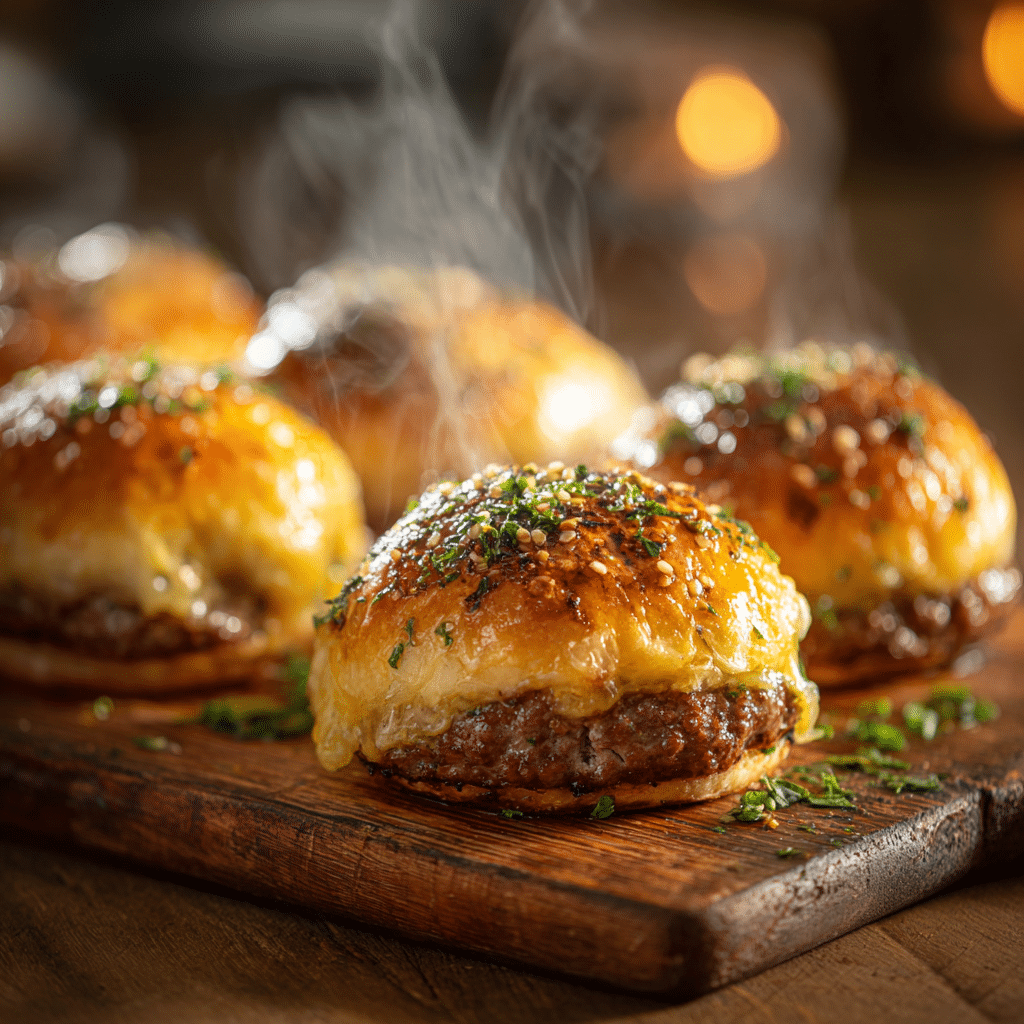
Tired of the same old ground beef recipes that leave your family underwhelmed? These garlic parmesan cheeseburger bombs are about to become your new weeknight hero – imagine all the flavors of your favorite cheeseburger wrapped in golden, buttery dough and topped with aromatic garlic parmesan goodness that melts in your mouth.
Hi there! I’m Olivia, and I still remember the first time I made these cheeseburger bombs in my kitchen. It was one of those chaotic Tuesday evenings when I had leftover ground beef and a can of biscuit dough staring at me from the fridge. Growing up in my grandmother’s kitchen, I learned that the best recipes often come from those “what do I have on hand?” moments. She used to say, “Olivia, honey, cooking is just love wrapped in creativity.” That night, as I watched my family’s faces light up with each bite of these cheesy, garlicky bombs, I knew I’d stumbled onto something special.
As someone who’s been perfecting comfort food recipes for years here at CookFoody.com, I can tell you that these garlic parmesan cheeseburger bombs hit all the right notes: they’re incredibly easy to make (perfect for busy weeknights), use affordable ingredients you probably already have, and deliver that satisfying, restaurant-quality flavor that brings everyone to the table. In this guide, I’ll share my secret tips for the juiciest filling, the fluffiest dough wrapping, and that irresistible garlic parmesan topping that makes these bombs absolutely irresistible.
Why This Garlic Parmesan Cheeseburger Bombs Recipe Works
There’s something magical about combining classic American comfort food with Italian-inspired flavors, and these garlic parmesan cheeseburger bombs prove that fusion cuisine doesn’t have to be complicated to be absolutely delicious.
• Uses budget-friendly ground beef that transforms into something extraordinary with just a few pantry staples • Ready in under 30 minutes from start to finish – perfect for those “what’s for dinner?” panic moments • Incredible versatility – serve as appetizers for game day, main course for kids, or late-night comfort food • Crowd-pleasing flavor combination that satisfies both burger lovers and garlic bread enthusiasts • Freezer-friendly so you can make a double batch and have comfort food ready whenever cravings strike
Choosing the Right Meat for Garlic Parmesan Cheeseburger Bombs
The foundation of amazing garlic parmesan cheeseburger bombs starts with selecting the right ground beef, and trust me, this choice can make or break your recipe.
Best Ground Beef for This Garlic Parmesan Cheeseburger Bombs Recipe
For the juiciest, most flavorful cheeseburger bombs, I always reach for 80/20 ground beef. This ratio gives you enough fat content (20%) to keep the filling moist and flavorful without being greasy. The fat renders beautifully during cooking, creating those delicious caramelized bits that make each bite incredible. Avoid lean ground beef (90/10 or higher) as it tends to dry out and won’t give you that rich, satisfying flavor we’re after.
Buying Tips for Your Garlic Parmesan Cheeseburger Bombs
Look for ground beef with a bright red color – avoid any packages with brown or gray spots. The meat should feel cold to the touch and have a fresh, clean smell. I always check the sell-by date and choose packages from the back of the display case where it’s coldest. If you have a good relationship with your butcher, ask them to grind chuck roast fresh for you – the flavor difference is remarkable.

Ground Beef Substitutions for Cheeseburger Bombs
While beef is traditional, you can absolutely customize these garlic parmesan cheeseburger bombs to suit your family’s preferences. Ground turkey (85/15) works beautifully but benefits from an extra pinch of seasoning. Ground pork creates incredibly juicy bombs with a slightly sweet flavor. For a leaner option, try a 50/50 mix of ground beef and ground mushrooms – it adds umami depth while reducing calories.
Ingredients & Prep for Garlic Parmesan Cheeseburger Bombs
Getting your prep work done before you start cooking is the secret to stress-free garlic parmesan cheeseburger bombs that turn out perfectly every time.
Meat Prep Essentials for Cheeseburger Bombs
Start by bringing your ground beef to room temperature for about 15 minutes before cooking – this ensures even browning. When cooking the beef mixture, break it up into small, bite-sized pieces rather than large chunks. This makes it easier to wrap in the dough and ensures every bite has that perfect meat-to-cheese ratio. Don’t forget to drain excess fat after browning to prevent soggy bombs.
Seasoning & Flavor Building for Garlic Parmesan Cheeseburger Bombs
The magic happens in the seasoning blend. Beyond the basic salt and pepper, that splash of Worcestershire sauce is non-negotiable – it adds depth and that classic burger flavor. I like to let the cooked beef mixture cool for 10-15 minutes before assembling, which prevents the cheese from melting too quickly and the dough from becoming sticky.
Pantry Staples for Perfect Cheeseburger Bombs
Keep these essentials on hand: quality butter for the garlic parmesan topping (real butter makes a difference), freshly grated parmesan (the pre-grated stuff just doesn’t compare), and fresh garlic whenever possible. For the dough, refrigerated biscuit dough is your shortcut to success, but if you’re feeling ambitious, homemade pizza dough elevates these bombs to gourmet status.
Step-by-Step Cooking Instructions for Garlic Parmesan Cheeseburger Bombs
Let me walk you through each step to ensure your garlic parmesan cheeseburger bombs turn out golden, cheesy, and absolutely irresistible.
Pre-Cooking Prep for Cheeseburger Bombs
Preheat your oven to 375°F (190°C) and line a baking sheet with parchment paper or lightly grease it. Remove your refrigerated biscuit dough from the fridge about 10 minutes before using to make it easier to work with. Set up your assembly station with the cooked beef mixture, shredded cheese, and flattened biscuit rounds – trust me, having everything ready makes the process so much smoother.
Cooking Method for Perfect Garlic Parmesan Cheeseburger Bombs
Heat your skillet over medium-high heat and add the ground beef, diced onion, and minced garlic. Cook for 6-8 minutes, breaking up the meat with a wooden spoon until it’s beautifully browned and the onions are translucent. Drain any excess fat, then stir in the Worcestershire sauce, salt, and pepper. Let this mixture cool slightly while you prepare your dough.
Assembly Technique for Cheeseburger Bombs
Gently flatten each biscuit into a 4-inch circle (don’t worry about perfect circles). Place 1-2 tablespoons of the beef mixture in the center, top with a generous sprinkle of cheese, then carefully gather the edges and pinch to seal completely. The key is ensuring no filling escapes – think of it like making little edible presents.
Baking Your Garlic Parmesan Cheeseburger Bombs
Place the bombs seam-side down on your prepared baking sheet, leaving about 2 inches between each one. Bake for 15-18 minutes until they’re golden brown and sound hollow when tapped. While they bake, prepare your garlic parmesan butter by mixing melted butter, minced garlic, grated parmesan, and parsley.
Pro Tips for Perfect Garlic Parmesan Cheeseburger Bombs
After making countless batches of garlic parmesan cheeseburger bombs, I’ve learned some game-changing tricks that guarantee success every time.
Avoiding Common Mistakes with Cheeseburger Bombs
The biggest mistake I see is overfilling the bombs – resist the temptation! Too much filling makes them difficult to seal and can cause them to burst open during baking. Another common error is not sealing the edges properly; make sure to pinch firmly and tuck the seam underneath for the best results.
Essential Tool Recommendations for Cheeseburger Bombs
A good non-stick skillet makes browning the beef effortless, while a large baking sheet ensures even cooking. I love using a pastry brush to apply the garlic parmesan butter – it gives you perfect, even coverage. A meat thermometer isn’t necessary here, but if you’re nervous about doneness, the internal temperature should reach 165°F.
Storage & Reheating Your Garlic Parmesan Cheeseburger Bombs
These bombs are best enjoyed fresh and hot, but leftovers keep beautifully in the refrigerator for up to 3 days. Reheat them in a 350°F oven for 8-10 minutes to restore that crispy exterior. For longer storage, freeze the assembled but unbaked bombs on a tray, then transfer to freezer bags – you can bake them straight from frozen, just add 5-8 extra minutes to the cooking time.
Flavor Variations for Garlic Parmesan Cheeseburger Bombs
One of the things I love most about garlic parmesan cheeseburger bombs is how easily they adapt to different flavor profiles and dietary needs.
Spicy Twist on Cheeseburger Bombs
For heat lovers, add a minced jalapeño to the beef mixture or incorporate chipotle peppers in adobo sauce for smoky spice. A dash of hot sauce in the meat mixture or a sprinkle of red pepper flakes in the garlic butter takes these bombs to the next level.
International Flavors for Cheeseburger Bombs
Transform these into Italian-style garlic parmesan cheeseburger bombs by adding Italian seasoning to the meat and using mozzarella instead of cheddar. For a Mexican twist, season with cumin and chili powder, use pepper jack cheese, and serve with salsa and sour cream.
Dietary Adaptations for Cheeseburger Bombs
Make these keto-friendly by wrapping the filling in cauliflower dough or using fathead dough instead of biscuits. For dairy-free versions, use plant-based cheese and dairy-free butter in the topping. Gluten-free? Swap the biscuit dough for your favorite gluten-free alternative.
| Variation | Key Changes | Flavor Profile |
|---|---|---|
| Classic Garlic Parmesan | Original recipe | Savory, garlicky, cheesy |
| Spicy Jalapeño | Add jalapeños + hot sauce | Bold heat with cheese cooling |
| Italian Style | Italian herbs + mozzarella | Mediterranean herb blend |
| BBQ Bacon | BBQ sauce + bacon bits | Sweet, smoky, indulgent |
| Mushroom Swiss | Sautéed mushrooms + Swiss | Earthy, sophisticated |
| Buffalo Style | Buffalo sauce + blue cheese | Tangy, spicy bar food |
Serving Suggestions for Garlic Parmesan Cheeseburger Bombs
These garlic parmesan cheeseburger bombs are incredibly versatile and work beautifully in so many different serving scenarios.
Perfect Side Dishes: Pair these rich, cheesy bombs with fresh, crisp salads like a simple garden salad or tangy coleslaw to balance the richness. Roasted vegetables such as asparagus, Brussels sprouts, or green beans add color and nutrition to your plate. For the ultimate comfort food experience, serve alongside sweet potato fries or crispy regular fries.
Beverage Pairings: The garlic and beef flavors pair beautifully with medium-bodied red wines like Merlot or Cabernet Sauvignon. For beer lovers, try a hoppy IPA to cut through the richness, or go classic with a cold lager. Non-alcoholic options include sparkling water with lemon or a rich, creamy milkshake for the kids.
Dipping Sauce Options: While these bombs are delicious on their own, offering a variety of dipping sauces elevates the experience. Classic ketchup and ranch are always hits, but try marinara sauce for an Italian twist, or honey mustard for something tangy-sweet.
FAQs About Garlic Parmesan Cheeseburger Bombs
Can I use frozen ground beef for cheeseburger bombs? Absolutely! Just make sure to thaw it completely and drain any excess moisture before cooking. Frozen ground beef sometimes releases more liquid during cooking, so you might need to cook it a bit longer to ensure all the moisture evaporates.
How do I fix overcooked cheeseburger bombs? If your bombs turn out a bit dry, brush them with extra garlic butter while they’re still warm – this adds moisture and flavor. You can also serve them with extra dipping sauces to add moisture back.
Are garlic parmesan cheeseburger bombs safe during pregnancy? Yes, as long as you cook the ground beef to an internal temperature of 160°F and use pasteurized dairy products. The high baking temperature ensures everything is properly cooked and safe.
Can I make these ahead of time? You can assemble the bombs up to 4 hours ahead and keep them covered in the refrigerator. You can also freeze them before baking – just add 5-8 minutes to the cooking time if baking from frozen.
What’s the best way to reheat leftover cheeseburger bombs? Reheat in a 350°F oven for 8-10 minutes rather than the microwave, which can make them soggy. The oven helps restore that crispy exterior we all love.
Conclusion
There’s something truly special about garlic parmesan cheeseburger bombs that goes beyond just their incredible taste. They represent everything I love about comfort food cooking – taking simple, everyday ingredients and transforming them into something that brings pure joy to the dinner table. From that first bite where the golden, garlicky exterior gives way to the melty cheese and seasoned beef inside, these bombs create those precious moments where everyone stops talking and just savors the deliciousness.
Ready to create some magic in your own kitchen? Fire up that oven and give these garlic parmesan cheeseburger bombs a try tonight – I promise they’ll become a regular in your meal rotation! Don’t forget to brush them with that garlic parmesan butter while they’re still warm; trust me, it makes all the difference.
Join the thousands of home cooks who’ve already fallen in love with this recipe! Share your photos and variations in the comments below – I love seeing how you make these bombs your own. And if you’re looking for more comfort food inspiration, check out our Crispy Chicken Ranch Wrap Recipe or try our Chicken Green Bean Stir Fry for your next gathering.
Remember, cooking is just love wrapped in creativity, and these cheeseburger bombs are proof that the simplest ingredients can create the most memorable meals. Let’s cook something amazing together!
If you loved this recipe, don’t forget to share it with your friends or save it to try later!
I’d be thrilled to see your personal touch—share your photos on Pinterest
Garlic Parmesan Cheeseburger Bombs: The Ultimate Comfort Food That’ll Have Everyone Begging for More
- Total Time: 35 minutes
- Yield: 12 cheeseburger bombs 1x
Description
Juicy cheeseburger filling wrapped in soft dough, baked to golden perfection, and topped with garlic parmesan – the ultimate comfort food appetizer or meal that’s irresistible.
Ingredients
1 lb ground beef
1/2 tsp salt
1/4 tsp black pepper
1/2 tsp garlic powder
4 oz cheddar cheese, cut into small cubes
1 can refrigerated biscuit dough (or pizza dough)
2 tbsp unsalted butter, melted
2 cloves garlic, minced
2 tbsp grated Parmesan cheese
Optional: sesame seeds for topping
Instructions
1. Preheat oven to 375°F (190°C) and line a baking sheet with parchment paper.
2. In a bowl, combine ground beef, salt, pepper, and garlic powder. Mix well.
3. Take a portion of dough and flatten into a small circle.
4. Place a spoonful of beef mixture and a cube of cheddar in the center. Fold dough over and pinch edges to seal.
5. Repeat with remaining dough, beef, and cheese.
6. Place sealed dough balls on prepared baking sheet.
7. In a small saucepan, melt butter and sauté minced garlic for 1–2 minutes. Brush garlic butter over dough balls.
8. Sprinkle with grated Parmesan cheese (and optional sesame seeds).
9. Bake 18–22 minutes until golden brown and cooked through.
10. Serve hot.
Notes
For extra flavor, mix chopped onions or pickles into the beef filling.
These can be made ahead and frozen; bake directly from frozen, adding a few extra minutes to baking time.
Serve with ketchup, mustard, or your favorite dipping sauce.
- Prep Time: 15 minutes
- Cook Time: 20 minutes
- Category: Appetizer, Comfort Food
- Method: Baking, Sautéing
- Cuisine: American
Nutrition
- Serving Size: 1 bomb
- Calories: 280
- Sugar: 2g
- Sodium: 350mg
- Fat: 18g
- Saturated Fat: 8g
- Unsaturated Fat: 7g
- Trans Fat: 0g
- Carbohydrates: 18g
- Fiber: 1g
- Protein: 14g
- Cholesterol: 55mg
Keywords: garlic parmesan cheeseburger bombs, comfort food, cheesy appetizers, baked burgers