
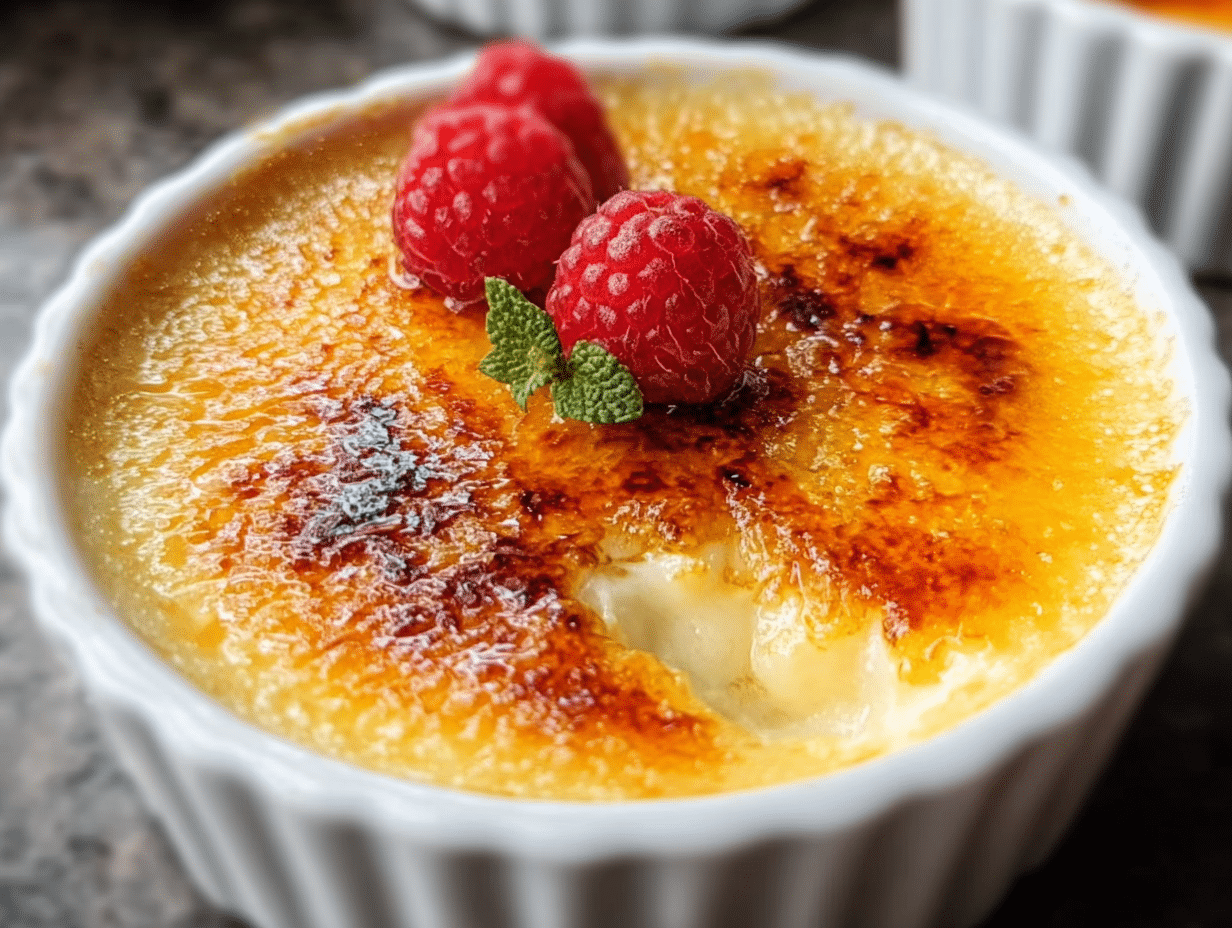
Tired of crème brûlée that turns out grainy, curdled, or with a rubbery texture? You’re not alone. This classic French dessert has intimidated home cooks for decades, but it doesn’t have to be complicated. This creamy crème brûlée recipe delivers that signature silky-smooth custard with a perfectly caramelized sugar crust every single time.
Hi there! I’m Lisa, the heart and soul behind Recipesrealm, and I’m thrilled to share this perfected creamy crème brûlée recipe with you! After years of testing temperatures, ratios, and techniques, I’ve cracked the code to achieving that restaurant-quality texture at home. Whether you’ve attempted this dessert before with disappointing results or you’re a complete beginner, this guide will walk you through everything you need to know—from selecting the freshest ingredients to mastering the torch technique. We’ll cover essential preparation tips, step-by-step instructions, common mistakes to avoid, and creative flavor variations that will impress any dinner guest.
At Recipesrealm, we believe that food isn’t just about taste—it’s about creating memories and sharing moments. This creamy crème brûlée is the perfect finale to any special occasion, from intimate anniversary dinners to elegant holiday gatherings.
Why This Creamy Crème Brûlée Recipe Works
This recipe transforms simple ingredients into an unforgettable dessert experience. Here’s what makes this creamy crème brûlée stand out from other versions:
- Uses only five basic ingredients you likely already have in your kitchen—heavy cream, egg yolks, sugar, vanilla, and salt
- Foolproof water bath technique ensures even, gentle cooking with zero curdling or graininess
- Perfect for both intimate dinners and entertaining since you can prepare it up to 3 days in advance
- Achieves that iconic crispy sugar topping without needing expensive equipment
- Delivers silky, luxurious texture that melts on your tongue with every spoonful
- Versatile base recipe that accepts countless flavor variations to match any preference
The secret lies in the precise temperature control and the careful balance of egg yolks to cream. This creates that signature wobble when you tap the ramekin—not too firm, not too liquid, but absolutely perfect.
Choosing the Right Ingredients for Creamy Crème Brûlée
The quality of your ingredients directly impacts the final texture and flavor of your creamy crème brûlée. Since this dessert relies on so few components, each one must be top-notch.
Best Dairy for This Recipe
Heavy cream is non-negotiable for authentic creamy crème brûlée. Look for cream with at least 36% fat content for the richest, most luxurious texture. Avoid ultra-pasteurized cream when possible, as it can develop an off-flavor when heated. The fat content creates that silky mouthfeel that defines a perfect crème brûlée.
Some bakers swear by adding a splash of whole milk to lighten the texture slightly, but traditionalists prefer pure heavy cream. For this recipe, we’re sticking with 100% heavy cream for maximum decadence.
Buying Tips for Premium Results
Eggs: Choose the freshest large eggs available. The yolks should be bright orange-yellow, which indicates fresh, high-quality eggs. Older eggs with pale yolks will work but won’t deliver the same vibrant color or rich flavor.
Vanilla: Real vanilla beans or pure vanilla extract make all the difference. If using vanilla beans, look for plump, moist pods that feel slightly oily to the touch. Madagascar vanilla offers classic flavor, while Tahitian vanilla adds floral notes.
Sugar: Superfine sugar dissolves more easily in the custard base, but regular granulated sugar works perfectly. For the caramelized topping, standard granulated white sugar creates the best crack-and-shatter effect.
Substitutions for Different Dietary Needs
While traditional creamy crème brûlée isn’t easily adapted to major dietary restrictions, here are some modifications:
Dairy-Free: Full-fat coconut cream can replace heavy cream, though the flavor profile changes significantly. The texture remains creamy but with tropical undertones.
Sugar Alternatives: Monk fruit sweetener or erythritol can work for the custard base, but traditional sugar is essential for the caramelized top since alternatives don’t caramelize properly.
Flavor Substitutions: Swap vanilla for almond extract, citrus zest, or coffee for completely different taste experiences while maintaining that signature creamy texture.
Ingredients & Prep for Creamy Crème Brûlée
Proper preparation is crucial for achieving that perfect creamy crème brûlée texture. Taking time to set up correctly prevents common disasters like curdled custard or uneven cooking.
Essential Prep Steps
Temperature Matters: Allow your eggs to come to room temperature for about 30 minutes before starting. Cold eggs don’t blend as smoothly and can cause the custard to cook unevenly. Similarly, measure your heavy cream and let it sit out briefly.
Equipment Setup: Preheat your oven to 325°F (163°C). Arrange six 6-ounce ramekins in a deep baking dish or roasting pan. Have a kettle of water heating for the water bath—you’ll need enough boiling water to come halfway up the sides of the ramekins.
Straining Station: Set up a fine-mesh strainer over a large measuring cup with a spout. This makes pouring the custard into ramekins much easier and removes any cooked egg bits or air bubbles.
Ingredient List
For the Custard Base:
- 2 cups (480ml) heavy cream
- 5 large egg yolks
- ⅓ cup (65g) granulated sugar
- 1 vanilla bean (or 2 teaspoons pure vanilla extract)
- Pinch of fine sea salt
For the Caramelized Topping:
- 6 tablespoons superfine or granulated sugar (1 tablespoon per ramekin)
Timing and Make-Ahead Strategy
Total Time Commitment: Budget about 1 hour for active preparation and baking, plus 4-6 hours for chilling (or overnight for best results).
Make-Ahead Advantage: The beauty of creamy crème brûlée is that you can bake the custards up to 3 days in advance. Store them covered in the refrigerator and caramelize the sugar topping just before serving for that signature crack.
Marinating Time: If infusing the cream with vanilla beans, coffee beans, or citrus zest, heat the cream with your flavoring agent and let it steep for 30 minutes before proceeding with the recipe. This deepens the flavor significantly.
Step-by-Step Cooking Instructions for Creamy Crème Brûlée
Follow these detailed instructions to achieve perfect creamy crème brûlée every single time. Each step is designed to prevent common mistakes that lead to grainy or overcooked custard.
Pre-Cooking Prep for Creamy Crème Brûlée
Step 1: Split your vanilla bean lengthwise with a sharp knife and scrape out the seeds using the back of the knife. Add both the seeds and the scraped pod to your heavy cream in a medium saucepan. If using extract, you’ll add it later.
Step 2: Heat the cream over medium heat until it just begins to steam and small bubbles form around the edges—around 170°F (77°C). Do not let it boil. Remove from heat and let steep for 15 minutes if using vanilla beans. This infusion creates incredible depth of flavor.
Step 3: While the cream infuses, separate your egg yolks into a large mixing bowl. Add the sugar and a pinch of salt. Whisk vigorously for about 2 minutes until the mixture becomes pale yellow and slightly thickened. This step is crucial for incorporating air and ensuring smoothness.
Cooking Method for Creamy Crème Brûlée
Step 4: Remove the vanilla pod from the cream (if using). Slowly drizzle about ¼ cup of the warm cream into the egg yolk mixture while whisking constantly. This tempering process prevents the eggs from scrambling. Continue adding cream gradually, whisking continuously, until all cream is incorporated. If using vanilla extract, add it now.
Step 5: Pour the custard through a fine-mesh strainer into a large measuring cup or pitcher. This removes any cooked egg bits and creates an ultra-smooth texture. Skim off any foam or bubbles from the surface.
Step 6: Place your ramekins in the baking dish and divide the custard evenly among them, filling each about three-quarters full. Carefully transfer the baking dish to the preheated oven rack.
Step 7: Pour hot water into the baking dish until it reaches halfway up the sides of the ramekins. This water bath (bain-marie) ensures gentle, even cooking and prevents the edges from overcooking while the centers remain raw.
Doneness Check for Creamy Crème Brûlée
Step 8: Bake for 35-45 minutes, checking after 30 minutes. The custards are done when the edges are set but the centers still jiggle slightly when you gently shake the pan—like Jell-O that hasn’t fully set. The centers should wobble as one mass, not ripple like liquid. The ideal internal temperature is 170-175°F (77-79°C).
Crucial Tip: Underbaking slightly is better than overbaking. The custards will continue cooking from residual heat after removal. If you see any browning on top, they’ve gone too far.
Resting for Creamy Crème Brûlée
Step 9: Carefully remove the baking dish from the oven. Let the ramekins sit in the water bath for 10 minutes to cool gradually. Sudden temperature changes can cause cracking.
Step 10: Remove the ramekins from the water bath using tongs or a kitchen towel. Place them on a wire rack to cool to room temperature, about 1 hour.
Step 11: Once cooled, cover each ramekin with plastic wrap and refrigerate for at least 4 hours or overnight. This chilling time allows the custard to fully set and develop its signature creamy texture. Your creamy crème brûlée is now ready for caramelizing.
Pro Tips for Perfect Creamy Crème Brûlée
Master these expert techniques to elevate your creamy crème brûlée from good to extraordinary. These tips come from years of trial and error in professional kitchens.
Avoiding Common Texture Issues with Creamy Crème Brûlée
Temperature Control is Everything: The number one cause of grainy or curdled crème brûlée is too-high oven temperature. Always use an oven thermometer to verify your oven’s accuracy. If your oven runs hot, reduce the temperature by 25°F.
Don’t Skip the Straining: Even experienced bakers strain their custard. This single step removes any cooked egg particles and air bubbles that create an imperfect texture. Pour slowly through the strainer to catch everything.
Watch the Water Bath: If the water gets too hot and starts simmering, it can overcook your custards from the outside. The water should be hot but not bubbling. If you notice simmering, crack the oven door slightly to release heat.
Avoid Overmixing: While you want to combine ingredients thoroughly, excessive whisking incorporates too much air. This creates bubbles on the surface that won’t yield that smooth, glossy finish. Mix just until combined and uniform.
Essential Tool Recommendations
Kitchen Torch: A culinary torch gives you the most control over caramelizing the sugar topping. Look for one with adjustable flame control. Crème brûlée torches are affordable (around $20-30) and last for years.
No Torch? No Problem: Place your chilled ramekins on a baking sheet and position them about 2-3 inches under a preheated broiler. Watch constantly—they can burn in seconds. Rotate the sheet for even caramelization. This method works but requires vigilance.
Fine-Mesh Strainer: A quality strainer with very fine mesh catches even the smallest particles. This investment pays dividends across all your cooking.
Instant-Read Thermometer: Take the guesswork out of doneness. The custard should read 170-175°F at the center when done.
Storage & Reheating Your Creamy Crème Brûlée
Refrigerator Storage: Unbaked custard mixture keeps for 24 hours covered in the refrigerator. Baked custards (without the caramelized top) stay fresh for up to 3 days when covered tightly with plastic wrap.
Freezing: While technically possible, freezing isn’t recommended as it can compromise the silky texture you’ve worked so hard to achieve. The custard may separate slightly upon thawing.
Serving Temperature: For the best texture and flavor, remove your creamy crème brûlée from the refrigerator 30 minutes before caramelizing and serving. This takes the edge off the chill and allows the vanilla notes to bloom.
Caramelizing Timing: Add the sugar topping and torch it no more than 1 hour before serving. The sugar will begin to soften if it sits too long, losing that satisfying crack.
Flavor Variations for Creamy Crème Brûlée
While classic vanilla creamy crème brûlée is perfection on its own, these creative variations add exciting new dimensions to the traditional recipe. Each adaptation maintains that signature silky texture while introducing complementary flavors.
Chocolate Lover’s Twist
Transform your creamy crème brûlée into a chocolate dream by adding 4 ounces of finely chopped dark chocolate to the warm cream. Stir until completely melted before tempering with the egg yolks. The result is a rich, velvety chocolate custard with a caramelized top. Use high-quality chocolate with 60-70% cacao for the best balance of sweetness and chocolate intensity.
Coffee & Espresso Infusion
Add 2 tablespoons of instant espresso powder or 3 tablespoons of coarsely ground coffee beans to the cream while heating. Let it steep for 20 minutes, then strain thoroughly before proceeding. This creates a sophisticated coffee-flavored creamy crème brûlée that’s perfect for brunch or as an after-dinner treat. The coffee complements the caramel topping beautifully.
Citrus Sunshine
Infuse your cream with the zest of 2 oranges, 3 lemons, or 4 limes. Heat the cream with the zest, steep for 30 minutes, then strain completely before mixing with eggs. This creates a bright, refreshing version of creamy crème brûlée that’s particularly lovely in spring and summer. Add 1 teaspoon of the corresponding citrus extract to intensify the flavor.
Seasonal & International Flavors
Lavender Dreams: Add 1 tablespoon of culinary lavender to the warming cream, steep for 20 minutes, and strain. The floral notes create an elegant, aromatic dessert.
Chai Spice: Steep 3 chai tea bags or 1 tablespoon of chai spice mix in the warm cream for an Indian-inspired twist.
Matcha Green Tea: Whisk 2 tablespoons of high-quality matcha powder into the egg mixture for a Japanese-inspired creamy crème brûlée with earthy undertones.
Coconut Paradise: Replace ½ cup of the heavy cream with coconut cream and add ½ teaspoon of coconut extract for tropical vibes.
Flavor Variation Quick Reference Table
| Variation | Key Addition | Steeping Time | Best Pairing |
|---|---|---|---|
| Classic Vanilla | 1 vanilla bean or 2 tsp extract | 15 minutes | Fresh berries |
| Dark Chocolate | 4 oz dark chocolate | None needed | Raspberry sauce |
| Coffee Espresso | 2 tbsp espresso powder | 20 minutes | Biscotti |
| Orange Citrus | Zest of 2 oranges | 30 minutes | Candied orange peel |
| Lavender | 1 tbsp dried lavender | 20 minutes | Shortbread cookies |
| Chai Spice | 3 chai tea bags | 20 minutes | Honey drizzle |
| Matcha Green Tea | 2 tbsp matcha powder | None needed | White chocolate shavings |
| Coconut | ½ cup coconut cream | 15 minutes | Toasted coconut flakes |
Serving Suggestions for Creamy Crème Brûlée
Presentation matters with elegant desserts like creamy crème brûlée. These serving ideas will help you create a memorable dining experience.
Perfect Pairings
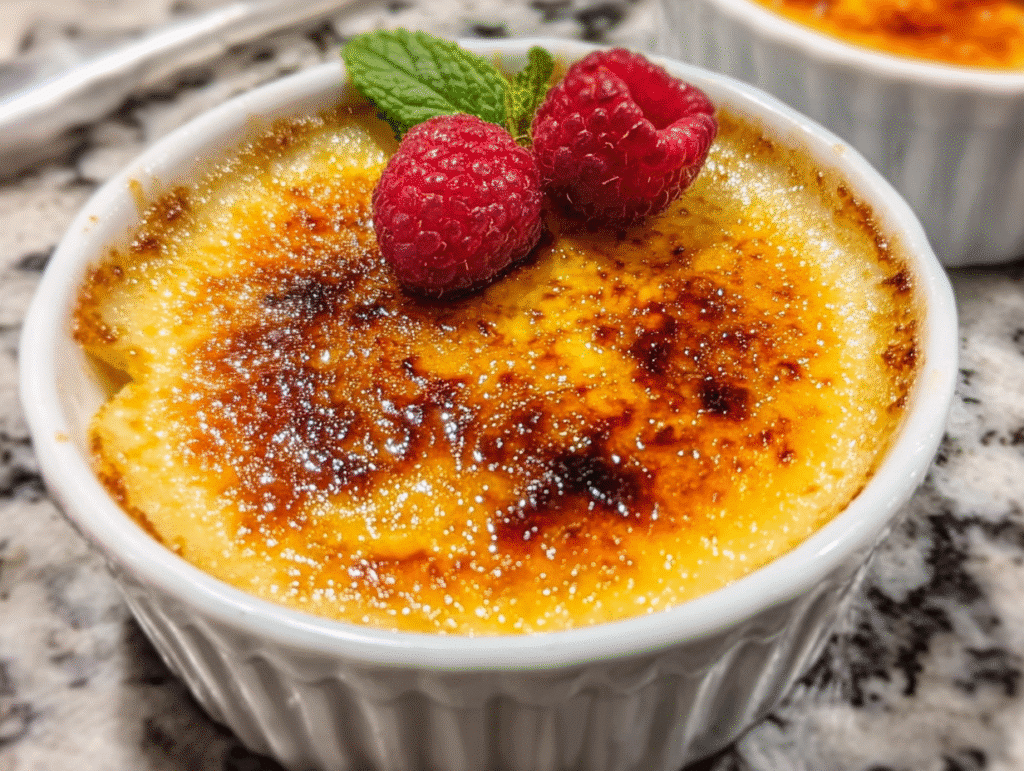
Fresh Berries: Arrange a small handful of fresh raspberries, blackberries, or sliced strawberries alongside each ramekin. The tartness cuts through the richness beautifully.
Delicate Cookies: Serve with thin almond tuiles, lacy Florentine cookies, or classic French madeleines for textural contrast. The crispy elements complement the creamy custard.
Fruit Compotes: A spoonful of berry compote, poached pears, or caramelized figs adds color and another layer of flavor without overwhelming the delicate custard.
Whipped Cream: While it might seem like overkill, a small dollop of lightly sweetened whipped cream adds cloud-like luxury.
Beverage Pairings
Coffee & Tea: Serve your creamy crème brûlée with freshly brewed espresso, French press coffee, or Earl Grey tea for a café-style experience.
Dessert Wines: Sauternes, late-harvest Riesling, or Moscato d’Asti complement the sweetness without overwhelming it.
Champagne: A dry champagne or sparkling Prosecco provides elegant contrast to the rich custard and makes any occasion feel special.
Presentation Tips
Serve creamy crème brûlée in the ramekins for authentic presentation, or carefully unmold onto dessert plates for a modern twist. Dust the plate with powdered sugar, add a mint sprig, or create an artistic sauce design using raspberry coulis or chocolate sauce for restaurant-quality plating.
FAQs About Creamy Crème Brûlée
Can I make creamy crème brûlée without a kitchen torch?
Absolutely! While a torch gives you the most control, you can caramelize the sugar under your oven’s broiler. Place the chilled ramekins on a baking sheet and position them 2-3 inches from the broiler element. Watch constantly—the sugar can burn in 30-60 seconds. Rotate the pan for even caramelization. The broiler method works well but requires careful attention.
How do I fix grainy or curdled creamy crème brûlée?
Unfortunately, once the custard has curdled, there’s no way to rescue it. Prevention is key: use lower oven temperature, don’t skip the water bath, and remove custards when they still wobble slightly in the center. If you notice graininess before baking, your cream may have been too hot when added to the eggs. Always temper gradually.
Can I use whole eggs instead of just egg yolks?
While you technically can use whole eggs, it will significantly change the texture of your creamy crème brûlée. Egg yolks provide richness and create that silky, dense texture. Whole eggs result in a firmer, more flan-like consistency. For authentic creamy crème brûlée, stick with yolks only.
Why is my sugar topping not caramelizing properly?
Ensure the custard surface is completely dry before adding sugar—pat it gently with a paper towel if needed. Use a thin, even layer of sugar (about 1 tablespoon per ramekin). Hold the torch 3-4 inches from the surface and move it constantly in circular motions. If the sugar isn’t melting, your torch flame may be too low or you’re holding it too far away.
How long does creamy crème brûlée last in the refrigerator?
Baked custards (without the caramelized sugar top) keep well for 3 days when covered tightly. Only caramelize the sugar topping within 1 hour of serving for the best texture. The longer the caramelized sugar sits, the softer it becomes, losing that satisfying crack.
Can I make creamy crème brûlée ahead for a dinner party?
Yes! This is one of the best make-ahead desserts. Bake the custards 1-3 days before your event and keep them covered in the refrigerator. About 1 hour before serving, caramelize the tops and let them sit at room temperature for 10 minutes before serving. This allows you to enjoy your guests without last-minute dessert stress.
Is creamy crème brûlée safe during pregnancy?
Traditional creamy crème brûlée contains raw egg yolks that are then baked. When properly cooked to an internal temperature of 170-175°F, the custard is fully cooked and safe. However, if you’re concerned, you can use pasteurized eggs or pasteurized egg yolks for extra peace of mind without affecting the texture.
What’s the difference between crème brûlée and flan?
While both are custard desserts, creamy crème brûlée is richer (made with heavy cream and only egg yolks) and is served with a caramelized sugar crust. Flan uses whole eggs and milk, has a lighter texture, and is topped with liquid caramel sauce rather than a hard sugar shell. Crème brûlée is baked in a water bath and served in individual ramekins, while flan is often unmolded.
Conclusion
There you have it—everything you need to create restaurant-quality creamy crème brûlée in your own kitchen! This elegant French dessert is far more approachable than you might think. With the right technique, quality ingredients, and a little patience, you’ll be serving up silky custards topped with that signature caramelized crack that makes everyone’s eyes light up.
Remember, the keys to success are temperature control, the water bath method, and removing the custards when they still have that telltale wobble in the center. Don’t be discouraged if your first attempt isn’t perfect—even professional pastry chefs took time to master this technique. Each batch will teach you something new about your oven and help you refine your timing.
Fire up your oven and try this tonight! Whether you’re celebrating a special occasion or simply want to treat yourself to something extraordinary, this creamy crème brûlée delivers every time. The beauty of this recipe is that it’s equally impressive for an intimate dinner for two or a dinner party for twelve.
Join the thousands of home cooks at Recipesrealm who’ve mastered this classic! Once you’ve perfected your technique, explore our other French-inspired desserts like The Ultimate New York Cheesecake Recipe: Creamy, Rich & Irresistible. Each recipe is crafted with the same attention to detail and tested techniques that ensure your success.
If you loved this recipe, don’t forget to share it with your friends or save it to try later! I’d be thrilled to see your personal touch—share your photos on Pinterest!
Print
creamy crème brûlée
- Total Time: 300
- Yield: 6 1x
- Diet: Vegetarian
Description
Luxuriously smooth creamy crème brûlée with a perfectly caramelized sugar crust. This foolproof recipe creates restaurant-quality custard with a signature wobble and that satisfying crack when you tap your spoon through the topping.
Ingredients
2 cups (480ml) heavy cream
5 large egg yolks
⅓ cup (65g) granulated sugar (for custard)
1 vanilla bean (or 2 teaspoons pure vanilla extract)
Pinch of fine sea salt
6 tablespoons granulated sugar (for caramelized topping)
Instructions
1. Preheat oven to 325°F (163°C). Arrange six 6-ounce ramekins in a deep baking dish.
2. Split vanilla bean lengthwise and scrape out seeds. Add seeds and pod to heavy cream in a saucepan. Heat over medium heat until steaming (170°F), then remove from heat and steep for 15 minutes.
3. In a large bowl, whisk egg yolks with ⅓ cup sugar and salt for 2 minutes until pale and slightly thickened.
4. Remove vanilla pod from cream. Slowly drizzle warm cream into egg mixture while whisking constantly to temper. Continue until all cream is incorporated.
5. Strain custard through fine-mesh strainer into a large measuring cup. Skim off any foam.
6. Divide custard evenly among ramekins. Place baking dish with ramekins on oven rack, then pour hot water into dish until it reaches halfway up the sides of ramekins.
7. Bake for 35-45 minutes until edges are set but centers still jiggle slightly when gently shaken.
8. Remove from oven and let ramekins sit in water bath for 10 minutes. Transfer to wire rack to cool to room temperature.
9. Cover each ramekin with plastic wrap and refrigerate for at least 4 hours or overnight.
10. Just before serving, sprinkle 1 tablespoon sugar evenly over each custard. Caramelize with kitchen torch until golden and bubbling, or place under broiler for 30-60 seconds, watching carefully.
11. Let sugar topping harden for 2-3 minutes before serving.
Notes
For best results, use heavy cream with at least 36% fat content.
The custards are done when they register 170-175°F on an instant-read thermometer.
Baked custards (without sugar topping) can be refrigerated for up to 3 days.
Only caramelize the sugar within 1 hour of serving for the crispest topping.
If you don’t have a kitchen torch, use your oven’s broiler but watch constantly to prevent burning.
- Prep Time: 20
- Cook Time: 40
- Category: Dessert
- Method: Baking
- Cuisine: French
Nutrition
- Serving Size: 1 ramekin (6 oz)
- Calories: 385
- Sugar: 24g
- Sodium: 45mg
- Fat: 31g
- Saturated Fat: 18g
- Unsaturated Fat: 11g
- Trans Fat: 0g
- Carbohydrates: 25g
- Fiber: 0g
- Protein: 5g
- Cholesterol: 285mg
Keywords: creamy crème brûlée, crème brûlée recipe, french dessert, custard dessert, caramelized sugar dessert