
Apple Crisp has always held a special place in my heart, and I’m Lisa, the passionate baker behind Recipesrealm. Growing up, the aroma of cinnamon and baked apples would fill our kitchen every autumn, creating memories that still warm my soul today. After years of perfecting this beloved dessert, I’ve discovered that the secret to an extraordinary apple crisp lies not just in the apples themselves, but in creating the perfect balance between tender, spiced fruit and a golden, crunchy oat topping that provides the most satisfying contrast.
As someone who has dedicated over a decade to mastering the art of home baking, I can confidently say that this apple crisp recipe will transform your fall baking game forever. The beauty of this dessert lies in its simplicity and the way it brings families together around the dinner table. Through countless kitchen experiments and feedback from the wonderful Recipesrealm community, I’ve refined this recipe to ensure it delivers consistently perfect results every single time.
This comprehensive guide will walk you through everything you need to know about creating the perfect apple crisp, from selecting the ideal apple varieties and creating the ultimate oat topping, to troubleshooting common baking challenges and exploring creative flavor variations that will make this dessert uniquely yours.
Why This Apple Crisp Recipe Works
This apple crisp recipe has become a cornerstone of my baking repertoire because it addresses every common frustration that home bakers face when attempting this classic dessert. After receiving hundreds of questions from fellow baking enthusiasts, I’ve designed this recipe to be foolproof while delivering restaurant-quality results in your own kitchen.
The magic begins with the perfect apple-to-topping ratio that ensures every bite contains the ideal balance of tender, caramelized fruit and crispy, golden oats. Unlike many recipes that result in soggy bottoms or overly sweet fillings, this apple crisp maintains its textural integrity while allowing the natural apple flavors to shine through the warm spice blend.
• Uses readily available ingredients that you likely already have in your pantry • Requires minimal prep time with maximum flavor payoff in just 45 minutes • Perfect for both intimate family dinners and large holiday gatherings • Delivers consistent results regardless of your baking experience level • Creates the perfect crispy-to-tender texture contrast that defines exceptional apple crisp
Choosing the Right Apples for Apple Crisp
Selecting the proper apple varieties is absolutely crucial for creating an apple crisp that maintains its shape during baking while developing complex, layered flavors that complement rather than compete with the oat topping. Through extensive testing, I’ve discovered that the secret lies in combining different apple types to create a symphony of textures and tastes.
Best Apple Varieties for This Apple Crisp Recipe
The foundation of exceptional apple crisp begins with understanding how different apple varieties behave under heat and how their individual characteristics contribute to the overall dessert experience. Granny Smith apples provide the essential tartness and structural integrity that prevents your crisp from becoming mushy, while Honeycrisp apples contribute natural sweetness and maintain a pleasant bite even after baking.
Braeburn apples offer a beautiful balance between sweet and tart with subtle spice notes that enhance the cinnamon and nutmeg in the filling. Gala apples bring additional sweetness and create lovely caramelized edges that add visual appeal to your finished apple crisp. The combination of these varieties ensures that every spoonful delivers varying textures and complementary flavors.
Apple Selection and Storage Tips for Perfect Apple Crisp
When shopping for your apple crisp ingredients, look for apples that feel firm and heavy for their size, with smooth, unblemished skin that shows no signs of wrinkling or soft spots. The stem area should be dry and clean, indicating proper storage and freshness. Avoid apples that feel soft when gently pressed or show any signs of browning around the core area.
Store your selected apples in the refrigerator crisper drawer until you’re ready to use them, as this maintains their firm texture and prevents premature softening. If you’re preparing your apple crisp in advance, toss the sliced apples with a small amount of lemon juice to prevent oxidation while maintaining the bright, fresh apple flavor that makes this dessert so appealing.
Apple Substitutions and Seasonal Considerations for Apple Crisp
While the recommended apple varieties provide optimal results, you can successfully substitute based on seasonal availability and personal preferences. Fuji apples work wonderfully as a substitute for Honeycrisp, offering similar sweetness and texture retention. Jonagold apples can replace Braeburn varieties while contributing their own unique flavor profile that pairs beautifully with traditional apple crisp spices.
During peak apple season, consider visiting local orchards to select the freshest possible fruit for your apple crisp. Newly harvested apples contain higher levels of natural pectin, which helps create the perfect jammy consistency in the fruit filling while maintaining individual apple piece integrity throughout the baking process.
Ingredients & Prep for Perfect Apple Crisp
Creating the ultimate apple crisp requires careful attention to ingredient quality and proper preparation techniques that ensure every component contributes to the final masterpiece. The beauty of this recipe lies in its simplicity, using pantry staples transformed through proper technique into something truly extraordinary.
Apple Preparation Essentials for Apple Crisp Success
Proper apple preparation is the foundation of exceptional apple crisp, and the technique you use can make the difference between a mediocre dessert and one that becomes a family legend. Begin by washing your apples thoroughly under cool running water, then pat them completely dry to ensure proper adhesion of the spice mixture.
Peel the apples using a sharp vegetable peeler or paring knife, removing all skin while minimizing flesh loss. Cut each apple into uniform slices approximately ¼-inch thick, maintaining consistency to ensure even cooking throughout the apple crisp. This uniformity prevents some pieces from becoming mushy while others remain undercooked.
Remove any remaining core pieces or seeds, as these can create bitter notes that interfere with the dessert’s overall flavor profile. Toss the prepared apple slices with lemon juice immediately after cutting to prevent browning and maintain the bright, fresh flavor that makes this apple crisp so appealing to both family and guests.
Essential Spice Blend and Flavor Enhancers for Apple Crisp
The spice blend for this apple crisp creates warmth and complexity that transforms simple apples into a sophisticated dessert worthy of any special occasion. The combination includes premium ground cinnamon that provides the classic apple crisp flavor foundation, fresh nutmeg that adds subtle warmth and depth, and a touch of cardamom that creates an unexpected but delightful aromatic note.
Apple Filling Ingredients:
- 8 large apples (mixed varieties as recommended above)
- ¾ cup granulated sugar
- 2 tablespoons all-purpose flour
- 2 teaspoons ground cinnamon
- ¼ teaspoon fresh ground nutmeg
- ⅛ teaspoon ground cardamom
- 2 tablespoons fresh lemon juice
- 1 teaspoon vanilla extract
Brown sugar in the filling creates deeper, more complex sweetness with subtle molasses notes that complement the apple’s natural sugars. The small amount of flour helps thicken the fruit juices during baking, preventing a watery apple crisp while maintaining the perfect saucy consistency that makes each bite irresistible.
Oat Topping Components for the Perfect Apple Crisp Crust
The oat topping is where this apple crisp truly shines, creating a golden, crunchy contrast to the tender spiced apples beneath. Old-fashioned rolled oats provide the essential texture and rustic appeal, while a combination of butter, brown sugar, and flour creates the perfect binding mixture that bakes into crispy, golden clusters.
Oat Topping Ingredients:
- 1 cup old-fashioned rolled oats
- ¾ cup all-purpose flour
- ¾ cup packed brown sugar
- ½ cup cold unsalted butter, cubed
- 1 teaspoon ground cinnamon
- ½ teaspoon salt
- ¼ cup chopped pecans (optional)
Cold butter is crucial for creating the ideal topping texture in your apple crisp. The cold fat creates steam pockets during baking that result in the light, crispy texture that defines exceptional apple crisp. Cut the butter into small, uniform cubes and keep refrigerated until the moment you’re ready to combine it with the dry ingredients.
Step-by-Step Cooking Instructions for Apple Crisp
Creating the perfect apple crisp requires attention to timing and technique, but the process itself is wonderfully straightforward and forgiving. These detailed instructions ensure that even beginning bakers can achieve professional-quality results that will impress family and friends while building confidence in the kitchen.
Pre-Cooking Prep for Apple Crisp Excellence
Begin your apple crisp preparation by preheating your oven to 375°F (190°C) and positioning the rack in the center position to ensure even heat distribution throughout the baking process. This temperature provides the perfect balance between cooking the apples thoroughly while achieving the golden, crispy oat topping that defines exceptional apple crisp.
Butter a 9×13-inch baking dish generously, ensuring complete coverage of the bottom and sides to prevent sticking and facilitate easy serving. The larger dish size allows for optimal apple-to-topping ratio while providing enough surface area for the oat mixture to develop its characteristic crispy texture during baking.
Prepare all ingredients according to the specifications outlined above, keeping the butter cold and the apple slices tossed with lemon juice to maintain freshness and prevent oxidation. Having everything ready before you begin assembly ensures smooth, efficient preparation that results in consistently perfect apple crisp every time.
Cooking Method for Perfect Apple Crisp Assembly
In a large mixing bowl, combine the prepared apple slices with granulated sugar, flour, cinnamon, nutmeg, cardamom, lemon juice, and vanilla extract. Toss gently but thoroughly to ensure even distribution of the spice mixture and sugar, which will create the delicious syrup that forms during baking and binds all the apple crisp components together.
Transfer the seasoned apple mixture to your prepared baking dish, spreading evenly to create a uniform layer that will bake consistently. The apples should fill the dish comfortably without overcrowding, allowing space for the natural juices to bubble and concentrate during the apple crisp baking process.
In a separate bowl, combine the oats, flour, brown sugar, cinnamon, and salt for the topping mixture. Add the cold butter cubes and use your fingertips or a pastry cutter to work the butter into the dry ingredients until the mixture resembles coarse crumbs with some larger butter pieces remaining. These larger pieces will create the delightful crispy clusters that make this apple crisp so texturally interesting.
Doneness Check and Baking Perfection for Apple Crisp
Sprinkle the oat topping evenly over the seasoned apples, ensuring complete coverage while allowing some apple pieces to peek through for visual appeal. The topping should cover the fruit generously but not be packed down, as this allows proper air circulation for optimal browning and crisping during the apple crisp baking process.
Bake the apple crisp for 40-45 minutes, or until the topping is golden brown and the apple juices are bubbling around the edges of the dish. The apples should be tender when pierced with a fork but still maintain their shape, and the topping should sound crisp when tapped gently with a spoon.
If the topping browns too quickly before the apples are fully cooked, tent the apple crisp loosely with aluminum foil and continue baking until the fruit reaches the proper tenderness. This technique ensures that both components achieve their ideal texture simultaneously for the perfect apple crisp experience.
Resting and Serving Your Perfect Apple Crisp
Remove the finished apple crisp from the oven and allow it to rest for at least 15 minutes before serving. This resting period allows the fruit juices to thicken slightly and the topping to firm up, making serving much easier while ensuring that each portion maintains its beautiful presentation.
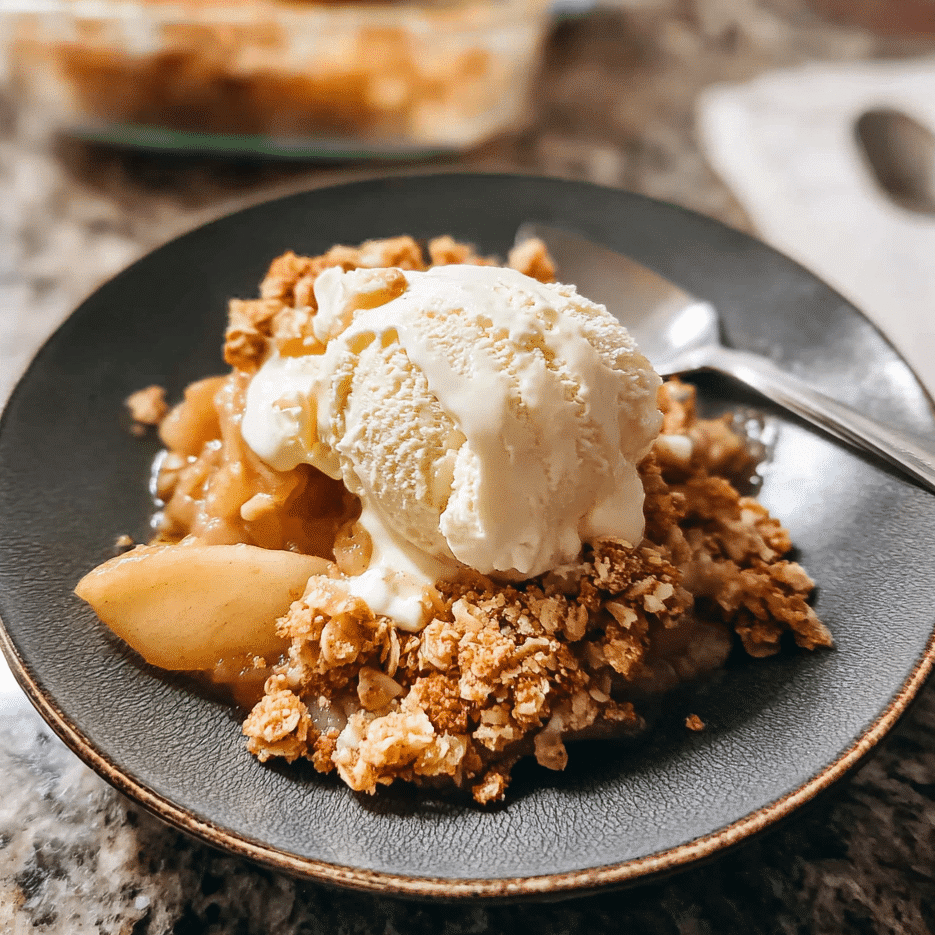
The apple crisp can be served warm, at room temperature, or even chilled, depending on your preference and the occasion. Each temperature offers a slightly different textural experience, with warm apple crisp providing the most aromatic and comforting presentation that showcases the spices and butter most prominently.
Pro Tips for Perfect Apple Crisp
Through years of baking and countless apple crisp experiments, I’ve discovered several professional techniques that consistently elevate this humble dessert from good to absolutely extraordinary. These insider secrets ensure that your apple crisp achieves the perfect balance of flavors and textures that will make it a requested favorite at every gathering.
Avoiding Common Apple Crisp Pitfalls
The most common mistake when making apple crisp is using apples that are too ripe or varieties that break down excessively during baking, resulting in a mushy texture that lacks the appealing contrast between fruit and topping. Always select firm, slightly underripe apples that will maintain their structure throughout the baking process while developing complex, concentrated flavors.
Overmixing the oat topping can result in a heavy, dense crust rather than the light, crispy texture that defines exceptional apple crisp. Work the butter into the dry ingredients just until the mixture resembles coarse crumbs with visible butter pieces, as these create the steam pockets that produce the desired flaky, golden topping.
Avoid the temptation to pack the oat topping down when sprinkling it over the apples, as this prevents proper air circulation and browning. The topping should be distributed evenly but remain loose and fluffy, allowing it to crisp properly while creating those irresistible golden clusters that make apple crisp so visually appealing.
Essential Tool Recommendations for Apple Crisp Success
A sharp vegetable peeler makes quick work of apple preparation and ensures clean, efficient peeling that minimizes waste while creating uniform results. Invest in a high-quality peeler with a comfortable grip, as this tool will make the difference between enjoying the prep process and finding it tedious when making apple crisp regularly.
A pastry cutter or your fingertips work best for incorporating cold butter into the oat topping mixture, creating the ideal texture that produces those coveted crispy clusters. While a food processor can speed the process, it often overmixes the ingredients and creates a more uniform, less interesting texture in the finished apple crisp.
An instant-read thermometer isn’t essential for apple crisp, but it can help ensure that the internal temperature reaches 175°F (79°C) in the center, indicating that the apples are properly cooked and the fruit juices have thickened appropriately for optimal serving consistency.
Storage and Reheating Guidelines for Apple Crisp
Fresh apple crisp stays delicious at room temperature for up to two days when covered loosely with foil, maintaining much of its original texture and flavor. For longer storage, refrigerate the covered apple crisp for up to five days, though the topping will soften somewhat during refrigeration.
To restore the crispy texture of refrigerated crisp, reheat individual portions in a 350°F (175°C) oven for 10-15 minutes, or until the topping sounds crisp when tapped gently. Avoid microwave reheating for the topping, as this creates steam that makes it soggy rather than restoring the desired crispy texture.
For advance preparation, assemble the apple crisp completely but don’t bake it until ready to serve. Cover tightly and refrigerate for up to 24 hours, then bake as directed, adding 5-10 additional minutes to account for the cold start temperature.
Flavor Variations for Creative Apple Crisp
One of the most delightful aspects of crisp is its versatility and willingness to accept creative flavor additions that can transform this classic dessert into something uniquely your own. These variations maintain the essential apple crisp character while introducing exciting new elements that will surprise and delight your family and guests.
Spiced and Warm Flavor Additions for Apple Crisp
Transform your traditional apple crisp into a warming, exotic dessert by incorporating chai spice blend into both the apple filling and oat topping. Add ½ teaspoon each of ground ginger and cardamom, ¼ teaspoon of ground cloves, and a pinch of black pepper to create complex, layered flavors that pair beautifully with the natural apple sweetness.
Maple syrup can replace some of the granulated sugar in the apple filling, contributing deep, complex sweetness and distinctive fall flavors that complement the fruit beautifully. Reduce the granulated sugar to ½ cup and add 3 tablespoons of pure maple syrup for authentic seasonal flavor in your crisp.
Orange zest brightens the entire dessert and adds citrus notes that enhance rather than compete with the apple flavors. Add the grated zest of one large orange to the apple mixture, being careful to avoid the bitter white pith that can create unpleasant flavors in your finished crisp.
Textural Enhancements and Mix-ins for Apple Crisp
Chopped toasted nuts add wonderful textural contrast and rich, buttery flavors that complement the oat topping beautifully. Pecans, walnuts, or almonds work particularly well, each contributing their own distinctive taste profile while enhancing the overall eating experience of your crisp.
Dried fruits such as cranberries, cherries, or chopped dates can be mixed with the apple filling to add chewy texture and concentrated fruit flavors that create complexity and visual interest. Use approximately ½ cup of dried fruit, soaking them briefly in warm water if they seem particularly dry or hard.
A handful of quick-cooking oats mixed into the apple filling creates additional texture and helps absorb excess fruit juices, preventing a watery crisp while contributing subtle oat flavor throughout the dessert rather than just in the topping.
Dietary Adaptation Options for Inclusive Apple Crisp
For gluten-free crisp, substitute the all-purpose flour with equal amounts of almond flour or a high-quality gluten-free flour blend that contains xanthan gum. The texture will be slightly different but equally delicious, allowing everyone to enjoy this classic dessert regardless of dietary restrictions.
Vegan crisp can be achieved by replacing the butter with cold vegan butter substitute or coconut oil that has been chilled until firm. The key is maintaining the cold fat temperature to achieve the proper topping texture that makes apple crisp so appealing to all dietary preferences.
Reduced-sugar versions can use natural sweeteners such as stevia, monk fruit, or erythritol, though the texture and browning may differ slightly from traditional versions. Start by replacing half the sugar with your preferred alternative and adjust to taste in future batches of apple crisp.
| Flavor Variation | Key Ingredients | Serving Suggestion | Prep Time Addition |
|---|---|---|---|
| Chai Spiced Crisp | Ginger, cardamom, cloves, black pepper | Vanilla ice cream, warm milk | 5 minutes |
| Maple Pecan Crisp | Pure maple syrup, toasted pecans | Whipped cream, caramel sauce | 10 minutes |
| Cranberry Orange Crisp | Dried cranberries, orange zest | Greek yogurt, honey drizzle | 8 minutes |
| Almond Coconut Crisp | Sliced almonds, coconut flakes | Coconut ice cream | 7 minutes |
| Ginger Molasses Crisp | Fresh ginger, molasses, crystallized ginger | Cinnamon ice cream | 12 minutes |
Serving Suggestions for Apple Crisp
The beauty of apple crisp lies not only in its delicious flavor and comforting texture but also in its incredible versatility when it comes to presentation and accompaniments. Whether you’re serving this dessert for a casual family dinner or an elegant holiday gathering, the right pairings can elevate your apple crisp from wonderful to absolutely unforgettable.
Classic Accompaniments That Enhance Apple Crisp
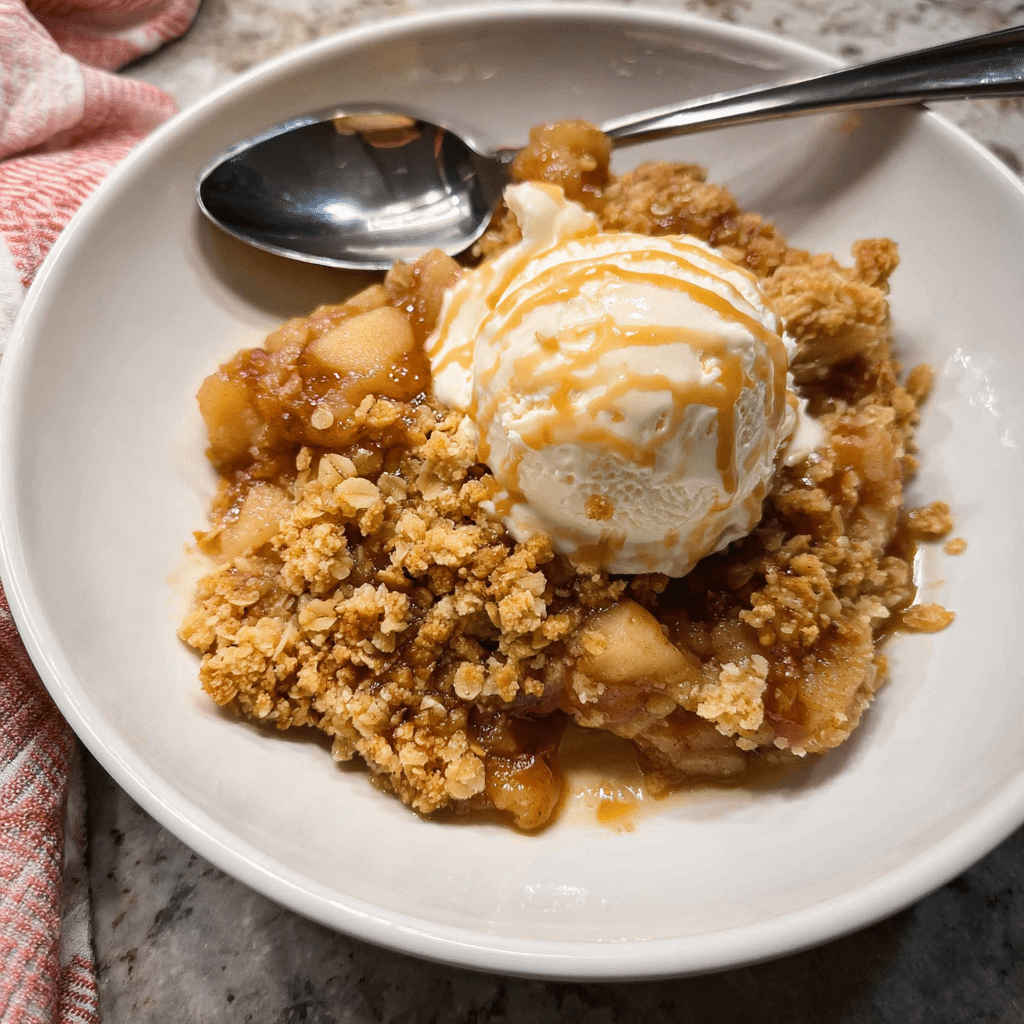
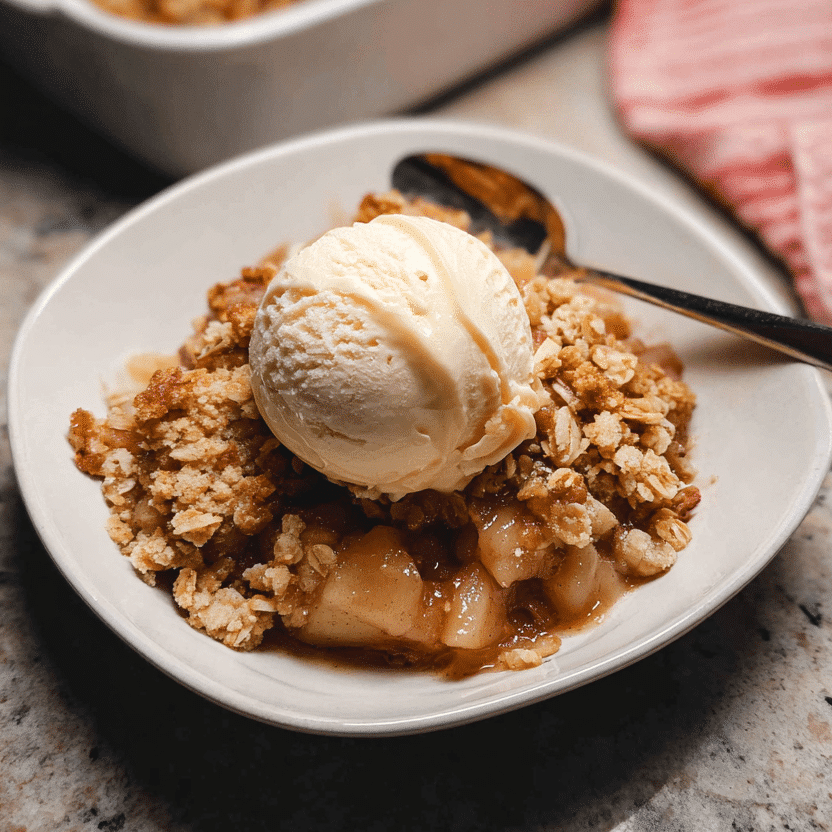
Vanilla ice cream remains the gold standard accompaniment for warm apple crisp, creating the perfect temperature and texture contrast that highlights both the creamy coldness of the ice cream and the warm, spiced fruit beneath the crispy topping. The vanilla flavor provides a neutral backdrop that allows the apple crisp spices to shine while adding richness and luxury to each bite.
Freshly whipped cream offers a lighter alternative that still provides the essential creamy element without overwhelming the delicate apple flavors. Lightly sweetened whipped cream with a touch of vanilla extract creates clouds of smoothness that melt into the warm apple crisp, creating a harmonious blend of temperatures and textures.
Caramel sauce drizzled over individual servings adds decadent sweetness and creates beautiful visual appeal that makes your apple crisp look restaurant-worthy. The buttery caramel flavors complement the oat topping while enhancing the natural apple sweetness without competing with the carefully balanced spice blend.
Beverage Pairings That Complement Apple Crisp
Hot beverages create the perfect cozy atmosphere when serving apple crisp during cooler months. Freshly brewed coffee with its rich, slightly bitter notes provides an excellent contrast to the sweet, spiced dessert while enhancing the warm, comforting feelings associated with this classic treat.
Spiced cider or mulled apple juice creates a harmonious flavor pairing that celebrates the apple theme while adding additional warming spices that complement rather than compete with those in the apple crisp. Serve warm in small mugs alongside generous portions of the dessert for the ultimate fall experience.
Black tea, particularly varieties with natural fruit or spice notes, offers a sophisticated pairing that cleanses the palate between bites while providing subtle complementary flavors. Earl Grey or chai tea work particularly well, their bergamot or spice profiles enhancing the overall apple crisp experience without overwhelming the delicate fruit flavors.

FAQs About Apple Crisp
Understanding the most common questions and concerns about apple crisp preparation helps ensure consistent success while building confidence in your baking skills. These frequently asked questions address real challenges that home bakers face, providing practical solutions based on years of experience perfecting this beloved dessert.
Storage and Make-Ahead Questions for Apple Crisp
Can apple crisp be made ahead of time? Absolutely! You can assemble the entire apple crisp up to 24 hours in advance, cover tightly with plastic wrap, and refrigerate until ready to bake. Add 5-10 additional minutes to the baking time to account for starting with cold ingredients, and your apple crisp will taste just as fresh and delicious as if assembled immediately before baking.
How long does baked apple crisp stay fresh? Properly stored apple crisp maintains optimal quality for 2-3 days at room temperature when covered loosely with foil, or up to 5 days when refrigerated in a covered container. The topping will soften during storage, but can be re-crisped in a 350°F oven for 10-15 minutes before serving.
Can you freeze apple crisp? Both unbaked and baked apple crisp freeze beautifully for up to 3 months. Freeze unbaked apple crisp in the baking dish, wrapped tightly in plastic wrap and foil. Bake directly from frozen, adding 15-20 minutes to the cooking time. Baked apple crisp can be frozen in individual portions and reheated in the oven for best texture retention.
Troubleshooting Common Apple Crisp Problems
Why is my apple crisp topping soggy? Soggy topping usually results from covering the dish too tightly during baking, trapping steam that prevents proper browning and crisping. Ensure your oven temperature is accurate, avoid covering during baking, and let the apple crisp rest uncovered after baking to allow steam to escape and the topping to firm up.
What causes watery apple crisp? Excess moisture typically comes from using apples with high water content or not allowing enough baking time for the fruit juices to concentrate and thicken. Choose firmer apple varieties, avoid pre-thawed frozen apples, and ensure the filling is bubbling actively around the edges before removing from the oven.
How do I prevent my crisp from browning too quickly? If the topping browns faster than the apples cook, tent the dish loosely with aluminum foil and continue baking until the fruit reaches proper tenderness. This technique allows the apples to finish cooking while preventing the topping from burning, ensuring both components achieve optimal texture.
Ingredient Substitution Questions for Crisp
Can I use different types of oats in crisp? Quick-cooking oats can be substituted for old-fashioned oats, though the texture will be slightly less distinct and the topping may be less crispy. Steel-cut oats are not recommended as they won’t soften sufficiently during the baking time. Stick with old-fashioned rolled oats for the best texture and appearance in your crisp.
What can I substitute for butter in the topping? Cold vegan butter or solid coconut oil work well as butter substitutes, maintaining the essential fat content and cold temperature needed for proper topping texture. Avoid liquid oils, which will create a different texture that doesn’t achieve the characteristic crispy clusters that define exceptional crisp.
Is this apple crisp recipe safe during pregnancy? This apple crisp recipe contains no raw eggs or other ingredients typically of concern during pregnancy. All ingredients are cooked thoroughly, making it perfectly safe for pregnant women to enjoy. As with any dietary concerns during pregnancy, consult with your healthcare provider about specific dietary restrictions or allergies.
Conclusion
Creating the perfect apple crisp is truly an art form that combines simple, wholesome ingredients with time-tested techniques to produce a dessert that brings comfort, joy, and connection to every table it graces. Through my years of baking and sharing recipes at Recipesrealm, I’ve witnessed firsthand how this humble dessert has the power to create lasting memories and bring families together in the most beautiful way.
The magic of crisp lies not only in its delicious combination of tender, spiced apples and crispy oat topping, but in its ability to make any house feel like a home. The aroma that fills your kitchen as it bakes creates an atmosphere of warmth and anticipation that speaks to something deep within our souls, reminding us of simpler times and cherished moments shared with loved ones.
Whether you’re baking this apple crisp for a special occasion or simply because you want to fill your home with the scents of cinnamon and baked apples, know that you’re participating in a tradition that has brought joy to countless families throughout generations. Each time you pull this golden, bubbling dessert from your oven, you’re creating not just a delicious treat, but an opportunity for connection, gratitude, and the simple pleasure of sharing something made with love.
Fire up your oven and try this crisp tonight! Let the comforting aromas fill your kitchen and create new memories with every delicious bite. Join the Pillsbury Biscuit Garlic Butter Cheese Bombs: The Ultimate Comfort Food Recipe who’ve discovered the joy of creating this perfect dessert, and make it a treasured part of your own family traditions.
If you loved this recipe, don’t forget to share it with your friends or save it to try later! I’d be thrilled to see your personal touch—share your photos on Pinterest
Print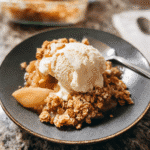
Homey Fall Dessert: Apple Crisp with Oat Topping
- Total Time: 55–60 minutes
- Yield: 6–8 servings 1x
- Diet: Vegetarian
Description
A cozy fall dessert featuring tender baked apples topped with a buttery oat crumble. Sweet, warm, and perfect with a scoop of vanilla ice cream.
Ingredients
6 cups peeled and sliced apples (Granny Smith or Honeycrisp)
1/2 cup granulated sugar
1 tsp ground cinnamon
1/4 tsp ground nutmeg
1 tbsp lemon juice
For topping:
1 cup old-fashioned oats
1/2 cup all-purpose flour
1/2 cup brown sugar
1/2 cup unsalted butter, melted
1/4 tsp salt
Instructions
1. Preheat oven to 350°F (175°C) and grease a 9×13-inch baking dish.
2. In a large bowl, toss sliced apples with sugar, cinnamon, nutmeg, and lemon juice.
3. Transfer apples to the prepared baking dish.
4. In a separate bowl, mix oats, flour, brown sugar, melted butter, and salt until crumbly.
5. Sprinkle oat topping evenly over the apples.
6. Bake for 40–45 minutes, until topping is golden and apples are tender.
7. Serve warm, optionally with vanilla ice cream.
Notes
Use a mix of apple varieties for extra flavor.
Adjust sugar depending on the sweetness of your apples.
Topping can be made ahead and stored in the refrigerator.
- Prep Time: 15 minutes
- Cook Time: 40–45 minutes
- Category: Dessert, Fall Recipe
- Method: Baked
- Cuisine: American
Nutrition
- Serving Size: 1 cup
- Calories: 320
- Sugar: 25g
- Sodium: 110mg
- Fat: 14g
- Saturated Fat: 8g
- Unsaturated Fat: 5g
- Trans Fat: 0g
- Carbohydrates: 45g
- Fiber: 5g
- Protein: 3g
- Cholesterol: 30mg
Keywords: Apple Crisp, Fall Dessert, Oat Topping, Cozy Dessert