
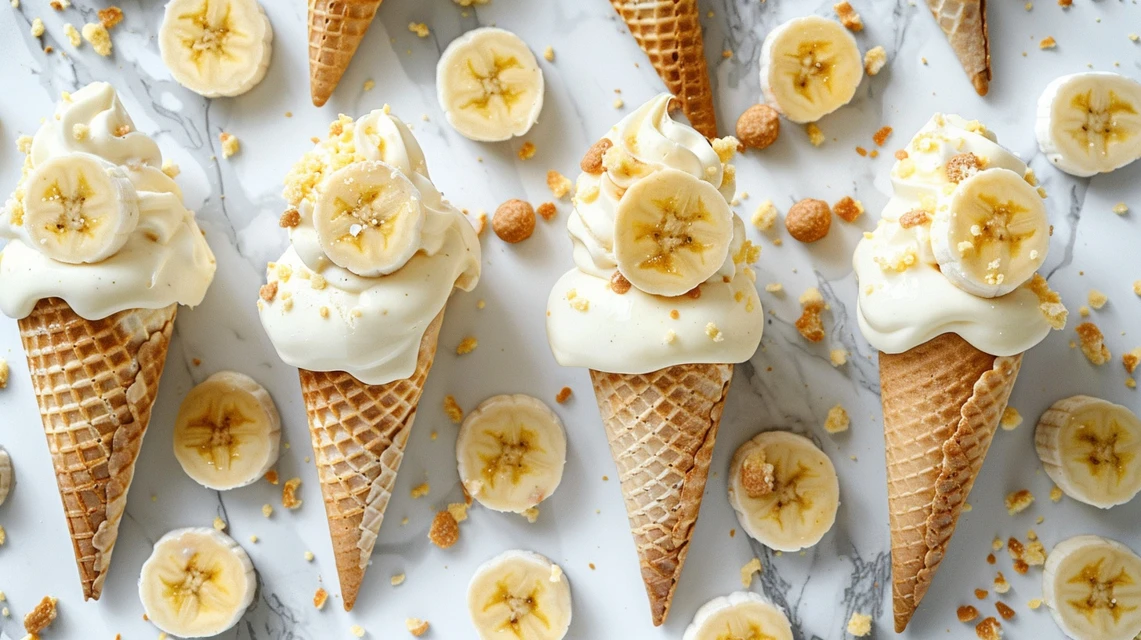
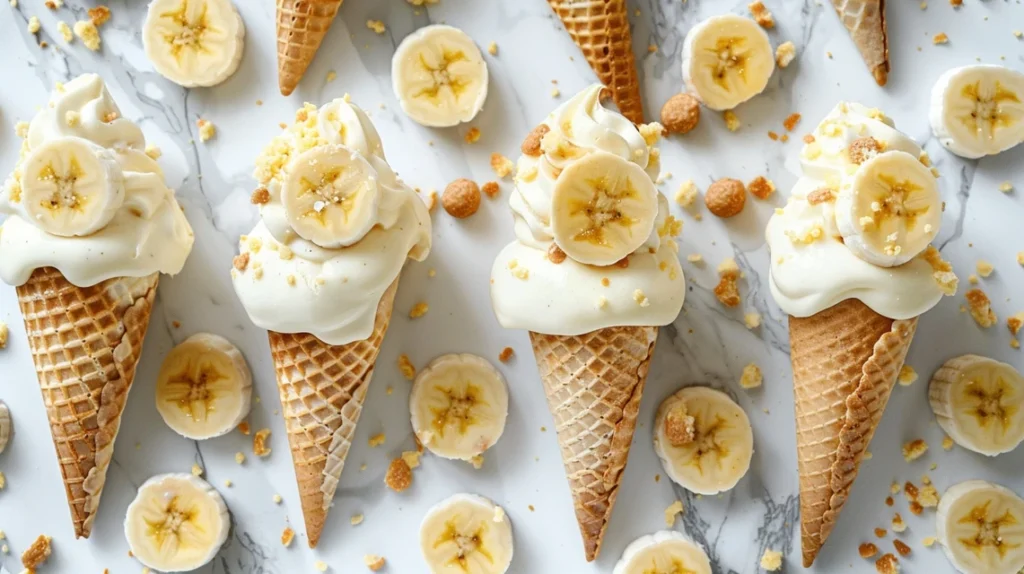
Growing up in my grandmother’s kitchen, I learned that the best desserts aren’t always the most complicated ones – they’re the ones that make people smile from the very first bite. These Banana Pudding Cheesecake Cones remind me of those magical summer afternoons when we’d create something special with whatever we had on hand. The combination of creamy banana pudding, rich cheesecake filling, and that satisfying crunch of vanilla wafers creates a dessert that’s both nostalgic and absolutely irresistible.
Hi, I’m Olivia from CookFoody.com, and I’m thrilled to share this show-stopping dessert that’s become a family favorite. What started as a creative way to use up some waffle cones has turned into the most requested treat at every gathering. These cones deliver all the comfort of traditional banana pudding with the elegant twist of cheesecake – and the best part? No baking required!
Whether you’re hosting a summer barbecue, planning a birthday party, or just want to surprise your family with something special, these Banana Pudding Cheesecake Cones are guaranteed to impress. Let me walk you through everything you need to know, from selecting the perfect ingredients to mastering the assembly technique that makes each cone a perfect handheld dessert.
Why This Banana Pudding Cheesecake Cones Recipe Works
This recipe is pure genius for several reasons that make it stand out from traditional banana pudding:
• Perfect portion control – Each cone serves as its own individual dessert, eliminating the need for plates or bowls • No-bake convenience – Ready in just 30 minutes with minimal cleanup required • Incredible texture contrast – The crispy cone, creamy fillings, and crunchy wafer topping create the perfect bite every time • Make-ahead friendly – Components can be prepared separately and assembled when ready to serve • Crowd-pleaser guarantee – Combines beloved flavors that appeal to both kids and adults
Choosing the Right Ingredients for Banana Pudding Cheesecake Cones
The secret to exceptional Banana Pudding Cheesecake Cones lies in selecting quality ingredients that complement each other perfectly.
Best Cones for This Recipe
Waffle cones are essential for this dessert because their sturdy structure holds up beautifully to the creamy fillings. Look for cones that are:
- Fresh and crispy (avoid any that feel soft or stale)
- Large enough to hold generous portions of filling
- Intact without cracks that might leak
Sugar cones can work as a substitute, but waffle cones provide the best flavor match with their subtle sweetness and vanilla notes.
Cream Cheese Selection Tips
Full-fat cream cheese is non-negotiable here. The richness is essential for achieving that perfect cheesecake texture. Make sure to:
- Use cream cheese that’s been softened to room temperature for at least 2 hours
- Avoid low-fat versions which can make the filling too thin
- Check expiration dates for the freshest flavor
Banana Pudding Mix Recommendations
Instant banana pudding mix works best because it sets quickly and maintains its stability. Jell-O brand consistently delivers the best banana flavor, but any quality instant pudding will work beautifully.
Ingredients & Prep for Banana Pudding Cheesecake Cones
Cone Preparation Essentials
Start by setting up your workspace with parchment paper for easy cleanup. The white chocolate coating not only adds flavor but creates a moisture barrier that keeps the cones crispy longer. When melting chocolate, use 30-second intervals in the microwave, stirring between each interval to prevent burning.
Cheesecake Filling Foundation
The key to silky smooth cheesecake filling is proper cream cheese preparation. Remove it from the refrigerator 2-3 hours before use, or soften quickly by placing the wrapped package in warm water for 10 minutes. Beat until completely smooth before adding other ingredients.
Banana Pudding Perfection
Use cold milk straight from the refrigerator – this helps the pudding set faster and creates a thicker consistency. Whisk vigorously for 2 minutes, then let it rest undisturbed for the full 5 minutes to achieve the perfect pudding texture.
Step-by-Step Cooking Instructions for Banana Pudding Cheesecake Cones
Pre-Assembly Prep for Banana Pudding Cheesecake Cones
- Prepare your workspace by laying out parchment paper and gathering all ingredients
- Soften cream cheese to room temperature for smooth mixing
- Crush vanilla wafers into various sizes – some fine crumbs and some chunky pieces for texture
- Slice bananas just before assembly to prevent browning
Cone Preparation Method for Banana Pudding Cheesecake Cones
- Melt white chocolate in microwave-safe bowl using 30-second intervals
- Dip cone rims about 1 inch deep into melted chocolate
- Roll immediately in crushed vanilla wafers while chocolate is still warm
- Set upright in glasses or a cone holder and refrigerate for 10 minutes
Filling Creation for Banana Pudding Cheesecake Cones
- Beat cream cheese until completely smooth and fluffy (about 3 minutes)
- Add powdered sugar and vanilla gradually, beating until incorporated
- Fold in whipped topping gently to maintain airiness
- Prepare banana pudding according to package directions using cold milk
Assembly Technique for Banana Pudding Cheesecake Cones
- Pipe or spoon cheesecake filling into bottom third of each cone
- Layer banana slices against the sides for visual appeal
- Add banana pudding filling the middle section
- Top with remaining ingredients and serve immediately
Pro Tips for Perfect Banana Pudding Cheesecake Cones
Avoiding Soggy Cones
The biggest challenge with Banana Pudding Cheesecake Cones is maintaining cone crispness. The white chocolate barrier helps, but timing is crucial. Assemble no more than 2 hours before serving, and store assembled cones in the refrigerator standing upright.
Tool Recommendations for Banana Pudding Cheesecake Cones
- Piping bags or large spoons for clean filling application
- Microwave-safe bowls for melting chocolate efficiently
- Wire cooling racks for cone setting
- Sharp knife for clean banana slices
Storage & Make-Ahead Tips
Components can be prepared separately up to 24 hours in advance:
- Store prepared cones in airtight containers
- Keep fillings refrigerated in separate containers
- Assemble just before serving for best results
Flavor Variations for Banana Pudding Cheesecake Cones
Chocolate Lover’s Twist
Replace vanilla wafers with chocolate wafer cookies and add a drizzle of chocolate syrup between layers. The combination of chocolate and banana creates an irresistible flavor profile that rivals any banana split.
Tropical Paradise Version
Add coconut flakes to the wafer coating and include diced pineapple with the banana layers. A splash of coconut extract in the cheesecake filling enhances the tropical theme.
Healthy Makeover Options
For a lighter version, substitute Greek yogurt for half the cream cheese and use sugar-free pudding mix. While the texture will be slightly different, the flavor remains deliciously satisfying.
| Variation | Key Changes | Flavor Profile | Difficulty Level |
|---|---|---|---|
| Classic | Original recipe | Sweet, creamy, nostalgic | Easy |
| Chocolate Twist | Chocolate wafers, chocolate syrup | Rich, indulgent | Easy |
| Tropical | Coconut flakes, pineapple, coconut extract | Fresh, exotic | Easy |
| Lighter Version | Greek yogurt, sugar-free pudding | Lighter, tangy | Easy |
| Caramel Pecan | Caramel sauce, chopped pecans | Nutty, sophisticated | Medium |
Serving Suggestions for Banana Pudding Cheesecake Cones
These Banana Pudding Cheesecake Cones are perfect as standalone desserts, but they also pair beautifully with:
Coffee service – The sweetness balances perfectly with strong coffee or espresso Ice cream social – Serve alongside vanilla ice cream for an extra indulgent treat Picnic desserts – Their handheld nature makes them ideal for outdoor gatherings Birthday parties – Kids love the fun cone format while adults appreciate the sophisticated flavors
Beverage pairings include cold milk, sweet tea, or even a glass of dessert wine for adult gatherings.
FAQs About Banana Pudding Cheesecake Cones
Can I make these Banana Pudding Cheesecake Cones ahead of time? While components can be prepared separately up to 24 hours in advance, assemble no more than 2 hours before serving to maintain cone crispness.
How do I prevent the bananas from browning? Slice bananas just before assembly, or brush lightly with lemon juice. The pudding mixture also helps protect banana slices from air exposure.
Can I use homemade pudding instead of instant mix? Yes, but ensure it’s completely cooled and set before assembly. Homemade pudding may have a slightly softer consistency than instant.
What if my cones crack during assembly? Small cracks can be “repaired” with melted chocolate. For larger cracks, use that cone for testing flavors and start with a fresh one.
Are these suitable for people with dietary restrictions? The recipe contains dairy and gluten. For gluten-free versions, use gluten-free waffle cones and cookies. Dairy-free alternatives exist for all dairy ingredients.
Conclusion
These Banana Pudding Cheesecake Cones represent everything I love about cooking – taking familiar, beloved flavors and presenting them in a way that creates new memories while honoring the old ones. Every bite delivers that perfect combination of creamy, crunchy, and sweet that makes dessert truly special.
The beauty of this recipe lies not just in its incredible taste, but in how it brings people together. I’ve watched kids’ faces light up when they see these cones, and I’ve seen adults transported back to childhood with their first taste. That’s the magic of good food – it connects us to our past while creating new moments of joy.
Ready to create some dessert magic? Gather your ingredients and give these Banana Pudding Cheesecake Cones a try this weekend. I promise they’ll become a regular request in your household, just like they have in mine.
Join the thousands of home cooks who’ve discovered the joy of these incredible cones – and don’t forget to share your creations with me! I love seeing how each family makes this recipe their own.
Next, try our Portobello Mushroom Burgers for another twist on this beloved flavor combination!
If you loved this recipe, don’t forget to share it with your friends or save it to try later!
I’d be thrilled to see your personal touch—share your photos on Pinterest