

Hi there! I’m Lisa, the heart and soul behind Recipesrealm, and today I’m absolutely thrilled to share my Creepy-Cute Mummy Brie recipe with you! As Halloween approaches, I know the struggle is real—you’re juggling costume preparations, party planning, and trying to find appetizers that are both impressive and easy to make. Last year, I found myself in the same boat, frantically searching for something that would wow my guests without keeping me in the kitchen all evening. That’s when I created this spooky-yet-sophisticated mummy-wrapped brie that became the star of my Halloween party!
This Creepy-Cute Mummy Brie transforms a simple wheel of brie into a hauntingly delicious centerpiece that takes just 20 minutes from start to finish. The buttery, melted cheese oozes out from beneath flaky puff pastry “bandages,” creating an irresistible combination that disappears faster than you can say “trick or treat.” At Recipesrealm, we believe that food isn’t just about taste—it’s about creating memories and sharing moments, and this recipe does exactly that by bringing smiles, gasps, and pure delight to your Halloween gathering.
Why This Creepy-Cute Mummy Brie Recipe Works
This Creepy-Cute Mummy Brie has become my go-to Halloween appetizer for three unbeatable reasons that make it a winner every single time.
Flavor meets festivity: The combination of creamy, buttery Creepy-Cute Mummy Brieencased in crispy, golden puff pastry creates an addictive contrast of textures. Unlike complicated Halloween recipes that sacrifice taste for presentation, this dish delivers on both fronts. The mild, luxurious flavor of brie appeals to virtually every palate, from cheese enthusiasts to picky eaters.
Incredibly convenient: With just 5 minutes of prep time and 15 minutes in the oven, this recipe fits perfectly into your busy Halloween schedule. You can assemble it up to 4 hours ahead and refrigerate until your guests arrive, then simply pop it in the oven for a freshly baked, impressive appetizer that looks like you spent hours creating it.
Endlessly versatile: While the classic mummy presentation is always a hit, this recipe adapts beautifully to various dietary preferences and flavor profiles. Want to make it more savory? Add herbs. Prefer something sweet? Drizzle with honey. Hosting a sophisticated adult gathering? Top with cranberry sauce. The brie base acts as a blank canvas for your creativity.
Budget-friendly elegance: Unlike elaborate charcuterie boards or expensive seafood platters, this recipe uses affordable ingredients that you can find at any grocery store. A single wheel of brie, one sheet of puff pastry, and a few pantry staples create an appetizer that looks and tastes far more expensive than it actually is.
Crowd-pleasing appeal: Whether you’re serving adults, kids, or a mixed crowd, everyone gravitates toward this warm, gooey cheese. It’s interactive (guests love tearing off pieces), photogenic (hello, Instagram-worthy Halloween content!), and universally loved. I’ve served this at family gatherings, adult cocktail parties, and kids’ Halloween events with equal success every time.
Choosing the Right Cheese for Your Creepy-Cute Mummy Brie
Selecting the perfect Creepy-Cute Mummy Brieis crucial for achieving that dreamy, melted center that makes this Creepy-Cute Mummy Brie so irresistible.
Best Cheese Options for This Recipe
The ideal Creepy-Cute Mummy Briefor this recipe is a small wheel measuring 8 to 10 ounces in diameter. This size ensures even heating and proper melting without the cheese completely liquefying and escaping from the pastry wraps. I always choose a wheel that’s about 1 to 1.5 inches thick—any thinner and it melts too quickly, any thicker and the center might remain cold while the pastry burns.
Look for brie labeled as “double cream” or “triple cream” if you want an extra-luxurious, buttery texture. The rind should be pure white without any brown spots or ammonia smell, which indicates the cheese is past its prime. A slightly soft feel when gently pressed is perfect; overly firm brie won’t give you that gorgeous oozy center, while overly soft brie might be overripe.
For those who find traditional brie too mild, consider using a flavored variety. Herb-crusted Creepy-Cute Mummy Brieadds aromatic complexity, while truffle brie elevates this appetizer to gourmet status. However, avoid very strongly flavored bries like blue cheese-infused varieties, as they can overpower the delicate balance of this recipe.
Buying Tips
Visit the specialty cheese section of your grocery store rather than grabbing pre-packaged Creepy-Cute Mummy Briefrom the regular dairy aisle. The quality difference is noticeable, and staff can often offer recommendations. When shopping, gently press the center of the wheel through the packaging—it should yield slightly but spring back. This indicates perfect ripeness.
Check the sell-by date and choose the freshest option available. For this recipe, you actually want brie that’s a few days before peak ripeness rather than at its softest point. Slightly firmer Creepy-Cute Mummy Brieholds its shape better during wrapping and baking, while still achieving that melted center we’re after.
If your local store doesn’t carry small wheels, don’t hesitate to ask the cheese counter staff to cut a portion from a larger wheel. Most are happy to accommodate, and you’ll get exactly the size you need. Alternatively, you can purchase an 8-ounce wedge and carefully wrap it, though the round wheel creates a more authentic mummy shape.
Substitutions
Can’t find brie or need a different option? Camembert works beautifully as it has a similar texture and flavor profile with slightly earthier notes. Use the same size wheel and follow the recipe exactly as written.
For a more budget-friendly option, a good-quality cream cheese wheel can substitute, though it won’t have quite the same sophisticated flavor. If using cream cheese, consider adding herbs or garlic to boost the taste.
Goat cheese (chèvre) offers a tangy alternative that pairs wonderfully with honey or fig jam. Choose a log-style goat cheese and cut it to match the Creepy-Cute Mummy Briewheel dimensions. Keep in mind that goat cheese is softer and may require extra care when wrapping.
Ingredients & Prep for Your Creepy-Cute Mummy Brie
Gathering the right ingredients and preparing them properly ensures your Creepy-Cute Mummy Brie turns out perfectly every time.

Cheese Prep Essentials
Before you begin assembling, remove your Creepy-Cute Mummy Briefrom the refrigerator and let it sit at room temperature for 15 to 20 minutes. This step is crucial—cold cheese won’t melt evenly and can create a disappointing lukewarm center instead of that gorgeous, flowing texture we want.
Do not remove the rind! This is a common mistake. The white rind is completely edible and helps contain the cheese while baking. If you remove it, your Creepy-Cute Mummy Briewill simply melt into a puddle. The rind softens beautifully when heated and adds a subtle mushroom-like flavor that complements the creamy interior.
Pat the surface of the brie dry with paper towels to remove any excess moisture. This helps the puff pastry adhere better and prevents soggy spots. If you’re adding any toppings like cranberry sauce or honey, have them ready but don’t apply them until you’ve unwrapped the brie on your serving board—applying them before baking can make the pastry soggy.
Puff Pastry & Pantry Staples
For the Mummy Wraps:
- 1 sheet frozen puff pastry (from a 17.3-ounce package), thawed according to package directions
- 1 wheel of brie cheese (8-10 ounces)
- 1 large egg
- 1 tablespoon water
- 2 whole black peppercorns or 2 capers (for eyes)
Optional Flavor Additions:
- 2 tablespoons honey or maple syrup
- 2 tablespoons cranberry sauce or fig jam
- 1 teaspoon fresh thyme leaves
- 1 clove garlic, minced
- ¼ cup chopped pecans or walnuts
For Serving:
- Crackers, baguette slices, or apple slices
- Fresh herbs for garnish (rosemary sprigs work great as “creepy” decorations)
- Extra honey or jam for drizzling
The key to success is proper puff pastry handling. Thaw your pastry in the refrigerator overnight or at room temperature for 30 to 40 minutes. It should be pliable but still cold—if it becomes too warm, it won’t puff properly and will turn greasy. Never thaw puff pastry in the microwave as it creates uneven texture and can partially cook the dough.
Keep your work surface lightly floured to prevent sticking, but don’t use too much flour as excess can make the pastry tough. I like to work on a sheet of parchment paper for easy transfer to the baking sheet later.
Step-by-Step Cooking Instructions for Creepy-Cute Mummy Brie
Follow these detailed steps to create a show-stopping Creepy-Cute Mummy Brie that will have your guests raving.
Pre-Cooking Prep for Creepy-Cute Mummy Brie
Preheat your oven to 375°F and line a baking sheet with parchment paper. This temperature is ideal for achieving golden, crispy pastry while melting the cheese perfectly without overcooking.
Unfold your thawed puff pastry sheet on a lightly floured surface or directly on parchment paper. Using a sharp knife or pizza cutter, slice the pastry lengthwise into strips approximately ½ inch wide. You’ll need about 10 to 12 strips depending on how densely you want to wrap your mummy. Don’t worry about perfection—irregular strips actually look more authentic as aged bandages!
Set aside two small pieces of pastry to create the mummy’s “eyes” later. You can cut small circles or ovals about the size of a dime. Place your brie wheel in the center of your work area—this will be the body of your mummy.
In a small bowl, whisk together the egg and water to create an egg wash. This will give your pastry beautiful golden color and help seal the strips together. Have a pastry brush ready for application.
Cooking Method for Creepy-Cute Mummy Brie
Begin wrapping your brie with the puff pastry strips, working in a crisscross pattern to mimic mummy bandages. Start by laying one strip across the center of the brie, letting the ends drape over the sides. The strip should cover the top and wrap slightly underneath—you don’t need to completely encase the bottom.
Continue adding strips at various angles, overlapping them slightly and leaving small gaps that allow the cheese to peek through. This gap technique is essential—it creates that authentic mummy appearance and allows steam to escape during baking, preventing the pastry from becoming soggy.
Don’t pull the strips too tightly or they’ll shrink during baking and tear. Lay them gently across the cheese with just enough tension to stay in place. It’s okay if some strips are longer than others—simply tuck the excess underneath or trim with kitchen scissors.
Once your brie is wrapped to your satisfaction (remember, messier looks more authentic!), brush the entire surface with egg wash. Be generous but avoid pooling, which creates uneven browning. Press your reserved pastry circles onto the top where you want the eyes, and brush those with egg wash too.
Carefully transfer your wrapped brie to the prepared baking sheet. If you worked on parchment paper, you can simply lift the entire paper onto the sheet pan. Place the peppercorns or capers on the pastry circles to create spooky eyes.
Bake for 15 to 20 minutes, rotating the pan halfway through for even browning. The pastry should be deep golden brown and puffed, with some cheese just beginning to ooze from the gaps.
Doneness Check for Creepy-Cute Mummy Brie
Your Creepy-Cute Mummy Brie is perfectly done when the puff pastry reaches a rich, golden-brown color with visible layers and a crispy texture. You should see slight bubbling or oozing of cheese from the gaps between bandages—this is exactly what you want!
The internal temperature isn’t as critical here as with other cheese dishes since brie is already safe to eat. However, if you want to check, the center should reach about 160°F for that ideal molten consistency. If you don’t have a thermometer, gently press the top—it should feel soft and yield easily, indicating the cheese has melted inside.
Watch carefully during the last 5 minutes of baking. Puff pastry can go from perfectly golden to overly dark quickly. If the pastry browns too rapidly but the cheese hasn’t melted enough, tent the top loosely with aluminum foil and continue baking for a few more minutes.
Resting Your Creepy-Cute Mummy Brie
This is the hardest part—waiting! Let your baked mummy rest on the baking sheet for 3 to 5 minutes before transferring to a serving board. This brief rest allows the cheese to settle slightly, making it easier to move without the entire bottom collapsing.
Use a large spatula to carefully slide under the entire mummy and transfer it to your serving platter. Don’t try to pick it up with your hands or use multiple utensils—this can break the delicate pastry or cause the hot cheese to leak out prematurely.
If any cheese has leaked onto the parchment paper during baking, scrape it up with a spatula and arrange it around your mummy as deliciously spooky “ooze.” Nothing goes to waste!
Serve immediately while warm. The cheese will remain at optimal gooeyness for about 15 to 20 minutes. After that, it will still be delicious but will firm up slightly as it cools.
Pro Tips for Perfect Creepy-Cute Mummy Brie
These expert techniques will take your Creepy-Cute Mummy Brie from good to absolutely spectacular.
Avoiding Common Mistakes with Creepy-Cute Mummy Brie
The soggy pastry problem: This is the most common issue. Prevent it by ensuring your brie is patted completely dry before wrapping and your puff pastry is cold when you start working. If adding jam or honey, wait until after baking and apply just before serving.
Pastry won’t seal or falls off: This happens when the pastry is too warm. If your kitchen is hot or you’ve handled the pastry extensively, refrigerate the assembled (unbrushed) mummy for 15 minutes before applying egg wash and baking. The cold pastry will firm up and adhere better.
Cheese explodes or leaks everywhere: Usually caused by wrapping too tightly or leaving no steam vents. Remember to leave those gaps between bandages! Also, avoid overfilling if you’re adding extras like garlic—too much filling creates pressure that forces cheese out.
Uneven browning: Rotate your baking sheet 180 degrees halfway through baking. Every oven has hot spots, and rotation ensures even color development. If one area browns faster, you can tent just that section with a small piece of foil.
Pastry doesn’t puff: Your pastry was either too warm when it went in the oven, or you’ve rolled/stretched it too thin. Puff pastry needs cold butter layers to create steam and rise. Always keep it chilled until the moment you assemble.
Tool Recommendations for Creepy-Cute Mummy Brie
A sharp pizza cutter or chef’s knife makes cutting uniform pastry strips effortless. Dull knives drag and tear the dough, creating uneven edges. I keep a dedicated pizza cutter just for pastry work.
Invest in a quality pastry brush for applying egg wash. Silicone brushes are easier to clean than natural bristle ones and don’t shed fibers onto your food. If you don’t have a pastry brush, a folded paper towel works in a pinch.
Parchment paper is non-negotiable for this recipe. It prevents sticking, makes cleanup effortless, and allows you to assemble your mummy on the counter then transfer everything to the baking sheet without touching the delicate pastry.
A large offset spatula (the kind with a bend in the handle) is perfect for transferring your finished mummy to a serving board without damaging it. The offset design gives you better leverage and control than a standard spatula.
While not essential, a kitchen thermometer removes all guesswork. An instant-read digital thermometer lets you check the cheese’s internal temperature without cutting into your beautiful creation.
Storage & Reheating Your Creepy-Cute Mummy Brie
Make-ahead instructions: Assemble your wrapped (unbrushed) mummy up to 4 hours ahead. Place it on the parchment-lined baking sheet, cover loosely with plastic wrap, and refrigerate. When ready to bake, remove from the fridge, apply egg wash, and add an extra 2 to 3 minutes to the baking time since you’re starting with cold cheese.
Leftover storage: If you somehow have leftovers (rare!), let the mummy cool completely, then wrap tightly in plastic wrap or transfer to an airtight container. Refrigerate for up to 2 days. Note that the pastry will soften in the refrigerator, so manage expectations.
Reheating: Place leftover mummy on a baking sheet and reheat in a 325°F oven for 8 to 10 minutes until the cheese softens again. Don’t microwave—it will make the pastry rubbery and sad. The reheated version won’t be quite as crispy as fresh, but it’s still delicious.
Freezing: I don’t recommend freezing the assembled mummy as the texture suffers significantly. However, you can freeze baked, cooled leftovers wrapped tightly in plastic wrap and aluminum foil for up to 1 month. Thaw overnight in the refrigerator and reheat as directed above.
Flavor Variations for Creepy-Cute Mummy Brie

Customize your Creepy-Cute Mummy Brie to match your party theme or dietary preferences with these creative twists.
Spicy Twist
Transform your mummy into a fiery treat by spreading a thin layer of jalapeño jelly or chipotle sauce on top of the brie before wrapping. The sweet heat contrasts beautifully with the creamy cheese. For extra kick, mix ¼ teaspoon of cayenne pepper into your egg wash—it adds subtle heat and gorgeous color.
Another option is to press thinly sliced pickled jalapeños onto the brie wheel before wrapping. The vinegar tang cuts through the rich cheese while the peppers add visual interest peeking through the bandages. Serve with tortilla chips instead of crackers for a Tex-Mex Halloween vibe.
For those who love bold flavors, try adding a sprinkle of red pepper flakes mixed with honey. Drizzle this spicy honey over the baked mummy just before serving for a sweet-heat combination that’s absolutely addictive.
Herbs and Garlic
Create a savory, aromatic version by pressing fresh herbs directly onto the brie before wrapping. Thyme, rosemary, and sage work beautifully—just strip the leaves from the stems and distribute them evenly on the cheese surface. The herbs infuse the brie as it melts, creating incredible depth.
For garlic lovers, mix 2 cloves of minced garlic with 1 tablespoon of softened butter and spread this mixture on top of the brie. As it bakes, the garlic mellows and perfumes the entire dish. This variation pairs exceptionally well with crusty bread for dipping.
A pesto version is equally stunning—spread 2 tablespoons of basil pesto on the brie before wrapping. The vibrant green peeking through the bandages adds color, and the basil-garlic combination is irresistible. Use sun-dried tomato pesto for a more Halloween-appropriate reddish hue.
Sweet Variations
For a dessert-like appetizer, spread 2 tablespoons of fig jam or apricot preserves on top of the brie before wrapping. The fruit sweetness caramelizes slightly during baking, creating pockets of jammy goodness. Sprinkle with chopped pecans for added texture.
Cranberry sauce (use whole berry style, not jellied) creates a gorgeous “bloody” effect when it oozes from the bandages—perfectly on theme! The tart cranberry balances the rich cheese beautifully. This version is especially popular during fall holidays.
Try a honey-walnut combination by drizzling honey over the brie and pressing chopped walnuts into it before wrapping. After baking, drizzle with additional honey and serve with apple slices. It’s like a cheese board transformed into a handheld appetizer.
Global Flavors Comparison
| Variation | Key Ingredients | Flavor Profile | Best Served With |
|---|---|---|---|
| Classic Mummy | Plain brie, puff pastry | Buttery, mild, versatile | Crackers, baguette |
| Mediterranean | Brie + sun-dried tomatoes + basil | Savory, herbaceous, bright | Pita chips, olives |
| French Countryside | Brie + honey + thyme | Sweet, floral, sophisticated | Sliced pears, walnuts |
| Holiday Spice | Brie + cranberry + rosemary | Tart, festive, aromatic | Crostini, apple slices |
| Nutty Autumn | Brie + maple syrup + pecans | Sweet, toasty, warming | Graham crackers, figs |
| Spicy Southwestern | Brie + jalapeño jelly + lime zest | Sweet-heat, tangy, bold | Tortilla chips, peppers |
Each variation maintains the core appeal of melted brie in crispy pastry while offering a distinct flavor experience. Choose based on your party’s theme or your guests’ preferences!
Serving Suggestions for Your Creepy-Cute Mummy Brie
Presentation and pairings can elevate your Creepy-Cute Mummy Brie from a simple appetizer to the centerpiece of your Halloween spread.
Perfect dippers: Offer a variety of textures and flavors for dipping. Crispy baguette slices, water crackers, and seeded crackers provide neutral bases that let the cheese shine. For a sweeter contrast, include sliced apples, pears, or dried apricots. Pretzel crisps add a satisfying crunch and subtle saltiness.
Themed presentation: Place your mummy on a black slate board or dark wooden cutting board to enhance the spooky aesthetic. Arrange fresh rosemary sprigs around it to look like creepy plants or grass. Scatter a few candy eyeballs nearby for extra Halloween fun. Use a small bowl of “bloody” marinara sauce (warmed) or cranberry sauce for dipping—label it with a fun name like “Vampire Blood.”
Build a Halloween spread: Pair your mummy brie with complementary appetizers that require minimal last-minute effort. Deviled eggs made to look like spiders, a veggie tray arranged as a skeleton, or a charcuterie board featuring orange and black foods (cheddar cheese, blackberries, orange bell peppers) creates a cohesive theme without overwhelming you.
Beverage pairings: For an adult gathering, serve with crisp white options like Sauvignon Blanc or Pinot Grigio, which cut through the richness of the cheese. Prefer red? A light Pinot Noir won’t overpower the delicate brie. For a festive touch, offer sparkling cider (the golden color is perfectly autumnal) or create a signature Halloween cocktail featuring apple or cranberry flavors.
Kids’ party adaptation: Serve with apple slices, graham crackers, and mini pretzels for kid-friendly dipping. Set up a “mummy feeding station” where children can break off pieces of the crispy pastry and create their own cheese crackers. It’s interactive, fun, and keeps them entertained while adults enjoy conversation.
Timing your service: Bring out your mummy brie about 30 minutes into your party, once guests have arrived and initial mingling has happened. This ensures everyone is there to witness the dramatic reveal. The warm, melted cheese becomes a natural gathering point that encourages conversation.
FAQs About Creepy-Cute Mummy Brie
Let me address the most common questions I receive about making this Creepy-Cute Mummy Brie perfectly every time.
Can I use phyllo dough instead of puff pastry? Yes, but the technique differs significantly. Phyllo dough requires brushing each sheet with melted butter and layering multiple sheets for structure. While it creates a crispier, more delicate wrap, it’s more time-consuming and fragile. Puff pastry is more forgiving for beginners and provides that satisfying flaky texture with less effort.
How do I prevent the cheese from completely melting out? Use brie that’s slightly firmer (a few days before peak ripeness), ensure you leave the rind intact, and don’t overbake. The combination of proper temperature (375°F) and time (15-20 minutes) allows the cheese to soften without liquefying. Also, those gaps between pastry strips provide necessary steam vents.
Can I make this with vegan cheese? Absolutely! Use a cashew-based brie-style vegan cheese and vegan puff pastry (most brands are actually already vegan—check the label). Replace the egg wash with non-dairy milk mixed with a touch of maple syrup for browning. The texture won’t be identical to dairy brie, but it’s still delicious and impressively melty.
What if I can’t find an 8-ounce wheel—can I use a larger one? You can, but you’ll need to adjust cooking time and potentially use more puff pastry. A 13-ounce wheel requires about 25 to 30 minutes at the same temperature. Monitor the pastry color closely and tent with foil if it browns before the cheese melts. For wheels larger than 1 pound, I recommend cutting them into smaller portions.
My puff pastry keeps tearing when I try to cut it. What am I doing wrong? Your pastry is likely too cold or you’re using a dull knife. Let it sit at room temperature for 5 minutes to become more pliable, then use a very sharp knife or pizza cutter with gentle, even pressure. If it’s too warm and sticky, refrigerate for 10 minutes to firm up again.
Is this recipe safe during pregnancy? Brie is made from pasteurized milk in most commercial varieties sold in the United States, making it generally safe when fully cooked to steaming hot throughout. However, pregnant individuals should verify their specific brie is made from pasteurized milk (check the label) and ensure it’s heated to at least 165°F internally. When in doubt, consult with a healthcare provider.
Can I make mini mummies instead of one large one? What a fun idea! Use small brie rounds (2-3 ounces each) and cut your pastry strips narrower (about ¼ inch). Reduce baking time to 12 to 15 minutes. Mini mummies are perfect for parties where guests might want individual servings and they look absolutely adorable arranged on a platter.
How do I rescue overcooked, tough pastry? Unfortunately, there’s no way to reverse overcooked puff pastry. However, you can salvage the situation by breaking off the crispest parts and serving the soft, cheesy interior as a warm spread with fresh bread. Label it “Unwrapped Mummy Dip” and embrace the happy accident!
What’s the best way to cut and serve this at a party? Don’t cut it! Let guests tear or pull pieces directly from the mummy with their crackers or hands. The interactive nature is part of the fun. If you must cut, use a serrated knife with a gentle sawing motion and accept that the first slice will be messiest—subsequent slices hold together better once some cheese has released.
Conclusion
Creating a show-stopping Creepy-Cute Mummy Brie for your Halloween celebration doesn’t require professional chef skills or hours in the kitchen. This recipe proves that with the right techniques and a bit of creativity, you can transform simple ingredients into an appetizer that guests remember long after the last ghost and goblin have gone home. The combination of buttery, melted brie encased in crispy, golden puff pastry delivers both visual impact and irresistible flavor that appeals to everyone from adventurous foodies to picky eaters.
At Recipesrealm, we’re all about making cooking feel like a joyful experience rather than a chore, and this mummy brie embodies that philosophy perfectly. It’s fun to assemble, forgiving of imperfections (messier wrapping actually looks more authentic!), and rewards you with that magical moment when guests gasp at your creation. Whether you choose the classic version or experiment with cranberry, herbs, or spicy variations, you’re creating more than just an appetizer—you’re creating a centerpiece that brings people together and sparks conversation.
The beauty of this recipe lies in its versatility. Make it ahead when you’re juggling multiple party preparations. Customize it to match your flavor preferences or dietary needs. Scale it down for an intimate gathering or create multiple mini mummies for a larger crowd. However you choose to make it, you’ll discover why this has become my most-requested Halloween recipe year after year.
Fire up your oven and try this tonight—or better yet, invite friends over to help wrap your mummy while sipping cider and sharing ghost stories. Join the thousands of home cooks who’ve fallen in love with this recipe and made it their own Halloween tradition. From my kitchen at Recipesrealm to yours, I can’t wait to hear how your Creepy-Cute Mummy Brie turns out! Don’t forget to check out our other seasonal recipes, including Cute Halloween Desserts for Kids – Ghost Sugar Cookies, for a complete Halloween menu that will make your celebration unforgettable.
If you loved this recipe, don’t forget to share it with your friends or save it to try later! I’d be thrilled to see your personal touch—share your photos on Pinterest!
Print
Quick Savory Halloween Snack – Creepy-Cute Mummy Brie
- Total Time: 25 minutes
- Yield: 8–10 servings 1x
- Diet: Vegetarian
Description
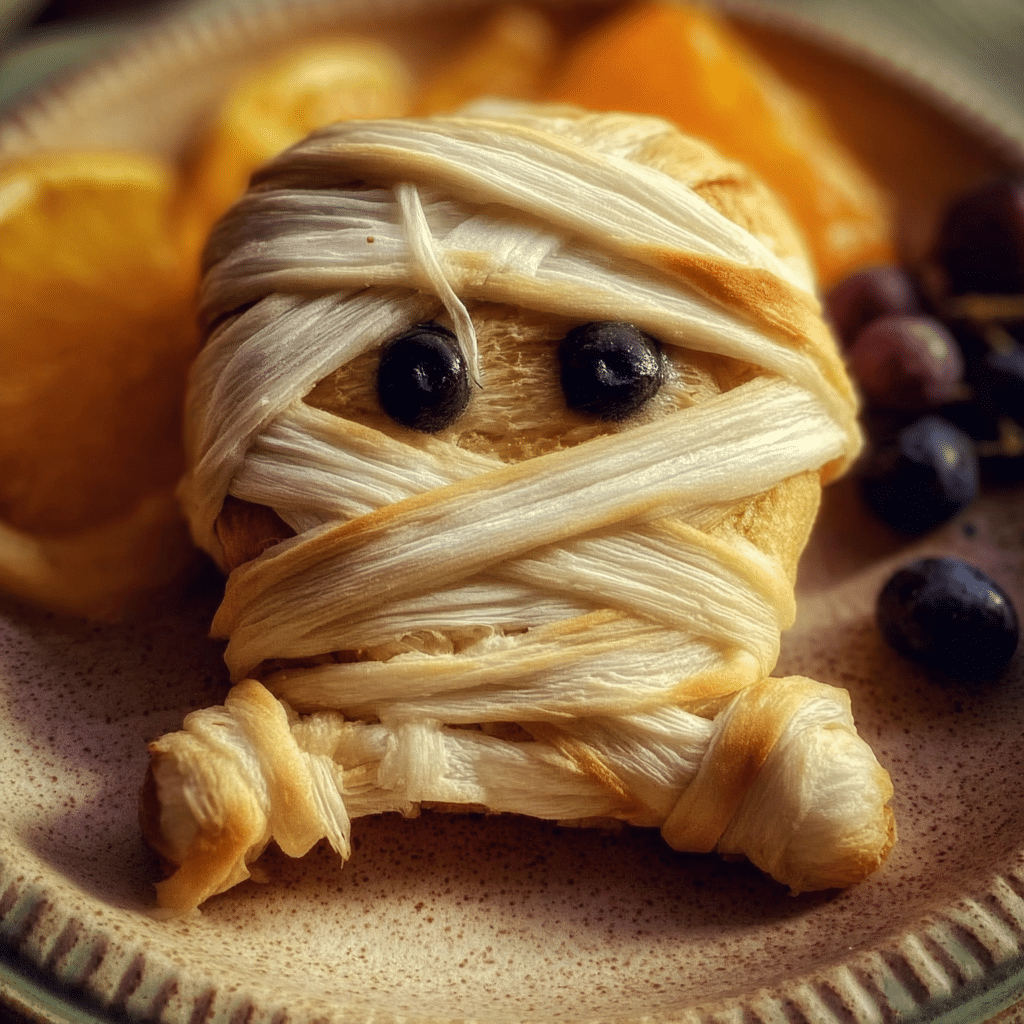
Transform a simple wheel of brie into a spooky, show-stopping Halloween appetizer! This Creepy-Cute Mummy Brie features buttery melted cheese wrapped in crispy golden puff pastry ‘bandages’ that takes just 20 minutes from start to finish. Perfect for Halloween parties, this interactive appetizer disappears faster than you can say trick or treat!
Ingredients
1 sheet frozen puff pastry (from 17.3 oz package), thawed
1 wheel brie cheese (8–10 ounces)
1 large egg
1 tablespoon water
2 whole black peppercorns or capers (for eyes)
Optional: 2 tablespoons honey, cranberry sauce, or fig jam
Optional: Fresh thyme or rosemary for garnish
Crackers, baguette slices, or apple slices for serving
Instructions
1. Preheat oven to 375°F and line a baking sheet with parchment paper.
2. Unfold thawed puff pastry on a lightly floured surface and cut lengthwise into ½-inch wide strips (about 10-12 strips total). Set aside two small pieces for eyes.
3. Pat the brie wheel dry with paper towels. Place in the center of your work area.
4. Whisk together egg and water in a small bowl to create egg wash.
5. Begin wrapping brie with pastry strips in a crisscross pattern, leaving small gaps between strips to mimic mummy bandages. Don’t wrap too tightly.
6. Brush entire surface with egg wash. Press reserved pastry circles on top for eyes and brush with egg wash.
7. Place peppercorns or capers on pastry circles to create spooky eyes.
8. Transfer wrapped brie to prepared baking sheet and bake for 15-20 minutes, rotating pan halfway through, until pastry is deep golden brown and cheese begins to ooze.
9. Let rest for 3-5 minutes on baking sheet, then carefully transfer to serving board using a large spatula.
10. Serve immediately with crackers, bread, or fruit while warm and gooey. Optionally drizzle with honey or top with cranberry sauce just before serving.
Notes
The white rind on brie is completely edible – do not remove it! It helps contain the cheese while baking.
Make ahead: Assemble unbrushed mummy up to 4 hours ahead, refrigerate, then brush with egg wash and bake when ready (add 2-3 minutes to baking time).
Puff pastry should be cold but pliable. If too warm, it won’t puff properly.
Leave gaps between pastry strips – this creates authentic mummy appearance and allows steam to escape.
Messier wrapping looks more authentic – don’t aim for perfection!
For spicy version, add jalapeño jelly or chipotle sauce before wrapping.
For sweet version, use fig jam or cranberry sauce.
Store leftovers wrapped in plastic wrap in refrigerator up to 2 days. Reheat at 325°F for 8-10 minutes.
- Prep Time: 5 minutes
- Cook Time: 15-20 minutes
- Category: Appetizer
- Method: Baking
- Cuisine: French-American
Nutrition
- Serving Size: 1 serving (approximately 1.5 oz)
- Calories: 185
- Sugar: 1g
- Sodium: 245mg
- Fat: 14g
- Saturated Fat: 8g
- Unsaturated Fat: 5g
- Trans Fat: 0g
- Carbohydrates: 10g
- Fiber: 0g
- Protein: 7g
- Cholesterol: 45mg
Keywords: halloween appetizer, mummy brie, baked brie, puff pastry brie, halloween party food, creepy cute mummy brie, easy halloween snacks
Markup