
Hi there! I’m Lisa from Recipesrealm, and today I’m sharing something truly magical – a butterscotch self-saucing pudding that creates its own luscious sauce as it bakes! Tired of complicated desserts that demand constant attention and multiple pans? I understand that frustration completely. After years of experimenting in my kitchen, I’ve perfected this show-stopping dessert that looks impressive but couldn’t be easier to make.
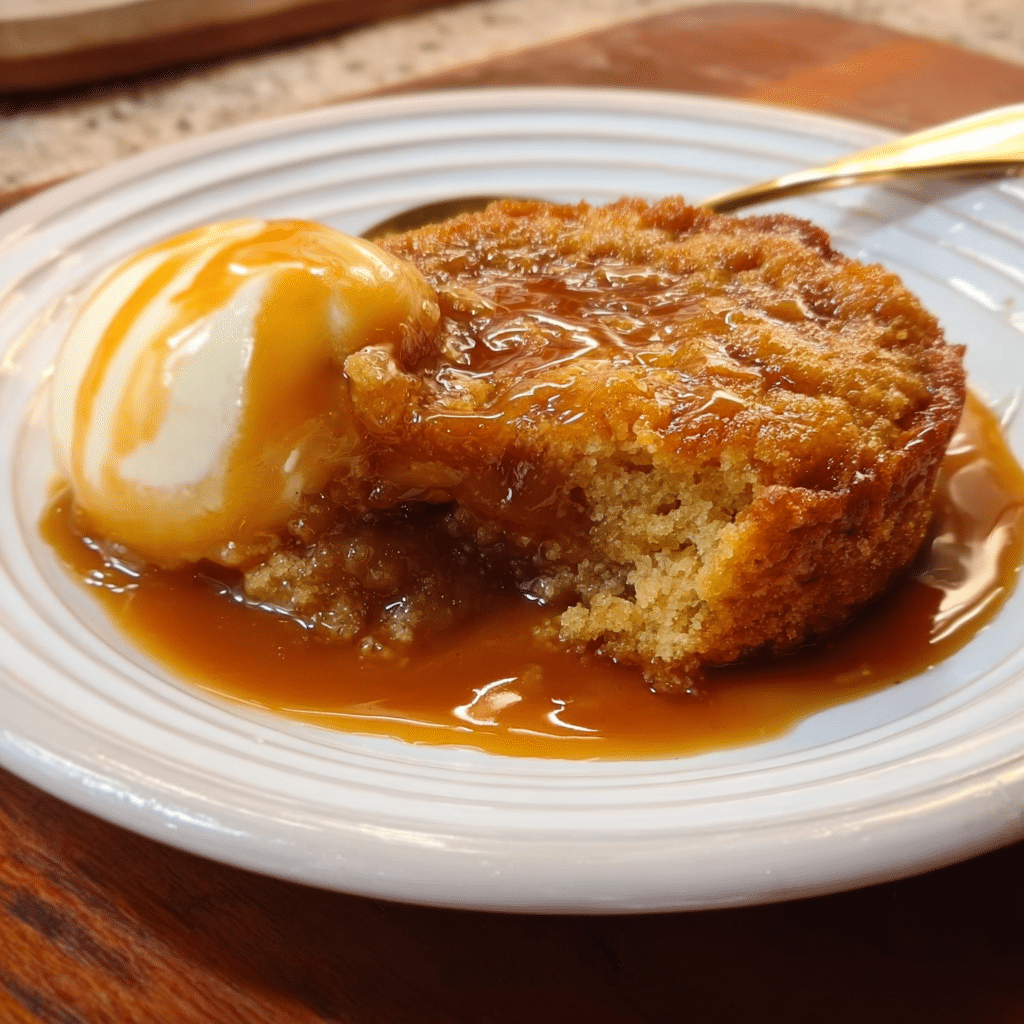
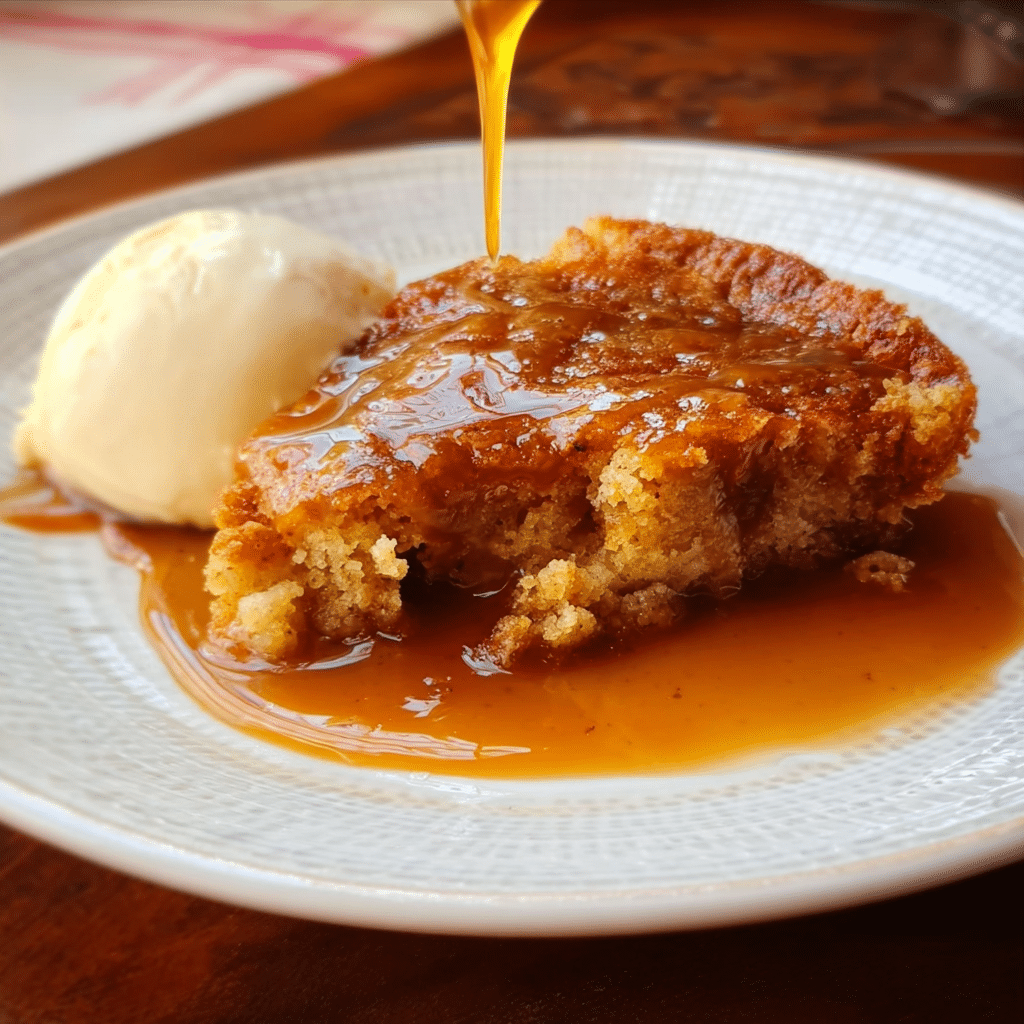
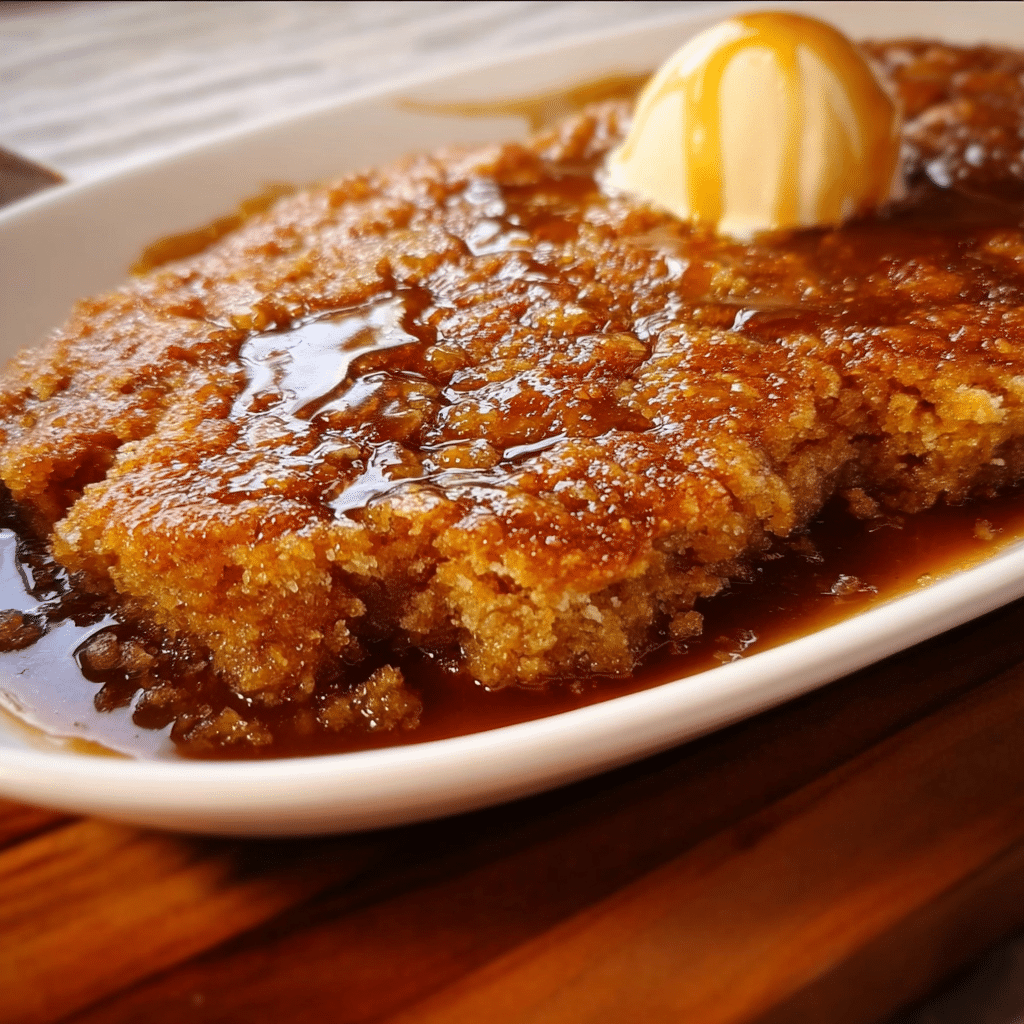
This butterscotch self-saucing pudding delivers a warm, gooey pudding cake sitting atop a dreamy butterscotch sauce – all from one simple batter poured into one dish. The magic happens in the oven, where the sauce mysteriously forms beneath the cake layer. As someone who believes food creates memories and brings people together, I’ve watched countless family gatherings light up when this golden dessert arrives at the table. The aroma alone makes everyone gather around!
In this comprehensive guide, I’ll walk you through everything: why this dessert works so beautifully, selecting the perfect ingredients, mastering the technique, troubleshooting tips, creative variations, and answers to your most common questions. Whether you’re an experienced baker or just starting your culinary journey, you’ll discover how satisfying and fun making this classic comfort dessert can be.
Why This Butterscotch Self-Saucing Pudding Recipe Works
This dessert has become a beloved staple at Recipesrealm for several compelling reasons that make it perfect for both everyday treats and special occasions:
- Foolproof technique that works every time: Unlike temperamental desserts that require precise timing, this butterscotch self-saucing pudding forgives minor variations and still delivers spectacular results. The self-saucing mechanism happens naturally through simple chemistry – no complicated techniques required.
- Uses affordable, pantry-friendly ingredients: You won’t need specialty items or expensive extracts. Basic butter, brown sugar, flour, milk, and vanilla create this extraordinary dessert. It’s the kind of recipe that saves the day when unexpected guests arrive.
- Ready in just 45 minutes from start to finish: Mix the batter in 10 minutes, bake for 35 minutes, and you’ve got a restaurant-quality dessert. Perfect for weeknight family dinners when you want something special without spending hours in the kitchen.
- Creates its own sauce while baking: The magic of self-saucing puddings never gets old. Pour what looks like cake batter into a dish, add liquid on top, and the oven transforms it into a two-layer masterpiece. It’s kitchen alchemy that impresses every time.
- Serves a crowd without breaking the bank: One batch easily feeds 6-8 people, making it ideal for gatherings, potlucks, or Sunday dinners. The cost per serving is remarkably low compared to store-bought desserts.
- Versatile enough for any season or occasion: Serve it warm on cold winter nights or at room temperature during summer gatherings. Dress it up with whipped cream for celebrations or enjoy it simple for everyday comfort.
Choosing the Right Ingredients for Butterscotch Self-Saucing Pudding
The beauty of this butterscotch self-saucing pudding lies in selecting quality ingredients that work together to create that signature flavor and texture. Let me guide you through making the best choices.
Essential Ingredients and Their Roles
Brown Sugar: This is your star ingredient for authentic butterscotch flavor. Dark brown sugar delivers deeper, more complex molasses notes, while light brown sugar offers gentler sweetness. I prefer dark brown sugar for the pudding layer and a mix for the sauce layer. Always pack brown sugar firmly when measuring, and if it’s hardened, microwave it for 10-15 seconds with a damp paper towel.
Butter: Use unsalted butter so you can control the salt level precisely. The butter should be at room temperature for the batter (soft enough to leave an indent when pressed) but melted for the sauce portion. Quality butter makes a noticeable difference – European-style butter with higher fat content creates an even richer result.
Flour: All-purpose flour provides the perfect structure for this pudding. Don’t substitute with self-rising flour, as the leavening is carefully balanced in this recipe. For a slightly lighter texture, you can use cake flour, but reduce the amount by 2 tablespoons per cup.
Milk: Whole milk creates the creamiest texture, but 2% works well too. Avoid skim milk, as the fat content is essential for richness. For the sauce layer, boiling water combined with milk creates the magical separation that forms the sauce beneath the cake.
Buying and Storage Tips
Shopping for this recipe is straightforward, but these tips ensure the best results:
Fresh ingredients matter: Check the expiration date on your baking powder – it loses potency after 6 months. Test it by dropping a teaspoon in hot water; it should bubble vigorously. Brown sugar stays fresh longer when stored in an airtight container with a terracotta brown sugar saver or a slice of bread.
Quality vanilla extract: Real vanilla extract elevates this dessert significantly. Imitation vanilla works in a pinch, but pure extract provides depth and complexity that complements the butterscotch perfectly. Store vanilla in a cool, dark place for maximum flavor retention.
Butter quality: If possible, choose butter from grass-fed cows for superior flavor and color. The slight yellow tint it imparts to the pudding makes it look even more appetizing. Keep butter refrigerated until you’re ready to use it, but remember to take it out 30-45 minutes before baking.
Ingredient Substitutions for Dietary Needs
Dairy-free version: Replace butter with vegan butter alternatives (stick form, not spread) and use full-fat coconut milk or oat milk instead of regular milk. The coconut milk adds a subtle tropical note that complements butterscotch beautifully.
Gluten-free option: Substitute the all-purpose flour with a 1:1 gluten-free baking blend that contains xanthan gum. Bob’s Red Mill and King Arthur brands work exceptionally well. The texture will be slightly denser but still delicious.
Reduced sugar: You can reduce the sugar in the pudding layer by up to 25% without compromising the texture too much, though the sauce layer needs its full sugar content to form properly. Consider using coconut sugar for a lower glycemic option with a caramel-like flavor.
Ingredients & Prep for Butterscotch Self-Saucing Pudding
Proper preparation sets you up for success with this butterscotch self-saucing pudding. Taking a few extra minutes for prep work ensures smooth sailing once you start mixing.
Essential Prep Steps
Mise en place: French for “everything in its place,” this principle is crucial for baking. Measure all ingredients before you begin. Line them up in the order you’ll use them. This prevents the panic of realizing you’re out of baking powder halfway through.
Oven preparation: Preheat your oven to 350°F (175°C) for at least 15 minutes before baking. Position the rack in the center of the oven for even heat distribution. If your oven has hot spots (most do), rotate the dish halfway through baking for uniform results.
Dish selection: Use an 8×8-inch square baking dish or a 2-quart oval dish. The depth matters – too shallow and the sauce won’t form properly; too deep and the top won’t set while the bottom stays gooey. Ceramic or glass dishes work best as they conduct heat evenly. Butter the dish lightly, though this butterscotch self-saucing pudding rarely sticks.
Complete Ingredient List
For the Pudding Layer:
- 1 cup all-purpose flour
- 2 teaspoons baking powder
- ½ teaspoon salt
- ¾ cup packed dark brown sugar
- 2 tablespoons unsalted butter, melted
- ½ cup whole milk
- 1 teaspoon vanilla extract
- ½ cup chopped pecans or walnuts (optional)
For the Sauce Layer:
- 1 cup packed dark brown sugar
- 2 tablespoons unsalted butter, melted
- 1¾ cups boiling water
Timing and Organization Tips
The beauty of this butterscotch self-saucing pudding is that you can prepare components in advance:
Up to 2 hours ahead: Mix the dry ingredients for both the pudding and sauce layers, keeping them in separate bowls. Cover tightly with plastic wrap. This is perfect when entertaining, as you can do the prep work early and just combine everything when it’s time to bake.
Measuring brown sugar: The trick to accurate measuring is packing it firmly into the measuring cup until it holds its shape when turned out. If you’re measuring multiple cups, pack each one individually rather than scooping from a large amount.
Room temperature ingredients: While the butter will be melted, having your eggs (if using) and milk at room temperature helps create a smoother batter that bakes more evenly. Take them out of the refrigerator 20-30 minutes before starting.
Step-by-Step Cooking Instructions for Butterscotch Self-Saucing Pudding
Now comes the exciting part – transforming simple ingredients into this spectacular dessert. Follow these detailed steps, and you’ll master this butterscotch self-saucing pudding technique perfectly.
Pre-Cooking Prep for Butterscotch Self-Saucing Pudding
Before mixing anything, complete these crucial preparation steps:
Oven and equipment setup: Preheat your oven to 350°F (175°C). Position the oven rack in the center. Lightly grease your 8×8-inch baking dish with butter or non-stick spray. Place the empty dish on a baking sheet – this catches any drips and makes it easier to remove the hot dish from the oven safely.
Ingredient temperature check: Melt the butter for both layers and let it cool slightly (you don’t want it hot enough to scramble if you’re adding eggs). Heat your water to boiling – I use an electric kettle for convenience. Have your milk measured and ready.
Workspace organization: Clear your counter space and have mixing bowls, whisk, measuring cups, and spoons within easy reach. This butterscotch self-saucing pudding comes together quickly once you start, so having everything ready prevents scrambling.
Cooking Method for Butterscotch Self-Saucing Pudding
Step 1: Create the pudding batter (5 minutes) In a medium bowl, whisk together the flour, baking powder, and salt until no lumps remain. In a separate large bowl, combine ¾ cup brown sugar, melted butter, milk, and vanilla extract. Whisk until the sugar begins to dissolve and the mixture is smooth. Add the dry ingredients to the wet ingredients and stir gently with a wooden spoon or spatula just until combined. The batter will be thick but pourable. Don’t overmix – a few small lumps are perfectly fine and will disappear during baking. If adding nuts, fold them in now.
Step 2: Pour the batter (1 minute) Scrape all the batter into your prepared baking dish. Use a spatula to spread it evenly across the bottom, smoothing the top. The batter layer should be relatively uniform, about ¾ inch thick. Don’t worry if it doesn’t reach the corners perfectly – it will spread during baking.
Step 3: Prepare the sauce mixture (2 minutes) In a medium bowl or large measuring cup, combine 1 cup brown sugar and 2 tablespoons melted butter. Pour in the boiling water and whisk until the sugar is mostly dissolved. The mixture will look thin and watery – this is exactly what you want for this butterscotch self-saucing pudding.
Step 4: The magical pour (1 minute) Here’s where the magic happens: Pour the hot sugar water mixture OVER the back of a large spoon held just above the batter. This gentle pouring method prevents the liquid from punching holes through the batter. Move the spoon around to distribute the liquid evenly. It will look like you’re drowning the batter – that’s correct! The liquid will pool on top, looking completely wrong. Trust the process.
Step 5: Baking (35-40 minutes) Carefully transfer the baking sheet with your dish to the preheated oven. Bake for 35-40 minutes without opening the oven door. The butterscotch self-saucing pudding is ready when the top is golden brown and springs back when lightly touched, and the edges are bubbling with the sauce underneath. The center might look slightly wobbly – that’s the sauce beneath the cake layer.
Doneness Check for Butterscotch Self-Saucing Pudding
Visual cues are your best guide for this dessert:
Surface appearance: The top should be deep golden brown with a slightly crackled appearance. The edges will be darker and bubbling actively. If the center looks very pale or wet, give it another 5 minutes.
Touch test: Gently press the center with your fingertip. It should feel set and spring back slowly. If your finger sinks in, the cake layer needs more time. Don’t use a toothpick test – it will always come out wet because of the sauce layer beneath.
Edge bubbling: You should see thick, caramel-colored sauce bubbling up around the edges. This indicates the sauce has formed properly underneath. If you see no bubbling, extend baking time by 5-minute increments.
Resting for Butterscotch Self-Saucing Pudding
Cooling period: Remove the dish from the oven and place it on a wire rack. Let the butterscotch self-saucing pudding rest for 10-15 minutes before serving. During this time, the cake layer firms up slightly, making it easier to scoop, while the sauce thickens to the perfect consistency. The dessert will continue to steam and bubble gently.
Serving temperature: This pudding is best served warm, when the sauce is most fluid and the cake is tender. However, it’s also delicious at room temperature if you prefer a thicker sauce. Avoid refrigerating before serving, as this causes the sauce to become too thick and the cake layer to become dense.
Pro Tips for Perfect Butterscotch Self-Saucing Pudding
After making hundreds of these puddings at Recipesrealm, I’ve discovered techniques that take this butterscotch self-saucing pudding from good to absolutely extraordinary.
Avoiding Common Mistakes with Butterscotch Self-Saucing Pudding
Don’t stir after adding the liquid: The most common mistake is the impulse to stir or swirl after pouring the hot liquid over the batter. Resist this completely! The magic of self-saucing puddings happens because the dense batter rises during baking while the liquid settles beneath and transforms into sauce. Stirring disrupts this process and creates a muddy texture.
Avoid overbaking: An overbaked butterscotch self-saucing pudding has a dry cake layer and reduced sauce. Set a timer for 30 minutes, then check every 3-5 minutes. Remember that the dessert continues cooking from residual heat even after you remove it from the oven.
Water must be boiling: Lukewarm or hot water won’t create the temperature contrast needed for proper sauce formation. The boiling water immediately begins melting the sugar while the batter sets around it. I heat my water while mixing the batter so it’s freshly boiled when needed.
Don’t use a deeper dish: Using a deeper casserole dish means the sauce has farther to travel to separate from the batter. Stick with the recommended 8×8-inch dish or similar shallow dish for consistent results.
Tool Recommendations for Butterscotch Self-Saucing Pudding
Essential equipment: A good-quality 8×8-inch square ceramic or glass baking dish distributes heat evenly. Metal pans work but may cause the edges to brown too quickly. An electric kettle makes boiling water effortless and precise. A whisk helps dissolve the sugar smoothly, while a sturdy rubber spatula is perfect for scraping every bit of batter into the dish.
Nice-to-have tools: A large ice cream scoop or serving spoon with deep bowls makes portioning easier, capturing both cake and sauce in each serving. Individual ramekins (6-ounce size) work beautifully for single servings – reduce baking time to 20-25 minutes. A kitchen scale ensures perfect measurements every time, especially for the brown sugar.
Serving essentials: Serve directly from the baking dish for casual family meals, or transfer portions to individual bowls or plates for dinner parties. A small ladle helps you scoop the sauce from the bottom to drizzle over each serving.
Storage & Reheating for Butterscotch Self-Saucing Pudding
Short-term storage: Cover leftover butterscotch self-saucing pudding with plastic wrap or aluminum foil and refrigerate for up to 3 days. The sauce will thicken considerably when cold but will loosen again when reheated. The cake layer absorbs some sauce during storage, making it even more moist.
Reheating instructions: For best results, reheat individual portions in the microwave for 30-45 seconds on high power. The sauce will become fluid again and steam beautifully. You can also reheat the entire dish covered with foil in a 300°F oven for 15-20 minutes. Add a tablespoon of water before reheating if the sauce seems too thick.
Freezing: While you can freeze this dessert for up to 2 months, the texture changes slightly. The cake layer remains good, but the sauce may separate upon thawing. If freezing, wrap portions tightly in plastic wrap and then aluminum foil. Thaw overnight in the refrigerator and reheat as directed above.
Flavor Variations for Butterscotch Self-Saucing Pudding
One of the joys of this butterscotch self-saucing pudding is how easily it accepts creative variations. These tested alternatives have all been crowd-pleasers at Recipesrealm gatherings.
Classic Twists on Butterscotch Self-Saucing Pudding
Salted Caramel Version: Add ½ teaspoon of flaky sea salt to the pudding batter and sprinkle another ½ teaspoon on top before baking. The salt cuts through the sweetness and enhances the butterscotch flavor beautifully. Use salted butter instead of unsalted for even more depth.
Chocolate Chip Addition: Fold ½ cup of semi-sweet or dark chocolate chips into the batter. As they bake, they create pockets of melted chocolate throughout the pudding. The chocolate-butterscotch combination is reminiscent of a luxurious candy bar.
Spiced Butterscotch: Add 1 teaspoon ground cinnamon, ¼ teaspoon ground ginger, and a pinch of nutmeg to the dry ingredients. These warm spices complement the butterscotch perfectly and make your kitchen smell incredible. This version is especially popular during fall and winter months.
Dietary-Friendly Butterscotch Self-Saucing Variations
Gluten-Free Butterscotch Pudding: Replace all-purpose flour with a 1:1 gluten-free baking flour blend. Ensure your baking powder is certified gluten-free. The texture will be slightly denser but equally delicious. Let the batter rest for 5 minutes before pouring it into the dish to allow the gluten-free flour to hydrate properly.
Dairy-Free Alternative: Use coconut oil or vegan butter instead of regular butter, and substitute full-fat coconut milk or oat milk for the dairy milk. The coconut milk version adds a subtle tropical undertone that pairs wonderfully with butterscotch. Use canned coconut milk rather than the refrigerated kind for proper fat content.
Lower Sugar Option: You can reduce the sugar in the pudding layer by up to 3 tablespoons without significantly affecting texture. However, the sauce layer requires its full sugar amount to form properly. Consider using coconut sugar for a more complex, caramel-like flavor with a lower glycemic index.
Global-Inspired Butterscotch Self-Saucing Flavors
British Sticky Toffee Influence: Add ½ cup finely chopped dates to the batter and use black treacle (available at specialty stores) instead of 2 tablespoons of the brown sugar. This creates a deeper, more complex flavor reminiscent of traditional British sticky toffee pudding.
Maple Butterscotch Fusion: Replace ¼ cup of the brown sugar in the pudding layer with pure maple syrup and add ½ teaspoon of maple extract. Top with chopped pecans before baking for a truly North American twist on this butterscotch self-saucing pudding.
Australian Macadamia Addition: Fold in ½ cup chopped macadamia nuts and add ½ teaspoon coconut extract to the batter. The buttery macadamias complement the rich butterscotch sauce perfectly, creating a tropical-meets-comfort-food experience.
Variation Comparison Table
| Variation | Key Addition | Flavor Profile | Best For |
|---|---|---|---|
| Classic Butterscotch | Standard recipe | Rich, caramel, sweet | Traditional comfort dessert lovers |
| Salted Caramel | ½ tsp sea salt | Sweet-salty balance | Sophisticated palates |
| Chocolate Chip | ½ cup chocolate chips | Butterscotch-chocolate | Chocolate lovers, kids |
| Spiced Butterscotch | Cinnamon, ginger, nutmeg | Warm, aromatic | Fall/winter seasons |
| Gluten-Free | GF flour blend | Identical to classic | Celiac/gluten-sensitive guests |
| Dairy-Free | Coconut milk, vegan butter | Subtle coconut hint | Vegan/dairy-free diets |
| Sticky Toffee | Dates, treacle | Deep, complex | British dessert enthusiasts |
| Maple Pecan | Maple syrup, pecans | Maple-forward | Autumn gatherings |
| Macadamia Coconut | Macadamias, coconut extract | Tropical, buttery | Summer entertaining |
Serving Suggestions for Butterscotch Self-Saucing Pudding
The right accompaniments transform this already delicious butterscotch self-saucing pudding into an unforgettable dessert experience. Here are my favorite pairings that have consistently impressed guests at Recipesrealm.
Perfect Toppings and Accompaniments
Vanilla ice cream: This is the classic pairing for a reason. The cold, creamy ice cream melting into the warm butterscotch sauce creates an incredible hot-and-cold contrast. Use high-quality vanilla bean ice cream for the best experience. Place a generous scoop right on top of the warm pudding and watch it slowly melt into the sauce.
Whipped cream: Freshly whipped cream (not canned) adds luxurious lightness that balances the dense pudding. Whip heavy cream with 2 tablespoons powdered sugar and 1 teaspoon vanilla until soft peaks form. A dollop on each serving provides the perfect creamy contrast to the rich butterscotch self-saucing pudding.
Crème fraîche or Greek yogurt: For a slightly tangy counterpoint to the sweet butterscotch, try a spoonful of crème fraîche or thick Greek yogurt. The acidity cuts through the richness beautifully and makes the dessert feel less heavy. This is particularly popular with European guests.
Caramel sauce drizzle: As if this butterscotch self-saucing pudding wasn’t indulgent enough, a drizzle of additional caramel sauce takes it over the top. Homemade salted caramel is sublime, or use high-quality store-bought. Warm it slightly before drizzling for better flow.
Chopped nuts: Toasted pecans, walnuts, or almonds add textural contrast and a subtle nuttiness that complements the butterscotch. Toast them in a dry skillet for 3-4 minutes until fragrant, then chop roughly and sprinkle over each serving.

Beverage Pairings with Butterscotch Self-Saucing Pudding
Coffee: A strong espresso or rich French press coffee provides a bitter contrast that enhances the sweet butterscotch flavors. The roasted notes in dark coffee echo the caramelized sugars in the pudding. Many guests at Recipesrealm love this pairing for after-dinner dessert.
Tea selections: Earl Grey tea with its bergamot notes pairs surprisingly well, as does strong English Breakfast tea. For herbal options, try chai with its warm spices or rooibos with its naturally sweet, caramel-like flavor. Serve tea hot to maintain the warm, comforting feel of this dessert.
Dessert wines: A tawny port or cream sherry echoes the butterscotch flavors beautifully. The fortified wines have enough body and sweetness to stand up to the rich pudding without being cloying. Serve in small glasses alongside the dessert.
Milk options: Don’t underestimate a cold glass of whole milk, especially for family dinners. Kids particularly love this combination. For adults, try cold brew coffee with a splash of cream for a sophisticated twist.
Presentation Ideas for Special Occasions
Individual portions: Bake the butterscotch self-saucing pudding in 6-ounce ramekins for elegant individual servings (reduce baking time to 20-25 minutes). Top each with a small scoop of ice cream and a mint leaf for a restaurant-quality presentation.
Rustic family style: Serve directly from the baking dish at the table, allowing guests to scoop their own portions. This casual approach encourages seconds and creates a warm, family-style atmosphere perfect for Recipesrealm gatherings.
Layered dessert glasses: For a modern presentation, layer crumbled cake pieces and sauce in clear glass dessert cups, alternating with whipped cream. This shows off the beautiful golden color and makes portion control easier.
FAQs About Butterscotch Self-Saucing Pudding
Over the years at Recipesrealm, I’ve answered countless questions about this butterscotch self-saucing pudding. Here are the most common concerns and my detailed solutions.
Can I make butterscotch self-saucing pudding ahead of time?
Short answer: Partially yes. You can mix the dry ingredients for both layers up to 24 hours in advance and store them separately in airtight containers. However, for the best results, combine the wet and dry ingredients and bake just before serving. The magic of this dessert is enjoying it warm from the oven.
Complete make-ahead strategy: If you absolutely must prepare it completely in advance, bake it up to 4 hours before serving and leave it covered at room temperature. Reheat in a 300°F oven covered with foil for 10-15 minutes before serving. The texture won’t be quite as perfect as freshly baked, but it’s still delicious.
Why didn’t my sauce form properly in my butterscotch self-saucing pudding?
Several factors could cause sauce issues:
Water wasn’t hot enough: The water must be actively boiling when poured over the batter. Lukewarm water won’t create the necessary temperature contrast for proper sauce formation. Always heat the water just before using it.
You stirred after adding liquid: Stirring combines the batter and liquid, preventing them from separating during baking. The batter must stay on top to rise and form the cake layer while the liquid sinks and becomes sauce.
Wrong pan depth: A dish that’s too deep means the liquid has farther to travel to separate from the batter. Use the recommended 8×8-inch shallow dish for consistent results.
Oven temperature was off: An oven that’s too cool won’t generate enough heat to separate the layers properly. Use an oven thermometer to verify your oven’s actual temperature matches the dial.
Can I use light brown sugar instead of dark in my butterscotch self-saucing pudding?
Yes, absolutely: Light brown sugar works perfectly well, though the flavor will be slightly less intense. Dark brown sugar contains more molasses, which gives that deep, caramel-butterscotch flavor. If using light brown sugar, consider adding 1 tablespoon of molasses to boost the butterscotch taste.
Other sugar substitutions: Regular white sugar doesn’t provide the butterscotch flavor at all and creates more of a vanilla pudding. Coconut sugar works and adds an interesting caramel note with lower glycemic impact. Don’t use sugar substitutes like erythritol or stevia – they won’t create the proper sauce consistency.
How do I fix an overcooked butterscotch self-saucing pudding?
Prevention is best: Set a timer for 30 minutes and check every 5 minutes after that. The pudding is done when the top springs back lightly when touched and the edges are bubbling.
If it’s already overcooked: The cake layer may be dry and the sauce reduced. Pour 2-3 tablespoons of hot water around the edges and return to the oven for 5 minutes. Serve with extra cream or ice cream to compensate for dryness. The butterscotch self-saucing pudding won’t be perfect, but these fixes help.
Is butterscotch self-saucing pudding safe during pregnancy?
Generally yes: This dessert contains no raw eggs, unpasteurized dairy, or other ingredients typically concerning during pregnancy. All ingredients are fully cooked at safe temperatures. However, always consult your healthcare provider about specific dietary concerns during pregnancy.
Can I double the butterscotch self-saucing pudding recipe?
Yes, with modifications: Double all ingredients and use a 9×13-inch baking dish. Increase baking time by 10-15 minutes, checking for doneness at 45 minutes. The larger surface area means slightly different heat distribution, so watch carefully to prevent overbaking the edges while the center finishes.
Better option for crowds: Instead of doubling, make two separate 8×8-inch batches. They bake more evenly and you can stagger baking times to serve one while the other bakes.
What’s the best way to reheat leftover butterscotch self-saucing pudding?
Microwave method (best for single servings): Place a portion in a microwave-safe bowl and heat on high for 30-45 seconds. The sauce will become fluid again and steam beautifully. Add a teaspoon of water if it seems too thick.
Oven method (best for whole dish): Cover with foil and reheat at 300°F for 15-20 minutes. Add 2 tablespoons of water to the dish before covering to help rehydrate the pudding and thin the sauce.
Can I use this butterscotch self-saucing technique with other flavors?
Absolutely: The self-saucing method works with many flavor profiles. Substitute cocoa powder for some of the flour to create chocolate self-saucing pudding. Use maple syrup and cinnamon for maple pudding. Replace brown sugar with white sugar and add lemon zest for lemon pudding. The technique remains the same – it’s the flavorings that change.
Conclusion
This butterscotch self-saucing pudding has become one of the most beloved recipes at Recipesrealm for good reason – it delivers spectacular results with minimal effort, creating those precious memories and special moments that make cooking so rewarding. The magic of watching a simple batter transform into a two-layer dessert never gets old, whether you’re making it for the first time or the hundredth.
From selecting quality ingredients to mastering the pour-over technique, you now have all the knowledge you need to create this show-stopping dessert with confidence. Remember that the key to success lies in using boiling water, not stirring after adding the liquid, and resisting the urge to overbake. Trust the process, and you’ll be rewarded with a golden pudding cake sitting atop the most luscious butterscotch sauce.
Whether you’re serving this warm with vanilla ice cream for a cozy family dinner, presenting individual ramekins at a dinner party, or experimenting with creative variations like salted caramel or spiced butterscotch, this versatile dessert adapts beautifully to any occasion. The combination of tender cake and rich sauce creates comfort in every spoonful.
At Recipesrealm, we believe that cooking should be fun, accessible, and rewarding – and this butterscotch self-saucing pudding embodies all three principles perfectly. So preheat that oven, gather your ingredients, and prepare to impress yourself and everyone at your table. The golden, bubbling dessert that emerges will make you feel like a kitchen magician!
Join the thousands of home cooks who’ve already fallen in love with this recipe. Fire up your oven and try Fall Dessert Trend: Mini Tres Leches Cakes your kitchen (and your taste buds) will thank you!
If you loved this recipe, don’t forget to share it with your friends or save it to try later! I’d be thrilled to see your personal touch—share your photos on Pinterest!
Print
Butterscotch Self-Saucing Pudding: The Ultimate Comfort Dessert
Description
This Butterscotch Self-Saucing Pudding is pure comfort in a bowl — soft, fluffy cake on top with a rich, gooey caramel-like sauce underneath. A cozy dessert that’s simple to make and always a crowd favorite!
Ingredients
**For the Pudding:**
1 cup self-rising flour
3/4 cup brown sugar
1/2 cup milk
1/4 cup unsalted butter, melted
1 egg
1 tsp vanilla extract
Pinch of salt
**For the Sauce:**
3/4 cup brown sugar
1 1/2 cups boiling water
2 tbsp unsalted butter
Instructions
1. Preheat oven to 350°F (180°C). Grease a medium baking dish (about 8×8 inches).
2. In a bowl, combine flour, brown sugar, and salt.
3. In another bowl, whisk together milk, melted butter, egg, and vanilla extract.
4. Pour wet ingredients into the dry ingredients and stir until just combined.
5. Spoon the batter evenly into the prepared baking dish.
6. To make the sauce, combine brown sugar and butter in a bowl. Pour boiling water over it and stir gently until butter melts.
7. Carefully pour the sauce mixture over the pudding batter using the back of a spoon (do not mix).
8. Bake for 35–40 minutes, until the top is golden and the pudding has risen.
9. Serve warm, spooning both the cake and the rich butterscotch sauce into bowls.
10. Optional: top with ice cream or whipped cream for extra indulgence!
Notes
You can make it ahead and reheat gently before serving.
Add a pinch of cinnamon for a spiced twist.
Best served fresh — the sauce thickens as it cools.