
Tired of soggy, store-bought granola that costs a fortune and contains more sugar than a candy bar? You’re not alone. I’ve been there, standing in the cereal aisle, reading labels with ingredients I can’t pronounce, wondering why something so simple has become so complicated.
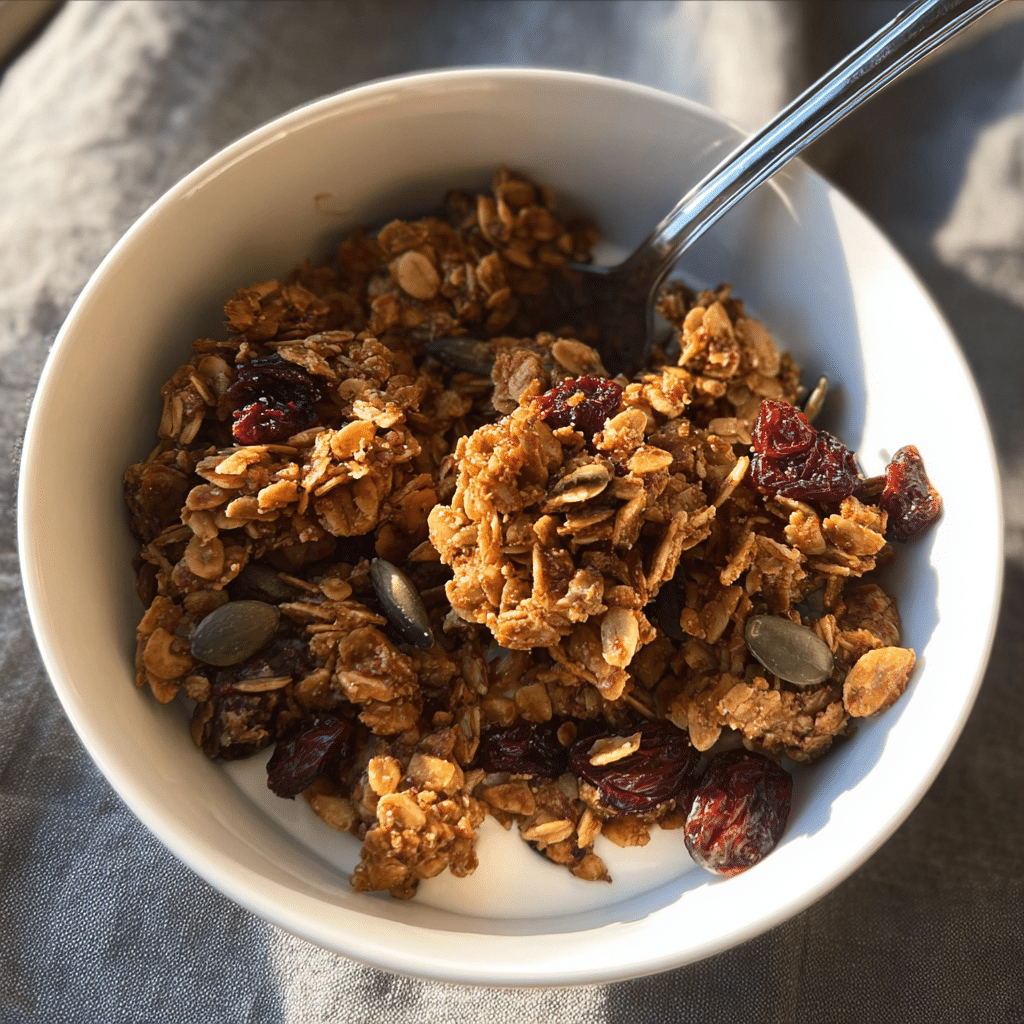
This homemade crunchy granola recipe is about to change everything. Imagine golden clusters that stay crispy for weeks, natural sweetness you can control, and that irresistible crunch that makes breakfast feel like a celebration. No preservatives, no mysterious additives—just wholesome ingredients that you can see and taste.
Hi there! I’m Lisa from Recipesrealm, and I’ve spent the last two years perfecting this granola recipe. After countless batches (my family became very willing taste-testers!), I’ve cracked the code to achieving that perfect cluster formation and golden-brown perfection. What started as a quest to avoid expensive grocery store granola has become one of my most-requested recipes.
In this guide, you’ll discover the science behind achieving maximum crunch, learn which ingredient ratios create those coveted clusters, explore endless flavor variations, and get answers to every granola question you’ve ever had. Whether you’re meal-prepping for busy mornings or looking for a healthier snack option, this recipe delivers every single time.
Why This Homemade Crunchy Granola Recipe Works
Creating the perfect homemade crunchy granola isn’t just about throwing oats in the oven—it’s about understanding the magic that happens when the right ingredients meet at the right temperature. This recipe has been tested, tweaked, and perfected to give you consistent results every time.
Here’s why this recipe stands out:
- Customizable sweetness level: Control exactly how sweet your granola is, unlike store-bought versions loaded with hidden sugars
- Budget-friendly bulk ingredients: Make a month’s worth of breakfast for less than three boxes of premium granola
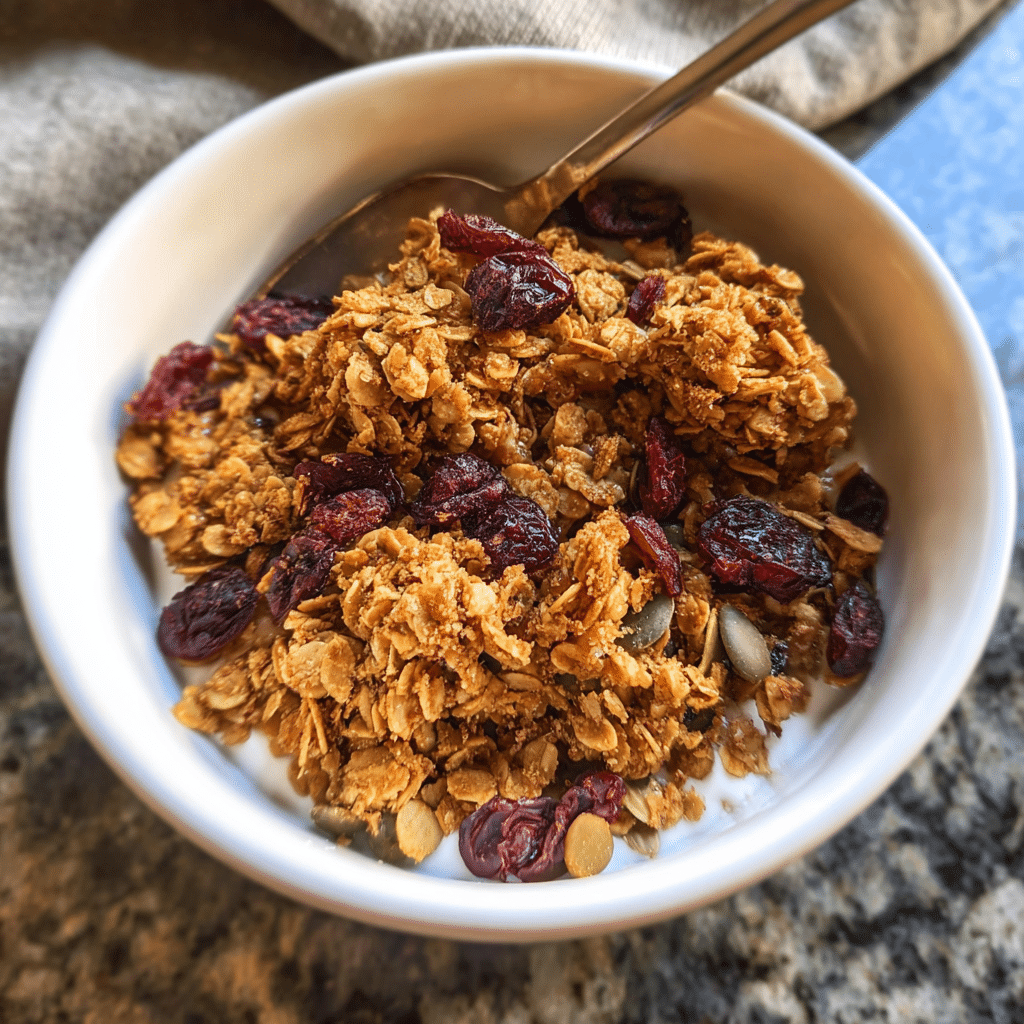
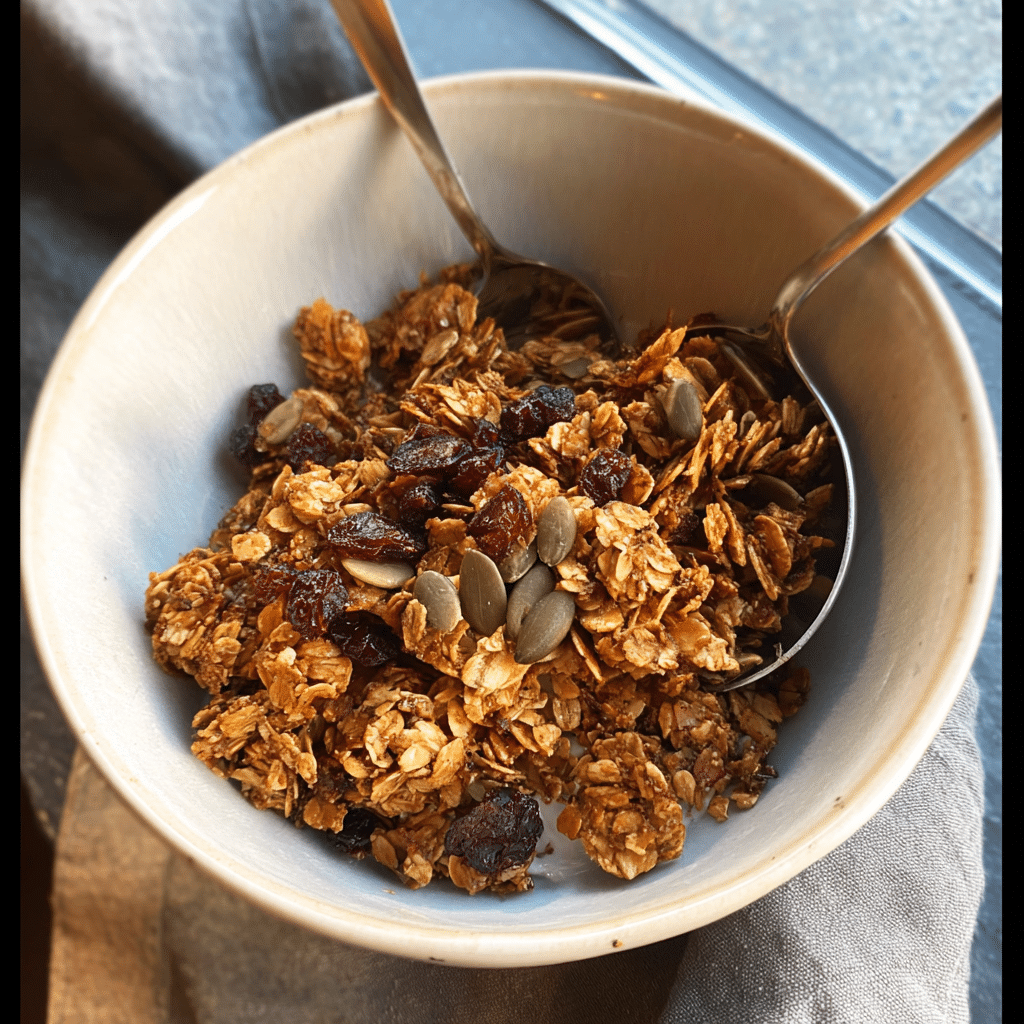
- Perfect cluster formation: The secret egg white technique creates those satisfying clumps that don’t crumble
- Stays crispy for 4+ weeks: Proper baking and cooling methods lock in that crunch
- Endless flavor possibilities: One base recipe transforms into dozens of variations
- No refined sugars needed: Natural sweeteners like maple syrup and honey work beautifully
- Allergy-friendly adaptations: Easy to make nut-free, gluten-free, or vegan
- Makes an impressive homemade gift: Package it beautifully for friends and family
The convenience factor alone is game-changing. Spend one hour on Sunday making a big batch, and you’ve got grab-and-go breakfast sorted for the entire month. Add it to yogurt, sprinkle it on smoothie bowls, eat it by the handful—this granola multitasks like a champion.
Choosing the Right Ingredients for Homemade Crunchy Granola
The quality of your ingredients directly impacts the final crunch and flavor of your homemade crunchy granola. Think of this as building a house—you need a solid foundation before you can add the beautiful details.
Best Base Ingredients for This Recipe
Old-fashioned rolled oats are non-negotiable here. They’re the backbone of your granola, providing that hearty texture and ability to form clusters. Quick oats turn mushy, and steel-cut oats won’t soften properly. Look for thick, whole flakes at your grocery store or buy in bulk to save money.
Nuts and seeds add protein, healthy fats, and extra crunch. Almonds, cashews, pecans, and walnuts are classics, while pumpkin seeds and sunflower seeds work beautifully for nut-free versions. Raw nuts are best because they’ll toast alongside the oats, developing deep, complex flavors.
Natural sweeteners create those gorgeous clusters and provide just enough sweetness. Maple syrup is my go-to because it doesn’t crystallize and adds a subtle flavor. Honey works wonderfully too, though it browns faster. Avoid granulated sugar—it doesn’t bind the ingredients together effectively.
Buying Tips for Premium Results
Visit the bulk section of your grocery store for the freshest, most affordable ingredients. Oats should smell fresh and slightly sweet, never musty or stale. When buying nuts, look for uniform color without dark spots or shriveled pieces.
For coconut oil (the best binding agent), choose unrefined virgin coconut oil for a subtle tropical note, or refined if you prefer no coconut flavor. It should be pure white when solid and crystal clear when melted.
Check expiration dates on spices—cinnamon, nutmeg, and vanilla lose potency over time. Fresh spices make a dramatic difference in flavor depth.
Smart Substitutions
Making it nut-free? Replace nuts with a combination of seeds (sunflower, pumpkin, hemp) and coconut flakes in equal measure. The texture will be slightly different but equally delicious.
Need it vegan? Skip the egg white (used for extra cluster formation) and increase the oil by one tablespoon. You’ll still get clusters, just slightly smaller ones.
Gluten-free? Use certified gluten-free oats. Regular oats are naturally gluten-free but often processed in facilities with wheat.
Low-sugar version? Reduce the sweetener by half and add unsweetened applesauce to maintain moisture and binding power.
Ingredients & Prep for Homemade Crunchy Granola
Preparation is where the magic begins. Taking a few extra minutes to properly measure and prepare your ingredients makes the difference between good granola and extraordinary granola.
Essential Base Ingredients
Dry Ingredients:
- 4 cups old-fashioned rolled oats
- 1½ cups mixed nuts, roughly chopped (almonds, pecans, cashews)
- 1 cup unsweetened coconut flakes
- ½ cup raw seeds (pumpkin or sunflower)
- 1 teaspoon ground cinnamon
- ½ teaspoon sea salt
- ¼ teaspoon ground nutmeg
Wet Ingredients:
- ½ cup pure maple syrup or honey
- ⅓ cup melted coconut oil
- 1 teaspoon pure vanilla extract
- 1 egg white (optional, for extra clusters)
Optional Mix-ins (add after baking):
- 1 cup dried fruit (cranberries, raisins, apricots, cherries)
- Dark chocolate chips
- Freeze-dried fruit pieces
Prep Essentials for Maximum Crunch
Step 1: Organize Your Workspace
Line a large baking sheet (18×13 inches) with parchment paper. Don’t use cooking spray or oil directly on the pan—it prevents proper cluster formation. Preheat your oven to 300°F (150°C). This low temperature is crucial for even toasting without burning.
Step 2: Prepare Your Nuts and Oats
Roughly chop larger nuts into halves or thirds—uniform size ensures even toasting. Leave almonds and cashews whole if preferred. Measure oats in a dry measuring cup, leveling off the top. Don’t pack them down.
Step 3: Create the Binding Mixture
In a small saucepan over low heat, warm the coconut oil and maple syrup together until just combined—about 2 minutes. Remove from heat and stir in vanilla extract. If using egg white, whisk it lightly in a separate bowl until slightly foamy but not stiff.
Step 4: The Critical Mixing Technique
In your largest mixing bowl, combine all dry ingredients. Pour the warm liquid mixture over the oats and stir thoroughly with a wooden spoon or your hands (hands work better for even coating). Every oat flake should glisten. If using egg white, fold it in gently at the end—this is your cluster secret weapon.
Marinating Time Note:
Unlike meat recipes, granola benefits from immediate baking. However, you can prepare the dry mix up to one week in advance and store it in an airtight container. Add the wet ingredients just before baking.
Pantry Staples That Elevate Flavor
Keep these on hand for spontaneous granola-making sessions:
- Quality vanilla extract: Imitation just doesn’t compare
- Various spices: cardamom, ginger, and cacao powder for variations
- Coconut oil: solid at room temperature, melts beautifully
- Pure maple syrup: Grade A Dark Amber has the best flavor
- Sea salt: enhances sweetness and balances flavors
- Nut butters: one tablespoon of almond or cashew butter adds richness
Step-by-Step Cooking Instructions for Homemade Crunchy Granola
Follow these instructions precisely for that professional-quality crunch. I’ve tested every variable, and these techniques consistently produce perfect results.
Pre-Cooking Prep for Homemade Crunchy Granola
Before your granola touches the oven, these preparation steps set you up for success.
Temperature and Timing:
Preheat your oven to exactly 300°F (150°C). Use an oven thermometer if possible—home ovens often run 25 degrees hotter or cooler than the dial indicates. This low-and-slow temperature prevents burning while allowing the oats to develop that golden color and nutty flavor.
Spreading Technique:
Transfer your granola mixture to your prepared baking sheet. Here’s the counter-intuitive secret: press it down firmly into an even layer about ½-inch thick. Use the back of a spatula or your hands to compact it. This compression is what creates those satisfying clusters. Don’t spread it loosely or you’ll end up with loose granola cereal.
Pan Position:
Place the baking sheet on the middle rack of your oven. The middle position provides the most even heat distribution. If baking two sheets at once, position one on the upper-middle rack and one on the lower-middle, and rotate them halfway through.
Cooking Method for Homemade Crunchy Granola
Baking Phase One (20 minutes):
Slide your pan into the preheated oven and set a timer for 20 minutes. During this first phase, resist the urge to stir. Let the mixture bake undisturbed—this is when the bottom layer begins to form those golden clusters.
The Crucial Stir (20-minute mark):
Remove the pan and use a large spatula to carefully flip and rotate sections of the granola. Don’t break it apart completely—flip it in large chunks like you’re turning pancakes. The toasted bottom should now face the top. This technique distributes heat evenly while maintaining cluster integrity.
Baking Phase Two (15-20 minutes):
Return to the oven and bake for another 15-20 minutes. Watch carefully during the final 5 minutes—granola goes from perfectly golden to burnt quickly. You’re looking for a rich, amber color and an incredible toasted aroma filling your kitchen.
Visual and Aromatic Cues:
Perfect granola should be golden brown (not dark brown), smell intensely nutty and sweet, and feel slightly soft when you press it. It will crisp up significantly during cooling—don’t overbake trying to achieve crunch while it’s hot.
Doneness Check for Homemade Crunchy Granola
Unlike meat with precise internal temperatures, granola doneness is about color, aroma, and texture.
The Color Test:
Your granola should be uniformly golden brown—think of a perfect piece of toast. Pale yellow means it needs more time; dark brown means it’s gone too far. The coconut flakes will be the darkest indicators, turning golden at the edges.
The Touch Test:
When you press the granola gently with a spatula, it should feel slightly soft but not wet. It shouldn’t stick to your finger. Remember, it continues “baking” from residual heat during cooling.
The Smell Test:
Your kitchen should smell like a bakery—nutty, sweet, and toasty. If you smell any burning or bitter notes, immediately remove it from the oven.
Resting for Homemade Crunchy Granola
This is where patience pays off tremendously. The cooling process is when the magic truly happens.
Immediate Post-Oven:
Remove the baking sheet from the oven and place it on a wire cooling rack. Do not stir, scrape, or touch the granola. I know it’s tempting, but this is the most critical rule. The mixture is still soft and needs time to crystallize into those crunchy clusters.
The 45-Minute Rule:
Let the granola cool completely on the baking sheet for at least 45 minutes, preferably a full hour. As it cools, the maple syrup and coconut oil will harden, cementing the oats and nuts into clusters. Breaking it apart too early results in loose, unclustered granola.
Breaking It Up:
After full cooling, use your hands to break the granola into your desired cluster size. I prefer large, irregular chunks—they’re more satisfying to eat and look more artisanal. Break along the natural fault lines rather than crumbling it uniformly.
Adding Dried Fruit:
Now—and only now—add your dried fruit and any chocolate chips. Adding them before baking makes fruit hard and leathery. Toss everything together gently.
Pro Tips for Perfect Homemade Crunchy Granola
These are the insider tricks I’ve learned through years of granola experimentation. They transform good granola into exceptional granola.
Avoiding Common Mistakes with Homemade Crunchy Granola
The Soggy Granola Problem:
If your granola turns out chewy instead of crunchy, you’ve likely underbaked it or stored it improperly. Always bake until deeply golden, and ensure it’s completely cool before storing. Store in an airtight container with a small silica gel packet (the kind that comes in vitamin bottles) to absorb any moisture.
The No-Cluster Dilemma:
Clusters form from the binding power of sweetener plus the compression technique. If your granola is too loose, you either didn’t press it down firmly enough before baking, used too little liquid sweetener, or stirred it too much during baking. The egg white trick also dramatically increases cluster size.
The Burnt Bottom Issue:
Dark baking sheets absorb more heat and can burn the bottom while the top remains pale. Use light-colored aluminum pans, or reduce oven temperature by 25°F if you only have dark pans. Also, check your oven temperature accuracy.
The Bland Flavor Factor:
Salt is crucial—it enhances sweetness and makes flavors pop. Don’t skimp on it. Also, ensure your vanilla extract and spices are fresh. Old spices contribute dusty, muted flavors rather than vibrant ones.
Essential Tool Recommendations for Homemade Crunchy Granola
Large Rimmed Baking Sheet (18×13 inches):
Also called a half-sheet pan, this is the perfect size for one batch. The rim prevents granola from sliding off during stirring. I recommend having two so you can make double batches.
Parchment Paper or Silicone Baking Mat:
Non-stick surfaces are essential. Parchment paper is my preference because it’s disposable and allows better airflow than silicone. Never use aluminum foil—granola sticks to it.
Large Mixing Bowl (at least 6 quarts):
You need room to mix vigorously without oats flying everywhere. Metal or glass bowls work better than plastic for even mixing.
Wooden Spoon or Spatula:
A sturdy wooden spoon withstands the vigorous stirring needed to coat every oat. A heat-resistant silicone spatula works well for flipping during baking.
Oven Thermometer:
This $10 investment prevents so many baking disasters. Oven temperatures vary significantly, and granola is sensitive to heat fluctuations.
Airtight Storage Containers:
Glass jars with tight-sealing lids keep granola fresh for weeks. I use half-gallon mason jars—they’re perfect for storing and look beautiful on the counter.
Storage & Reheating Secrets for Homemade Crunchy Granola
Proper Storage:
Store completely cooled granola in an airtight container at room temperature for up to 4 weeks. Keep it away from heat sources and direct sunlight. Never refrigerate—condensation makes it soggy.
Extending Shelf Life:
For maximum freshness, store in the pantry for 2 weeks, then transfer to the freezer in freezer-safe bags. Frozen granola stays crunchy for up to 3 months. There’s no need to thaw—it’s ready to eat straight from the freezer.
Reviving Lost Crunch:
If your granola loses its crispness, spread it on a baking sheet and toast at 300°F for 5-7 minutes. Let it cool completely before storing again. This refresh method works wonders for granola that’s absorbed humidity.
Portioning for Convenience:
Divide a large batch into weekly portions in separate containers. This minimizes how often you open the main storage container, reducing exposure to air and maintaining freshness longer.
Flavor Variations for Homemade Crunchy Granola
The beauty of homemade crunchy granola is its versatility. Once you master the base recipe, these variations keep breakfast exciting for months.
Spicy Chai Homemade Crunchy Granola
Transform your granola into a warming, spice-forward experience reminiscent of a cozy chai latte.
Spice Additions:
- 2 teaspoons ground cinnamon
- 1 teaspoon ground ginger
- ½ teaspoon ground cardamom
- ¼ teaspoon ground cloves
- ⅛ teaspoon black pepper (adds subtle heat)
Replace half the maple syrup with blackstrap molasses for deeper, more complex sweetness. Add crystallized ginger pieces and chopped dates after baking. This version pairs beautifully with vanilla yogurt and creates an exotic breakfast bowl.
Tropical Paradise Homemade Crunchy Granola
Bring vacation vibes to your breakfast table with island-inspired flavors.
Tropical Mix:
- Increase coconut flakes to 2 cups
- Add ½ cup chopped macadamia nuts
- Use ⅓ cup coconut oil for maximum tropical flavor
- Mix in 1 tablespoon lime zest before baking
After cooling, add dried pineapple chunks, dried mango pieces, and freeze-dried banana slices. The combination is like sunshine in a bowl—perfect over coconut yogurt or as a snack straight from the jar.
Dark Chocolate Sea Salt Homemade Crunchy Granola
For those who believe chocolate belongs in breakfast (and I’m one of them).
Chocolate Lover’s Additions:
- Add 3 tablespoons dark cocoa powder to dry ingredients
- Increase maple syrup by 2 tablespoons (cocoa absorbs moisture)
- Use 1 teaspoon espresso powder for depth
- Add flaky sea salt to taste before baking
Once cooled, fold in dark chocolate chunks (70% cacao or higher) and cacao nibs for extra crunch. This decadent version feels like dessert but provides sustained energy.
Paleo-Friendly Homemade Crunchy Granola
For those following grain-free diets, this version delivers equal satisfaction.
Paleo Adaptations:
- Replace oats with equal parts chopped nuts and unsweetened coconut flakes
- Use raw honey as the only sweetener
- Increase nuts to 3 cups total
- Add 1 cup unsweetened coconut chips
The result is more nut-cluster-forward with intense crunch. Higher in fat and protein, it’s incredibly satisfying. Pair with full-fat coconut yogurt or eat by the handful.
Apple Cinnamon Homemade Crunchy Granola
Classic fall flavors that work year-round.
Autumn-Inspired Mix:
- Increase cinnamon to 2 teaspoons
- Add ½ teaspoon apple pie spice
- Use 2 tablespoons apple butter mixed with the wet ingredients
- Add chopped pecans and walnuts
After baking, mix in dried apple chips (chopped) and a handful of golden raisins. This tastes like apple pie for breakfast and makes your house smell incredible while baking.
Savory Everything Bagel Homemade Crunchy Granola
Not all granola needs to be sweet—this savory version is revolutionary.
Savory Profile:
- Eliminate all sweeteners except 2 tablespoons maple syrup (for binding)
- Add 3 tablespoons everything bagel seasoning
- Include 1 tablespoon nutritional yeast
- Increase salt to 1 teaspoon
- Add dried onion and garlic powder
This works brilliantly as a salad topper, soup garnish, or savory yogurt bowl base. It’s unexpected and absolutely addictive.
Flavor Variation Comparison Table
| Variation | Best For | Key Ingredients | Sweetness Level | Dietary Notes |
|---|---|---|---|---|
| Classic Original | Everyday breakfast | Maple syrup, cinnamon, mixed nuts | Medium | Easily adaptable |
| Spicy Chai | Spice lovers | Cardamom, ginger, molasses | Medium | Naturally vegan option |
| Tropical Paradise | Summer vibes | Coconut, macadamia, dried mango | Medium-High | Nut-heavy |
| Dark Chocolate Sea Salt | Dessert breakfast | Cocoa powder, dark chocolate | Medium | Contains caffeine |
| Paleo-Friendly | Grain-free diets | Extra nuts, coconut chips | Low-Medium | Grain-free, dairy-free |
| Apple Cinnamon | Fall comfort | Apple butter, apple chips | Medium-High | Classic crowd-pleaser |
| Savory Everything Bagel | Savory applications | Everything seasoning, minimal sweetness | Very Low | Unique, conversation-starter |
Serving Suggestions for Homemade Crunchy Granola
Your beautiful homemade crunchy granola deserves to shine in multiple ways. Here are my favorite serving methods that showcase its versatility.

Breakfast Bowl Perfection
The Classic Yogurt Parfait:
Layer ½ cup Greek yogurt, ¼ cup granola, fresh berries, and a drizzle of honey in a clear glass. Repeat layers once. The contrast between creamy yogurt and crunchy granola creates textural heaven. Use full-fat yogurt for the most satisfying experience.
Smoothie Bowl Topper:
Blend your favorite smoothie until thick, pour into a bowl, and create a generous granola “island” on top. Add sliced banana, chia seeds, and nut butter. The granola provides essential crunch that drinking smoothies lacks.
Overnight Oats Enhancement:
Stir ⅓ cup granola into your overnight oats right before eating (never the night before—it’ll get soggy). The combination of soft oats and crunchy clusters is breakfast gold.
Snacking Innovations
Trail Mix Upgrade:
Combine granola with dark chocolate chips, dried fruit, and extra nuts for an elevated trail mix. Perfect for hiking, road trips, or afternoon energy slumps. Portion into small bags for grab-and-go convenience.
Granola Bark:
Melt dark chocolate, spread it thin on parchment paper, and press granola clusters into the surface. Refrigerate until solid, then break into irregular shards. This is addictive and makes impressive gifts.
Ice Cream Sundae Crown:
Sprinkle granola generously over ice cream instead of traditional toppings. The temperature contrast between cold ice cream and room-temperature granola is surprisingly delightful.
Baking Applications
Fruit Crumble Topping:
Replace traditional crumble topping with granola. Toss fresh fruit with a touch of sugar, spread in a baking dish, top with granola, and bake at 350°F for 25 minutes. The granola gets even crunchier while the fruit softens.
Granola Energy Balls:
Process granola in a food processor until broken down, mix with nut butter and honey, and roll into balls. Refrigerate for 30 minutes. These portable snacks are perfect for lunchboxes.
Pie Crust Alternative:
Press crushed granola mixed with melted butter into a pie pan for a no-bake crust. Works beautifully for cheesecakes and cream pies.
Beverage Pairings
With Coffee:
The nutty, toasted flavors of granola complement medium-roast coffee beautifully. Try it with a latte for a textured morning experience.
With Herbal Tea:
Chamomile or rooibos tea provides a gentle, soothing contrast to granola’s crunch. Perfect for a calming evening snack.
With Fresh Juice:
Orange juice and granola might sound odd, but the citrus acidity balances the sweetness perfectly. Try it with a yogurt parfait for a complete breakfast.
FAQs About Homemade Crunchy Granola
After sharing this recipe with hundreds of home cooks, these are the questions I hear most often.
Can I Make Homemade Crunchy Granola Without Nuts?
Absolutely! Replace nuts with an equal amount of seeds (sunflower, pumpkin, hemp) and increase coconut flakes. The texture will be slightly different—more delicate than chunky—but equally delicious. This is perfect for school-safe snacks since many schools have nut-free policies.
You can also add puffed quinoa or puffed rice for additional crunch without nuts. Just add these puffed grains during the last 5 minutes of baking to prevent burning.
How Do I Make Homemade Crunchy Granola Form Better Clusters?
The cluster secrets are: sufficient liquid sweetener, the optional egg white, firm pressing before baking, and resisting the urge to stir frequently. Press the granola mixture firmly into the pan before baking—this compression is crucial. The egg white acts as a natural glue, so don’t skip it if clusters are your priority.
Also, let it cool completely undisturbed. Every time you stir hot granola, you break potential clusters. Patience during cooling creates the best results.
Why Is My Homemade Crunchy Granola Burning in Some Spots?
Uneven oven heat is usually the culprit. Use the middle rack position and rotate the pan 180 degrees at the halfway point. Dark-colored pans absorb more heat—switch to light aluminum pans or reduce temperature by 25°F. Also, ensure your oven temperature is accurate with an oven thermometer.
Ovens with hot spots require extra attention. Consider baking at 275°F for slightly longer to achieve more even browning.
Can I Reduce the Sugar in Homemade Crunchy Granola?
Yes, but understand that sweetener serves two purposes: flavor and binding. You can reduce maple syrup to ⅓ cup (from ½ cup) without major issues. Go lower than that, and you’ll need to compensate with additional coconut oil or add a mashed banana for moisture and binding.
Unsweetened applesauce (¼ cup) can replace some sweetener while maintaining moisture. The granola will be less sweet but still cluster reasonably well.
How Long Does Homemade Crunchy Granola Last?
When stored properly in an airtight container at room temperature, homemade granola stays fresh and crunchy for 3-4 weeks. In the freezer, it lasts up to 3 months without any loss of quality. The key is ensuring it’s completely cool before storage and keeping moisture out.
If you live in a humid climate, add a food-safe silica gel packet to your storage container to absorb excess moisture.
Is Homemade Crunchy Granola Gluten-Free?
Oats are naturally gluten-free, but they’re often processed in facilities that handle wheat, leading to cross-contamination. Purchase certified gluten-free oats if you have celiac disease or severe gluten sensitivity. All other ingredients in this recipe are naturally gluten-free.
Always check labels on nuts, seeds, and dried fruit for potential cross-contamination warnings.
Can I Make Homemade Crunchy Granola in an Air Fryer?
While possible, I don’t recommend it. Air fryers don’t provide the even, gentle heat needed for perfect granola. The circulating air creates uneven browning, and the smaller capacity means multiple batches. Stick with your regular oven for best results.
If you must try, use 275°F, cook in small batches, and stir every 5 minutes. Expect smaller clusters and potentially uneven results.
What’s the Best Way to Gift Homemade Crunchy Granola?
Package cooled granola in clear mason jars (pint or quart size) with decorative fabric covering the lid, tied with twine. Attach a handwritten tag with the recipe name and storage instructions. Include serving suggestions on the tag.
For holidays, layer different granola varieties in a large jar for a beautiful visual effect. Add a wooden spoon tied to the jar with ribbon for a complete gift set.
Can I Double This Homemade Crunchy Granola Recipe?
Definitely! Use two baking sheets and position them on the upper-middle and lower-middle racks. Rotate the pans halfway through baking for even cooking. All ingredients scale proportionally—just mix in your largest bowl to ensure even coating.
I regularly make triple batches when meal prepping, and the recipe scales beautifully.
Why Does My Homemade Crunchy Granola Taste Bland?
Salt is the most commonly under-measured ingredient in granola. It enhances all other flavors and balances sweetness. Increase to ¾ teaspoon if needed. Also check your spice freshness—old cinnamon and vanilla contribute little flavor.
Toast your nuts before adding them for extra depth, or add a tablespoon of nut butter to the wet ingredients for richness.
Conclusion
There’s something deeply satisfying about pulling a pan of golden, fragrant homemade crunchy granola from your oven. The house fills with the most incredible aroma—nutty, sweet, and utterly comforting. You’ve just created something that usually costs $12 per bag at the store, but yours is fresher, healthier, and tailored exactly to your taste.
This recipe has become a staple in my kitchen, and I make a batch every two weeks without fail. My family has their breakfast routine down: yogurt, fresh fruit, and a generous handful of granola. It’s the crunch that makes breakfast feel complete, that satisfying texture that transforms a simple bowl into something special.
The beauty of mastering homemade crunchy granola is that it opens up endless possibilities. Once you’ve nailed the basic technique, you can experiment with seasonal flavors, adapt it for dietary needs, or create signature blends that become your household favorites. I love knowing exactly what’s in our breakfast—no mysterious preservatives or excessive sugars, just wholesome ingredients working together.
Whether you’re meal prepping for busy weekdays, looking for a healthier snack option, or wanting to impress guests with a homemade gift, this granola delivers on every level. The time investment is minimal—about an hour from start to finish—but the reward lasts for weeks.
So fire up your oven this weekend and give this recipe a try. Your mornings are about to get a whole lot crunchier, and your grocery budget will thank you. Join the thousands of home cooks who’ve discovered that making granola from scratch isn’t just possible—it’s actually easier and more enjoyable than you’d ever expect.
Start simple with the Crispy Homemade Waffles: Golden, Light & Perfectly Crunchy Every Time, then let your creativity guide you through the variations. Before long, you’ll be the friend known for incredible granola, and people will be asking for your secret. (Feel free to send them here!)
Happy baking, and here’s to transforming your breakfast one crunchy cluster at a time!
If you loved this recipe, don’t forget to share it with your friends or save it to try later! I’d be thrilled to see your personal touch—share your photos on Pinterest!
Print
The Ultimate Homemade Crunchy Granola Recipe That’ll Transform Your Breakfast
Description
This homemade crunchy granola is golden, toasty, and full of flavor — made with oats, nuts, seeds, and a touch of honey. Perfect for breakfast with yogurt, milk, or as a healthy snack!
Ingredients
3 cups old-fashioned rolled oats
1 cup nuts (almonds, walnuts, or pecans, chopped)
1/2 cup seeds (pumpkin or sunflower seeds)
1/2 cup shredded coconut (optional)
1/2 cup honey or maple syrup
1/3 cup coconut oil or olive oil
1 tsp vanilla extract
1 tsp ground cinnamon
1/4 tsp salt
1/2 cup dried fruit (raisins, cranberries, or apricots, optional)
Instructions
1. Preheat oven to 325°F (160°C) and line a baking sheet with parchment paper.
2. In a large bowl, combine oats, nuts, seeds, coconut, cinnamon, and salt.
3. In a small saucepan, warm honey (or maple syrup) and oil until smooth. Stir in vanilla.
4. Pour wet mixture over dry ingredients and stir until evenly coated.
5. Spread mixture in an even layer on baking sheet.
6. Bake for 25–30 minutes, stirring halfway, until golden and fragrant.
7. Cool completely to crisp up, then stir in dried fruit if using.
8. Store in an airtight container for up to 2 weeks.
Notes
For extra crunch, press granola down with a spatula before baking and avoid over-stirring.
Add chocolate chips after cooling for a sweet twist.
Make it gluten-free by using certified gluten-free oats.